© Feb. 2023
144 TB20J Plus Maintenance Manual
CONTROL SYSTEM
switched from to , indicating calibration suc-
ceeded, and the corresponding actual value will be
changed).
3. If re-calibrating the parameters at this position is re-
quired, press
to return to the TEST-RUN INFO
interface, then re-enter the SENSOR CALIBRA-
TION interface, and repeat the previous step.
4. Press
successively to return to the main inter-
face, and power off the machine as required.
Weight Calibration
1. Make sure that no heavy objects are placed on the
platform and that the platform is stable without
shaking.
2. Enter the TEST-RUN INFO interface.
3. On the TEST-RUN INFO interface, select Weight
Calibration through
and , and press to en-
ter the WEIGHT CALIBRATION interface.
Fig 9 WEIGHT CALIBRATION interface
4. On the WEIGHT CALIBRATION interface, select
No-load in the Loading column on the right side of
the display screen through
, adjust the value to 0
through
and , and press and hold for 3s to
complete the no-load calibration.
5. Place a heavy object with the weight equal to the
rated load of the machine on the platform, and en-
sure that the platform is stable without shaking.
6. Select Heavy-load in the Loading column on the
right side of the display screen through
, adjust
the value to the weight value of the heavy object on
the platform through
and , and press and hold
for 3s to complete the heavy-load calibration (the
actual weight value on the left side of the corre-
sponding display screen is equal to the weight value
of loads on the platform).
7. If re-calibration is required, press
to return to the
TEST-RUN INFO interface, then re-enter the
WEIGHT CALIBRATION interface, and repeat the
previous step.
8. Press
successively to return to the main inter-
face, and power off the machine as required.
• If the machine is equipped with a dual-channel sen-
sor, when pressing and holding
for no-load and
heavy-load calibration, the weight of two channels
will be calibrated at the same time.
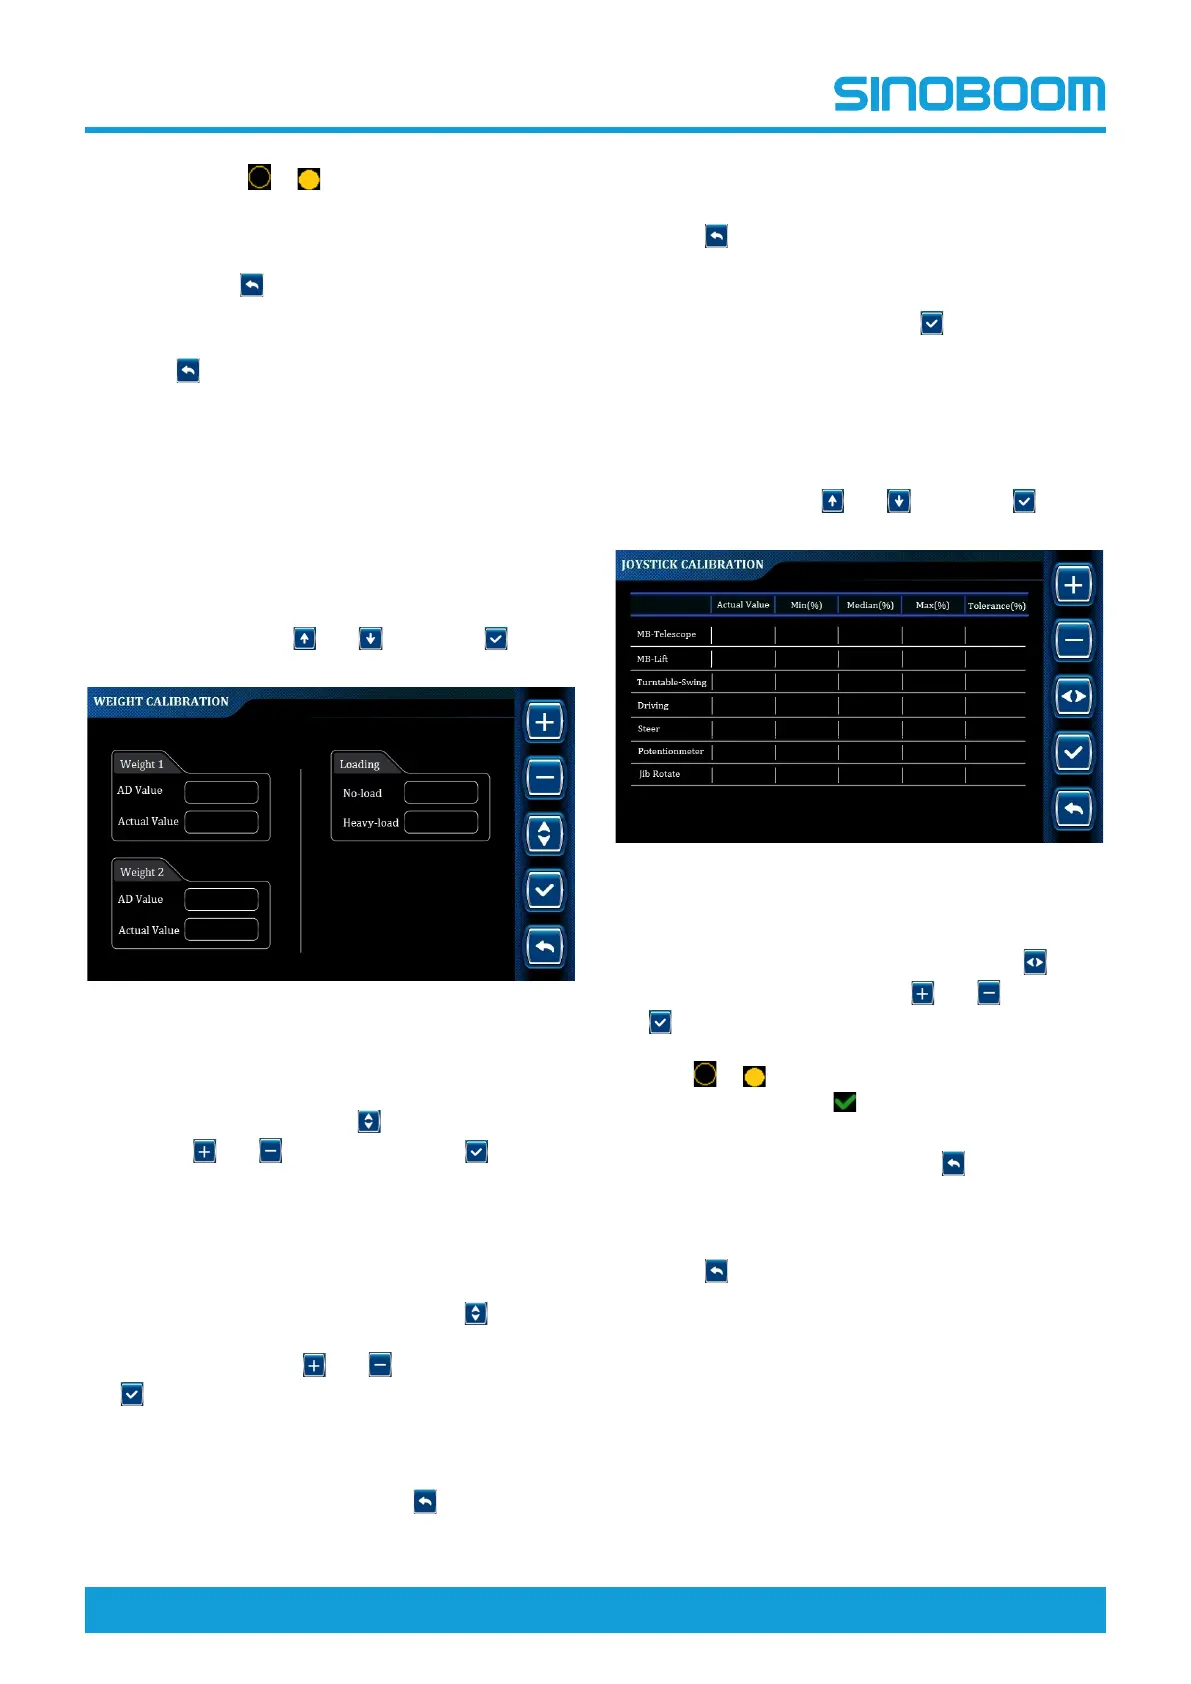
Joystick Calibration
1. On the TEST-RUN INFO interface, select Joystick
Calibration through
and , and press to en-
ter the JOYSTICK CALIBRATION interface.
Fig 10 JOYSTICK CALIBRATION interface
2. On the JOYSTICK CALIBRATION interface, select
the joystick option to be calibrated through
,
change the tolerance through
and , and press
to save the value and complete the calibration
(the icon before the selected option will be changed
from
to ,indicating calibration succeeded;
there will be the icon
on the interface when toler-
ance value is saved.)
3. If re-calibration is required, press
to return to the
TEST-RUN INFO interface, then re-enter the JOY-
STICK CALIBRATION interface, and repeat the pre-
vious step.
4. Press
successively to return to the main inter-
face, and power off the machine as required.
 Loading...