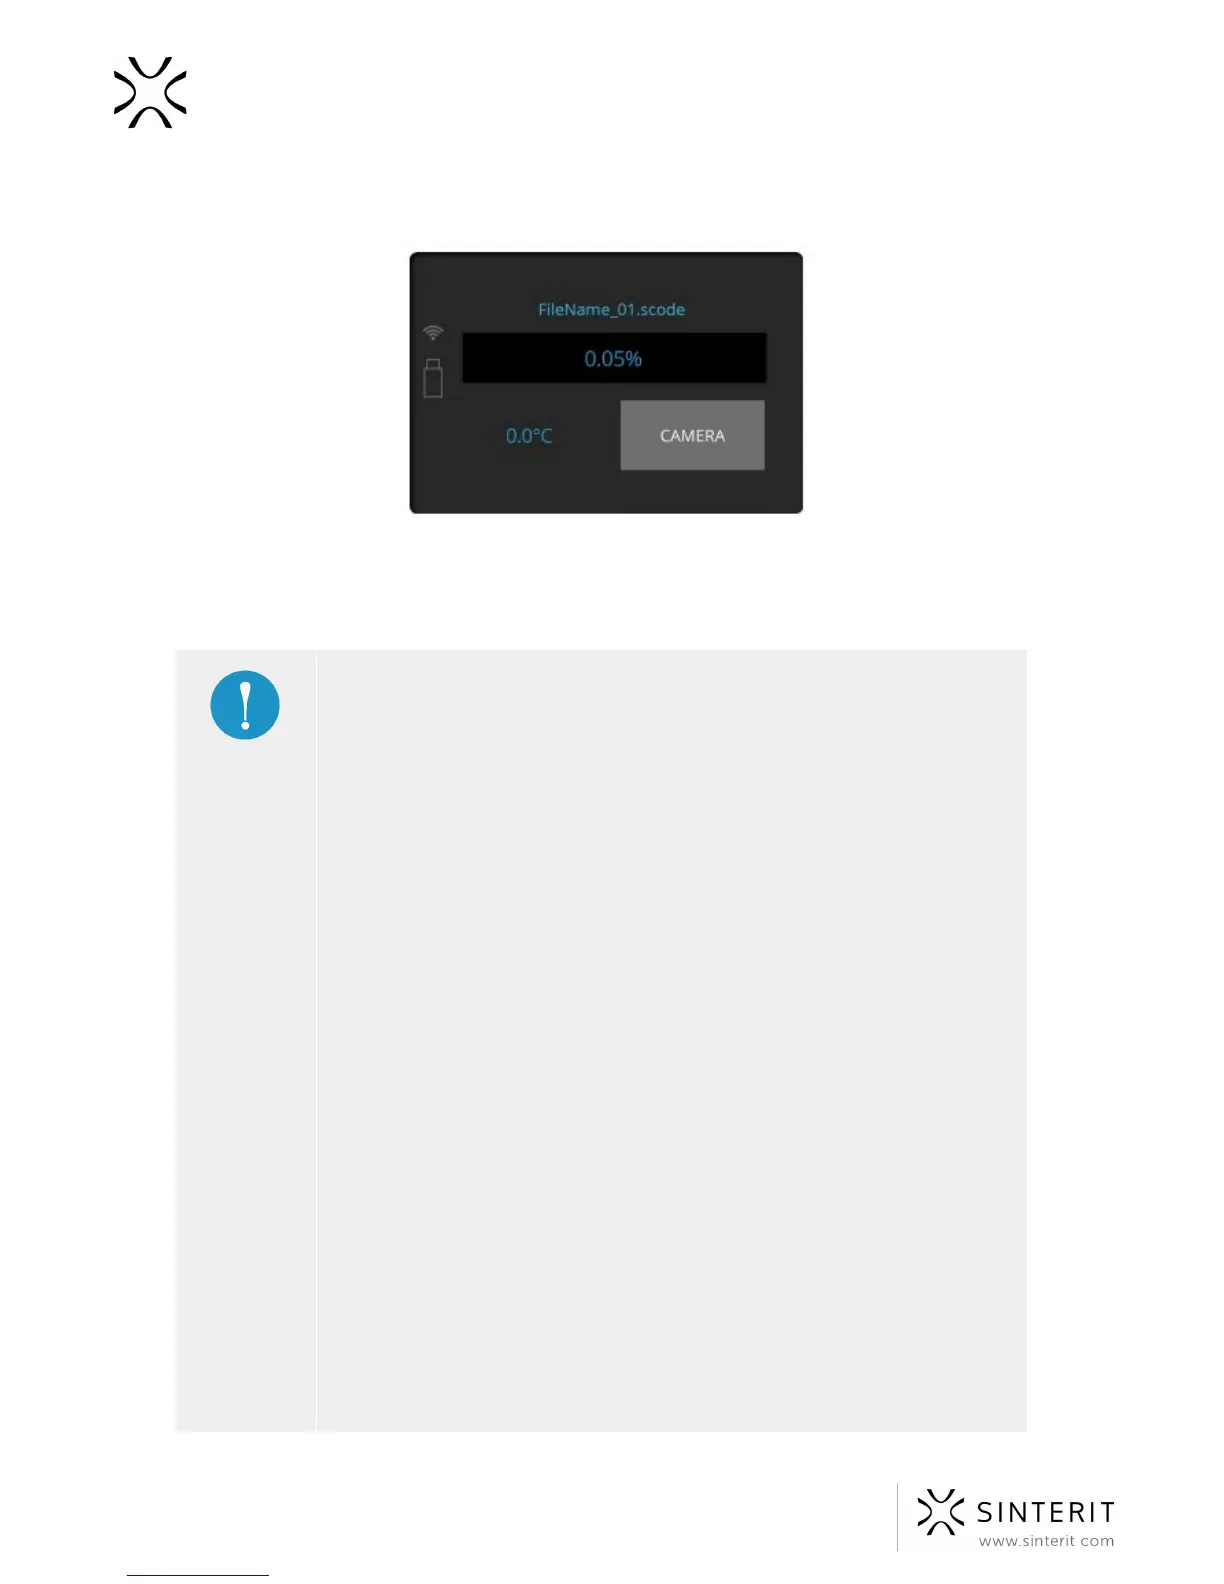
2. Clicking on the “CAMERA” button activates the internal camera view, which will be
displayed for 10 seconds. After that the display will return to the main screen.
3. If there appear any problems during a printing process (f. ex. observed by the means of
the internal camera or the top vision window), the user can fine tune the temperature
(TEMP +/- 5 [⁰C]).
Temperature management suggestions:
● The possibility to adjust the temperature is provided directly in
Sinterit Lisa Printer in ‘Temp.’ tab or in the Sinterit Studio software
suite.
● On the device, this option is depicted by means of + and – buttons
which increase or decrease the temperature by 0.5 [°C] (maximum
extent +/- 5 [°C]). In Sinterit Studio, this option is depicted by means
of Print Surface Temperature Offset drop-down menu [°C].
● These options are used to increase the level of cake welding
(printouts more straight but less detailed) or to decrease the level of
cake welding (cake becomes more powdery, it is easier to clean it
up but printouts can be distorted; printout details have better
quality).
● Another calibration option is to change the laser power. This change
is only possible on the level of Sinterit Studio. In the program menu,
it can be found as Laser Power Ratio (1.0 by default).
● The laser intensity is raised by increasing the value by 0.05, and
lowered by decreasing (also by 0.05). The acceptable calibration
scope of laser multiplier is 0.5-3.0.
● As the laser gets weaker, the printout durability get lower as well,
however the quality of details gets better. Similarly: an increase of