6.2 Requirements for Mounting the SMARadio Controlled
Socket
Requirements for the mounting location:
☐ The SMAradio-controlled socket must only be operated in wall outlets suitable for the power
of the connected load.
☐ A minimum distance of 1m must be maintained from devices using the 2.4 GHz radio
spectrum (e.g. WLAN devices, microwave ovens). This will prevent reduced connection
quality and data transmission speed.
6.3 Checking the BLUETOOTH Connection at the
Designated Mounting Location
If the SunnyHomeManager is to communicate with other SMA devices via BLUETOOTH, e.g. with
SMAradio-controlled sockets, you must check the BLUETOOTH connection at the designated
mounting location.
Requirements:
☐ The same NetID must be configured for all BLUETOOTH devices and on the
SunnyHomeManager (see Section5, page34).
☐ The BLUETOOTH PV system must be commissioned (see Section5.2, page34).
Procedure:
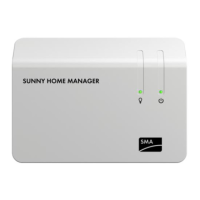
1. Supply the SunnyHomeManager with voltage via the plug-in power supply unit (see
Section7.6.1, page48).
☑ After approximately two minutes, the BLUETOOTH LED is glowing blue. The connection
to the BLUETOOTH devices is good.
✖ The BLUETOOTH LED is flashing blue?
The BLUETOOTH connection is critical.
• If possible, select a different mounting location and check the connection.
• If no other mounting location is possible, use a BLUETOOTHRepeater or an
SMAradio-controlled socket. This will extend the wireless range of your
BLUETOOTH network.
2. Pull the plug-in power supply unit out of the outlet.
3. Unplug the DC plug of the plug-in power supply unit from the terminal Power of the
SunnyHomeManager.
6.4 Mounting the SunnyHomeManager
6.4.1 Mounting the SunnyHomeManager on the Wall
1. Define the position of the SunnyHomeManager on the wall.
2. Mark the position of the drill holes on the wall (distance between drill holes: 58mm).
6 Mounting
SMA Solar Technology AG
Installation Manual 39HoMan-IA-en-20

 Loading...