This document can not be reproduced or released without the Sodikart authorization.
MAN.SIG.EN.02
04/2014
35
USE SPARE PARTS OF SODI ORIGIN
User maintenance guide
8
6
7
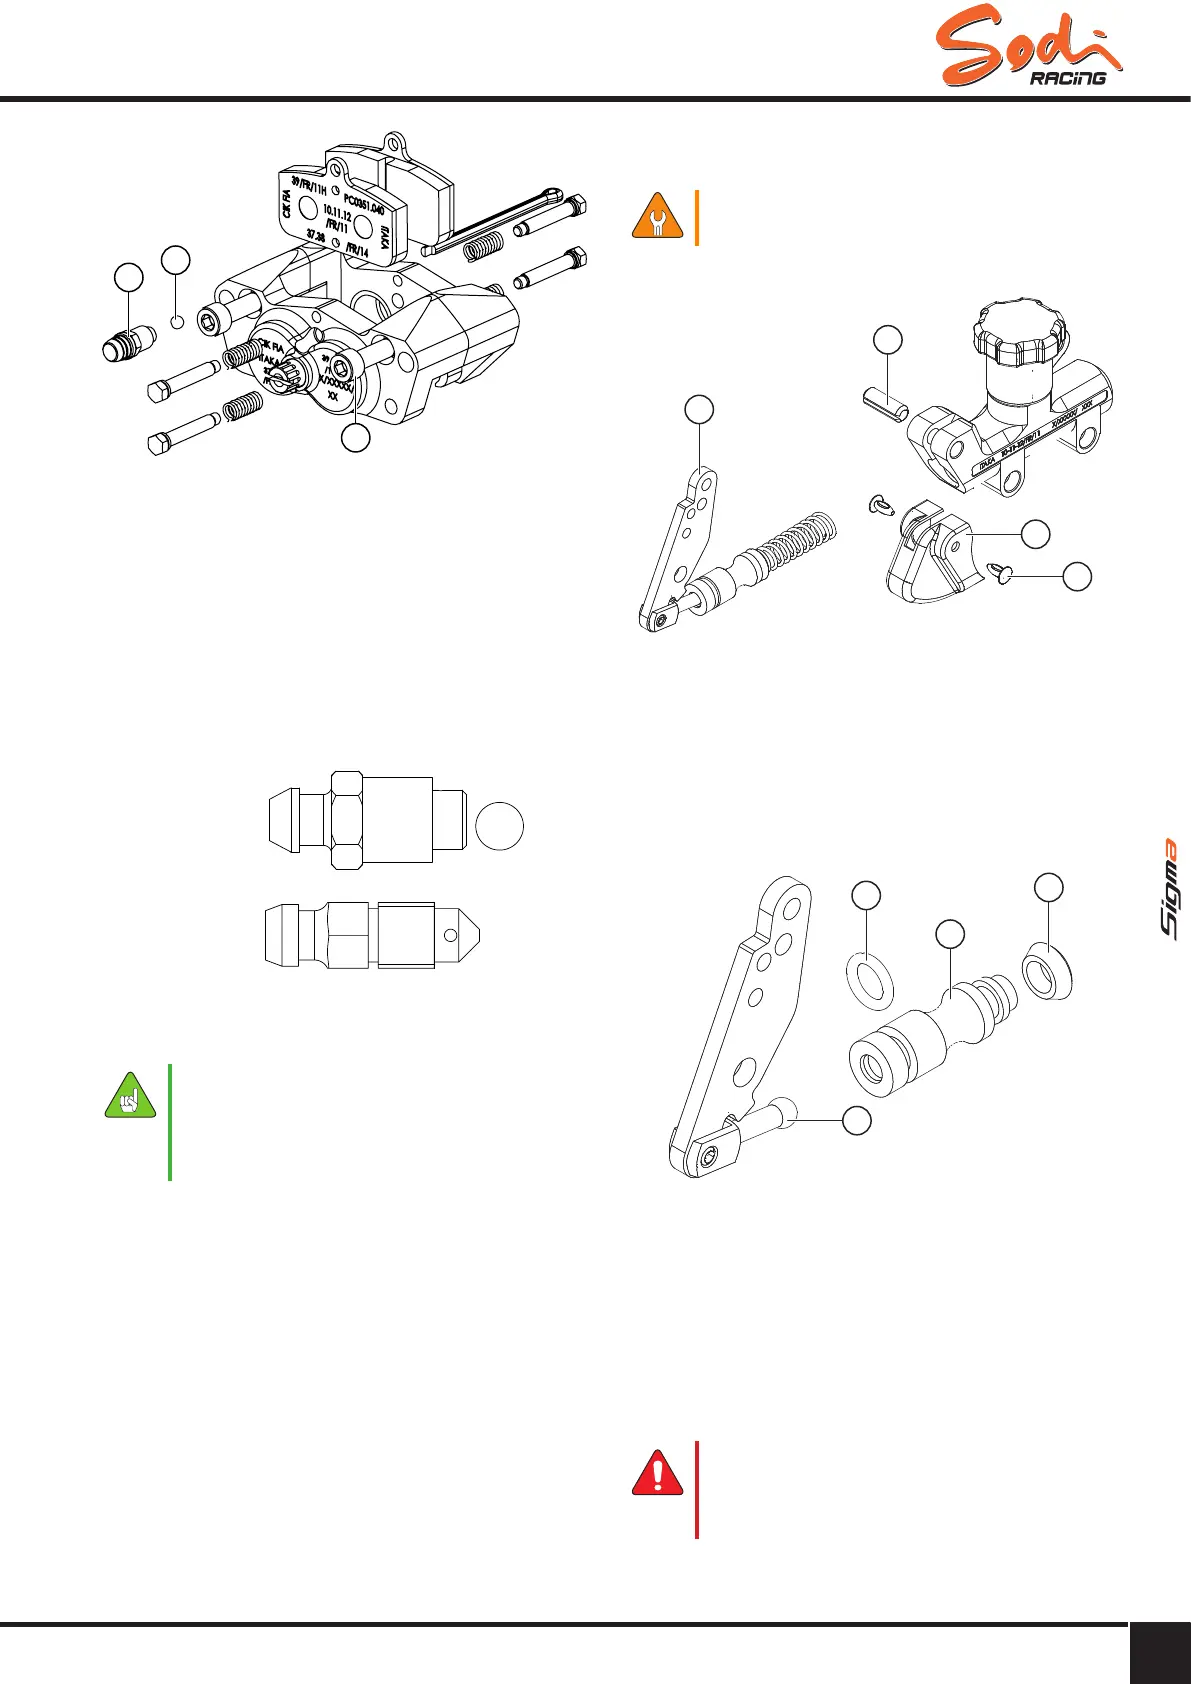
Legend
6 Bleeder screw
7 Ball
8 Mounting screw
● Tighten the 2 screws (8). Torque 18Nm, applying
a drop of weak thread locking compound to each
screw.
● Reinsert the ball (7) in its housing (if necessary).
● Tighten the bleed screw and its cap (6).
Torque 10 Nm.
● Reinstall brake pads (refer to the section on
Cleaning/Replacement of rear brake pads).
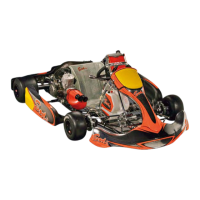
A
B
● A - Bleeder screw with ball
● B - Bleeder screw without ball
●● Always●use●new●seals●and●clips.
●● Replace●any●defective●parts,●using●only●
original●SODIKART●parts.
●● Install●a●new●set●of●pads●after●any●servicing●
of●the●callipers.
6.1.12 - Replacing master cylinder seals and
pistons
This operation must be performed by a
Sodikart dealer.
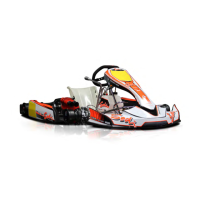
Removing
3
4
1
2
Legend
1 Pressure pin
2 Dust cover
3 Pin
4 Piston lever
● Remove the two pressure pins (1) and the dust
cover (2).
● Withdraw the pin (3) and remove the piston lever
assembly (4) from the master cylinder.
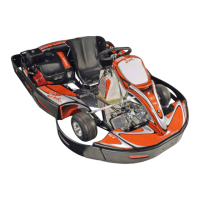
7
8
6
5
Legend
5 Yoke
6 Piston
7 O-ring
8 Gasket
● Disconnect the yoke (5) from the piston (6).
● Remove the O-ring (7) and the seal (8).
● Clean the body of the master cylinder. Do not use
WD40 or other greasy products to clean the master
cylinder.
► Do not use any cleaning product that
could damage the seals. A brake uid
leak could appear, causing a serious or
fatal accident.