US
ING THE
DA
NTE INTERFACE ON
NU
CLEUS
2
W
ITH AN EXISTING
I/O S
ETUP
There are several ways to integrate the Nucleus
2
mic pre’s & monitor section with an existing sound card setup.
O
n pages 6&7 there are example setups that use the Nucleus
2
o
ptical SPDIF and analogue I/O for connecting an external
s
ound card; an alternative is to use Dante Via.
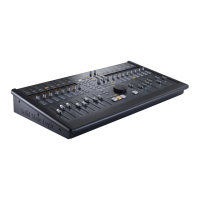
D
ante Via is a soware that allows you to route audio sources on your computer to the Dante network (and therefore to
t
he Nucleus
2
D
ante soundcard). The example below shows how Pro Tools I/O can be used alongside Nucleus
2
;
outputs
1
and 2 of Pro Tools are going to Dante Via, and routed using Dante Controller to the Nucleus
2
m
onitoring section. The
N
ucleus
2
o
utputs 1 and 2 (from the SuperAnalogue mic pre’s) are routed over Dante to Dante Via, which routes them to
i
nputs 1 & 2 of Pro Tools.
Dante Via Install and Setup
1. Go to
www.audinate.com
2. Go to Products > Dante Via
3. Click on Buy Dante Via, select your OS from the dropdown menu, then click and download the installer. At this point
you can purchase a Dante Via license, or use the free trial.
4. Run the Dante Via installer and open the soware – please note that you will need to ‘stop’ Dante Virtual Soundcard, if it is
already running.
You will also need to install Dante Controller – instructions on how to do this can be found on pages 10&11.
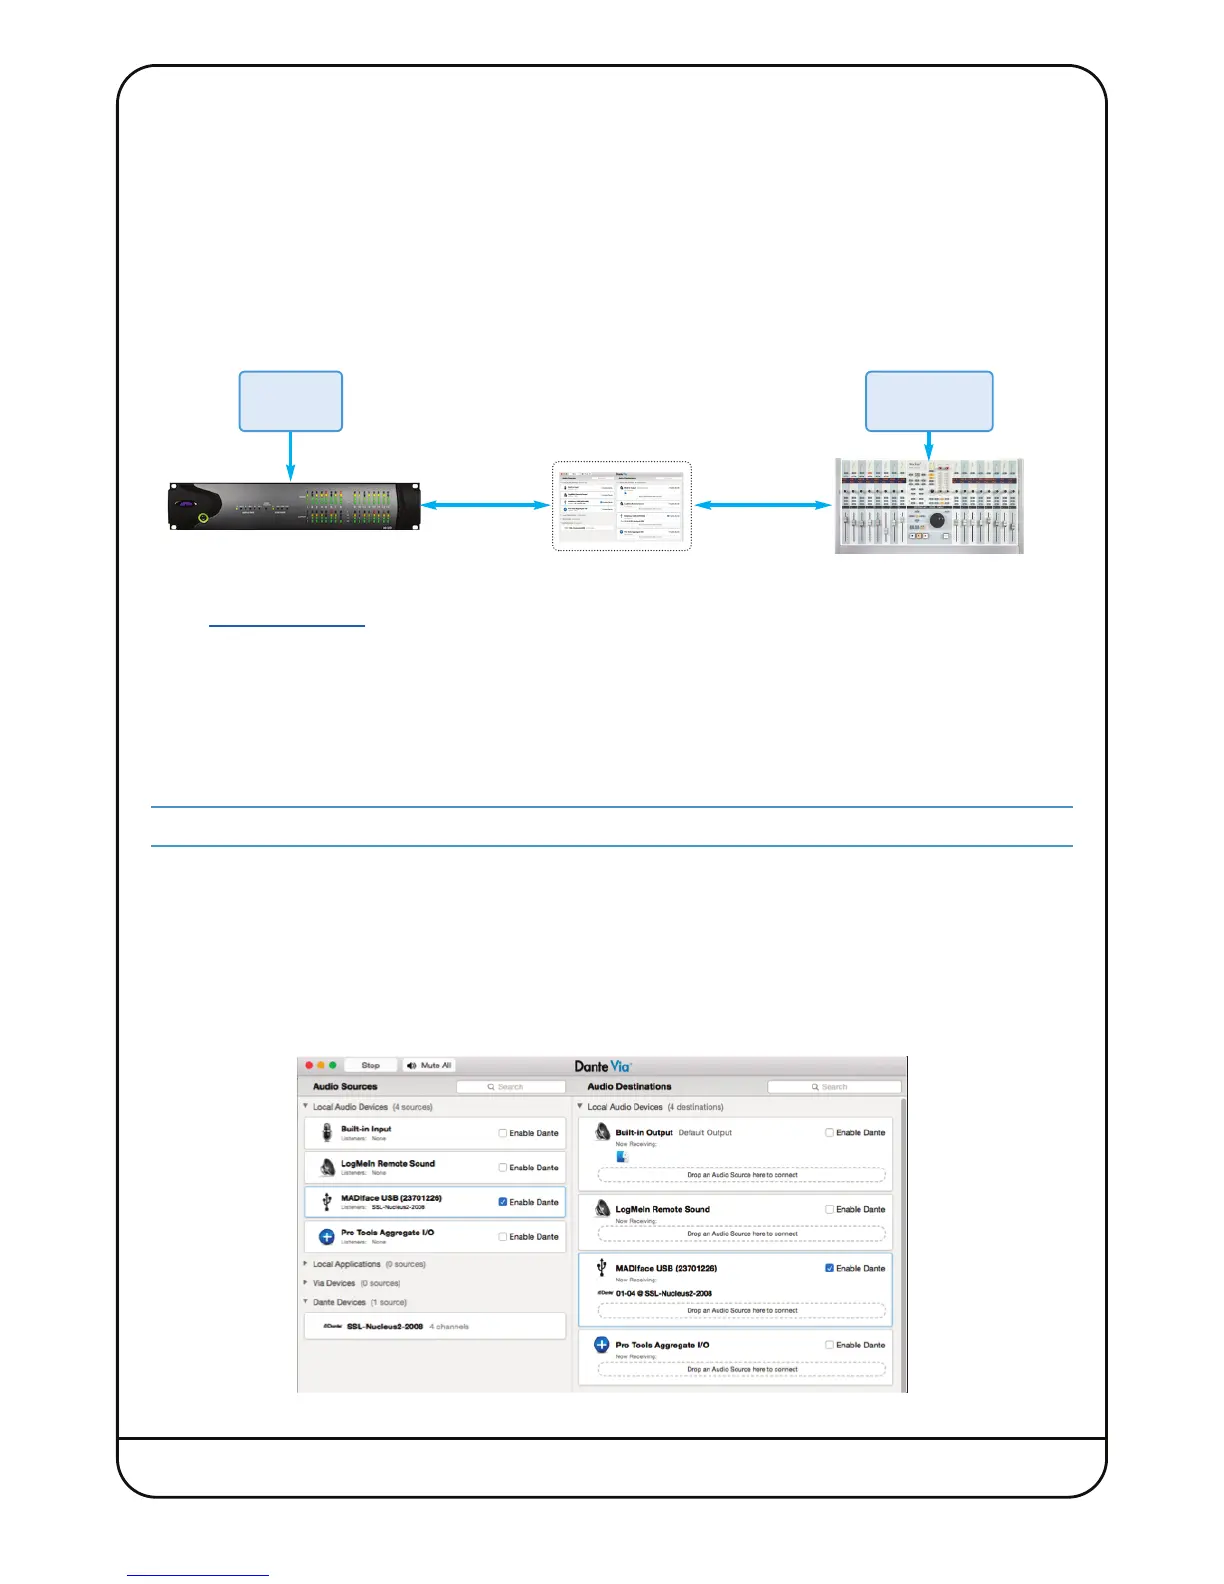
Configuration
On the le side of the Dante Via window is a list of Audio Sources, and on the right Audio Destinations.
1. Under the Audio Sources list, click Enable Dante for the soundcard you wish to connect to the Dante network.
2. Under the Audio Destinations list, click Enable Dante for the soundcard you wish to connect to the Dante network.
The soundcard will now be available on the Dante network, and visible in Dante Controller.
Nucleus
2
User Guide Page 13
Pro Tools
In/Out 1-2
Nucleus
2
In/Out 1-2
Computer running
Dante Via
Live Room
Sources
Control Room
Sources