Page 40 Nucleus
2
User Guide
CHANNEL CONTROL
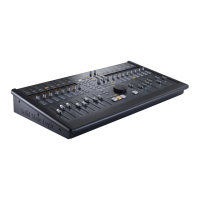
Channel Scrolling
On sessions with more than 16 channels, the CHANNEL and BANK switches allow you to
choose which DAW channels are controlled by the 16 Nucleus
2
faders.
To scroll the Nucleus
2
through the DAW channels in increments of one, use the left and right
CHANNEL switches. To scroll in increments of 16 DAW channels, use the left and right BANK
switches.
A
channel scrolling function can also be assigned to the Nucleus
2
j
og wheel via the Nucleus
2
R
emote. Select
T
RACKS
f
or the
J
og Wheel Default
.
See Page 26 for more details.
Logic users: Note that the tracks in the session may not appear on Nucleus
2
in the order that they are displayed in
the
ARRANGE
window unless the
ARRANGE Channel Strip View
mode is selected in the Logic control surface set up
menu.
Basic Channel Parameters
The channel faders and the three switches above them are used for basic control of the DAW channels selected using the
CHANNEL and BANK scrolling functions described above:
- The Nucleus
2
fader controls the DAW channel fader
- The Nucleus
2
CUT and SOLO switches control the DAW channel cut and solo functions.
The CUT switches will flash red whenever the SOLO function is active in the DAW.
- The Nucleus
2
SEL switch is used to select the channel in the DAW, for purposes such as channel naming. The switch
lights to indicate that it’s corresponding DAW channel is selected. It can also be used for track arming (by pressing the
centre section REC switch – see below), automation (using the centre section AUTO switch – see below) and for
assigning plug-ins to the Nucleus
2
plug-in editor (using the centre section PARAM switch – see Page 42).
Channel Metering
DAW channel meters are replicated at the top of each Nucleus
2
channel strip, above the Mode switch.
Track Arming
The channel SEL switches can be used as track arming switches. To do this, select the REC switch above-left of the
MONITOR LEVEL control. You will notice that the SEL switches now light red and emulate the status of the channel record
ready indicator. Once the REC switch is deselected, the REC LED just below the relevant channel meter lights to indicate
‘Record Ready’ status.
Automation Control
The DAW channel’s automation mode can be controlled by selecting the AUTO switch above-left of the MONITOR LEVEL
control. Use the channel SEL switches to select which channel’s automation mode is being edited, then press the V-Sel
switches to trigger the mode shown in the lower row of the display above them. The upper row of the display will indicate
the selected mode for the selected channel.
Note that the automation modes can be accessed using the V-Sel switches in either side of Nucleus
2
.
HUI Users: Single-letter indication of automation modes can be permanently displayed after the channel name in
the upper row of the display – this is determined by
Show Auto Mode
in the
DAW
tab of the Remote. Write modes are
indicated by a flashing W, read modes by a flashing R, and Off is indicated by no flashing letter. See the Nucleus
2
Remote Section for more information.