MHC-V83D
22
Sony CONFIDENTIAL
For Authorized Servicer
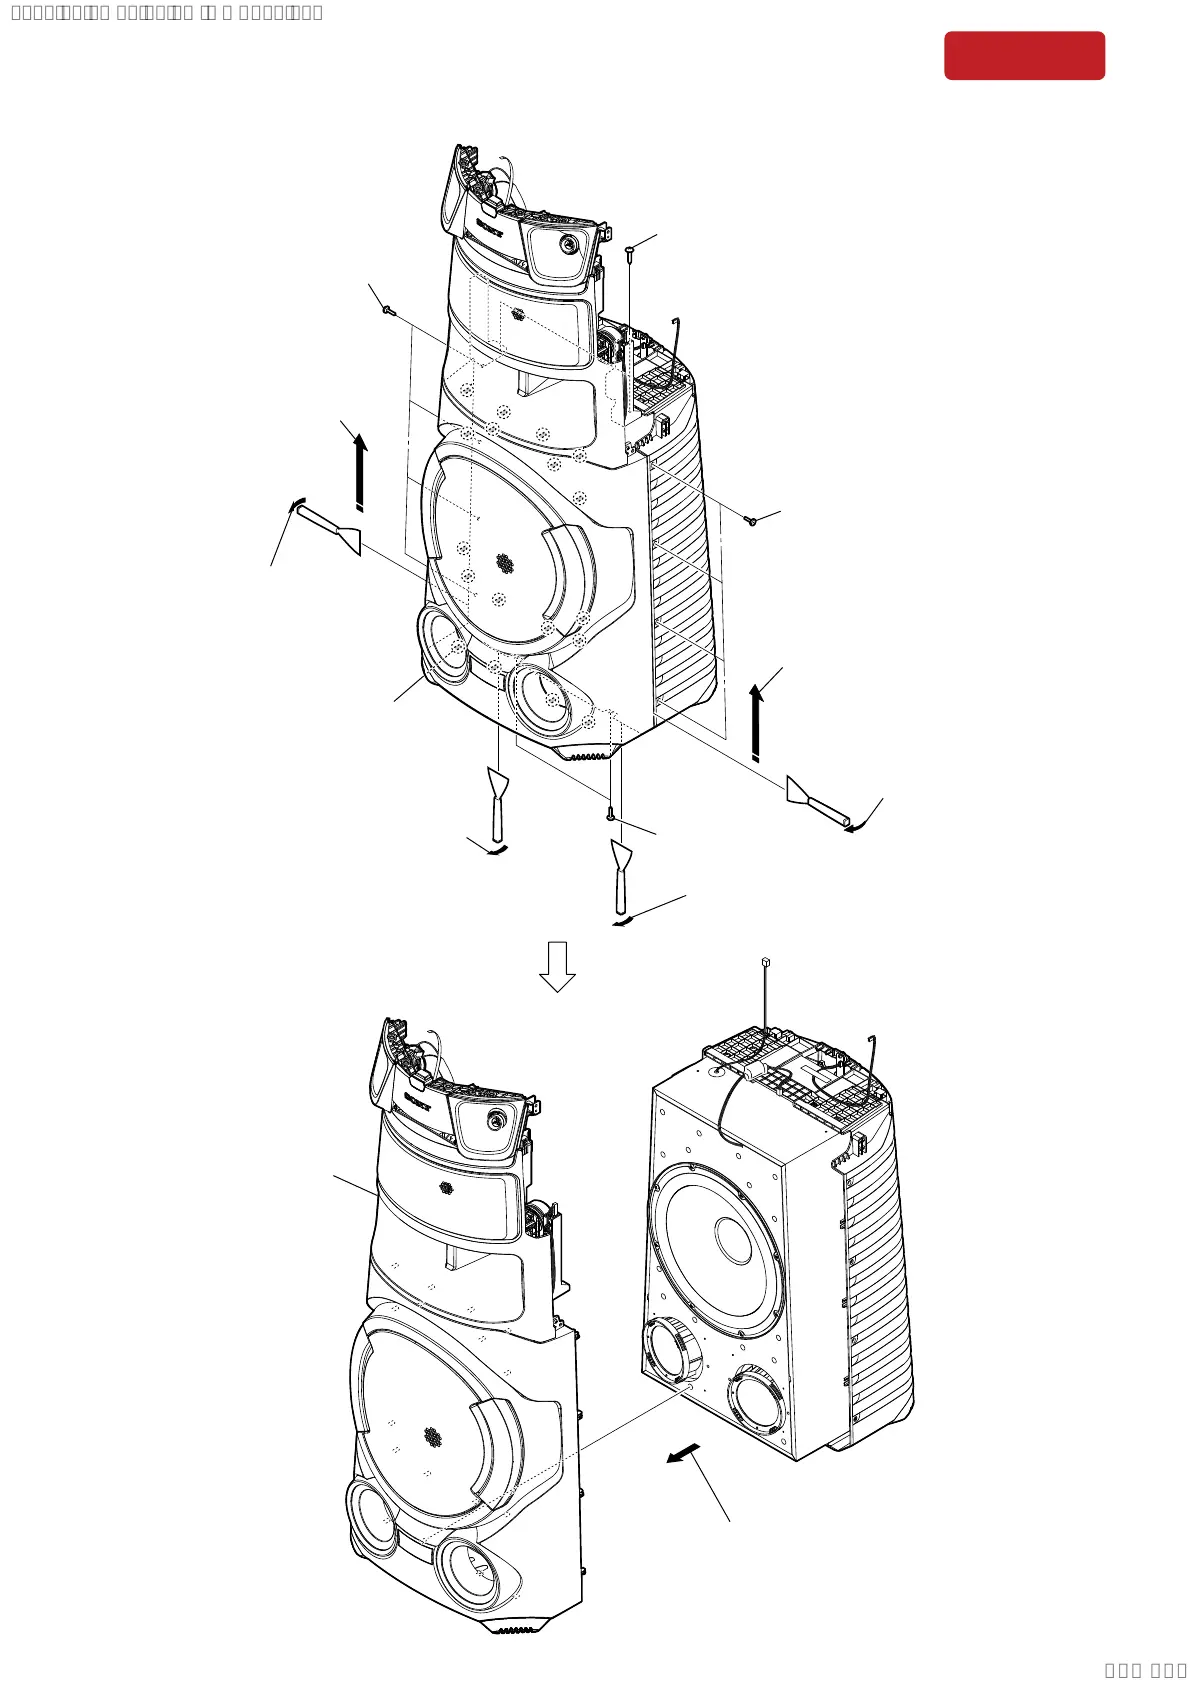
2-12. FRONT PANEL SECTION
3 two screws
(tapping)
1 two screws
((4 u 13) (TR-184A))
2 four screws
(tapping)
2 four screws
(tapping)
total eighteen bosses
5 All bosses are removed while moving
jig in the direction of the arrow, and
front panel section is removed.
5 All bosses are removed while moving
jig in the direction of the arrow, and
front panel section is removed.
4 Insert the jig into a space and slowly
remove the front panel section.
Note 1: When using a jig, please work
so as not to injure front panel
section and speaker cabinet.
4 Insert the jig into a space and slowly
remove the front panel section.
Note 1: When using a jig, please work
so as not to injure front panel
section and speaker cabinet.
4 Insert the jig into a space and slowly
remove the front panel section.
Note 1: When using a jig, please work
so as not to injure front panel
section and speaker cabinet.
4 Insert the jig into a space and slowly
remove the front panel section.
Note 1: When using a jig, please work so as not to injure
front panel section and speaker cabinet.
6 Remove the front panel
in the direction of an arrow.
7 front panel section
Note 2:
When installing the front panel
section, remove the used glue
and use a new glue to fix the
panel, front SW.
SYSSET
2020/06/2222:32:42(GMT+09:00)

 Loading...