I
iblackSep 23, 2025
What does NV_ERROR mean on Spirax Sarco Valve Positioners?
- AAmy MyersSep 23, 2025
If your Spirax Sarco Valve Positioners display NV_ERROR, it means there is a defective memory chip. Return the device for repair.
What does NV_ERROR mean on Spirax Sarco Valve Positioners?
If your Spirax Sarco Valve Positioners display NV_ERROR, it means there is a defective memory chip. Return the device for repair.
How to fix ERROR 10 on Spirax Sarco SP7-20?
If you encounter ERROR 10 with your Spirax Sarco Valve Positioners, it indicates that the supply voltage was interrupted for at least 20 ms. To fix this, check both the power source and the wiring.
What to do if I get ALARM 2 on Spirax Sarco SP7-20 Valve Positioners?
If you receive ALARM 2 on your Spirax Sarco Valve Positioners, it means the setpoint current is outside the permissible range (less than 3.8 mA or greater than 20.5 mA). To solve this, check the power source.
How to troubleshoot ERROR 11 on Spirax Sarco SP7-20?
If you encounter ERROR 11 with your Spirax Sarco Valve Positioners, it means the supply voltage has fallen below the minimum voltage. To resolve this, check the power source and the wiring.
What causes TIMEOUT on Spirax Sarco Valve Positioners?
If your Spirax Sarco Valve Positioners display TIMEOUT, it means the automatic adjustment function is taking too long. You can increase the supply pressure or use boosters to resolve this.
What to do when ALARM 7 appears on Spirax Sarco SP7-20 Valve Positioners?
If your Spirax Sarco Valve Positioners display ALARM 7, it means the specified limit value for the travel counter has been exceeded. Reset the counter (only possible via a connected PC with suitable software).
What does it mean when Spirax Sarco Valve Positioners show ERROR 50 to 99?
If you are seeing errors in the range of ERROR 50 to 99 on your Spirax Sarco Valve Positioners, this indicates an internal error. If the error can be reproduced and occurs in the same position after resetting, the device must be returned for repair to the manufacturer.
What to do when ALARM 6 appears on Spirax Sarco Valve Positioners?
If your Spirax Sarco Valve Positioners display ALARM 6, it means the defined limit value for the stroke counter has been exceeded. Reset the counter (only possible via a connected PC with suitable software).
Why is ALARM 4 appearing on my Spirax Sarco SP7-20?
If you receive ALARM 4 on your Spirax Sarco Valve Positioners, it indicates that controlling is inactive because the device does not operate in control mode or the binary input is active. To solve this, switch to control mode or switch off the binary input.
What does ALARM 3 indicate on Spirax Sarco SP7-20?
If you receive ALARM 3 on your Spirax Sarco Valve Positioners, it indicates the zero position has shifted by more than 4%. Correct the mounting to resolve this.
Covers essential safety precautions and warnings for operating the positioner.
Provides an overview of the product's features, specifications, and general characteristics.
Details the procedures and requirements for installing the positioner.
Outlines the steps for setting up and configuring the positioner for operation.
Explains how to operate the device and perform routine maintenance tasks.
Addresses common issues, error codes, and lists product certifications and approvals.
Specific warnings and requirements for using the positioner in potentially explosive atmospheres.
Guidelines for safe electrical wiring and protective earth conductor integrity.
Information on product suitability for intended applications and safe access procedures.
Addresses risks associated with hazardous liquids, gases, and environments during operation.
Requirements for tools, protective clothing, and work permits for safe operation.
Guidelines for safe handling, residual hazards, freezing protection, and product returns.
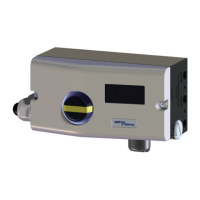
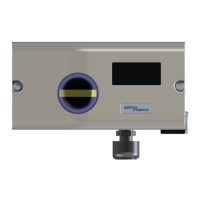
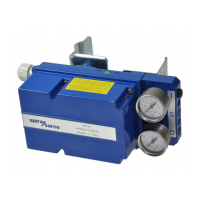
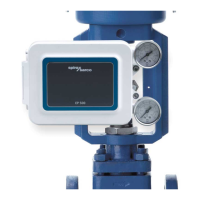
Introduces the SP7 positioner, its capabilities, design, and communication support.
Explains the information provided on the product label and provides an example.
Specifies ATEX ratings and ambient temperature limits for explosion protection.
Specifies IECEX ratings and ambient temperature limits for explosion protection.
Illustrates the positioner's schematic diagram and lists its basic and optional components.
Explains how the SP7-20, SP7-21, SP7-22 positioners function and adapt to actuators.
Provides the initial steps and diagram for mechanical mounting of the positioner.
Defines the operating and measuring ranges for linear actuators.
Defines the operating and measuring ranges for rotary actuators.
Lists the components of the attachment kit for mounting on linear actuators per IEC 534.
Step-by-step instructions for attaching the follower guide to the actuator stem.
Instructions for attaching the lever to the positioner's feedback shaft.
Details the process of mounting the positioner onto a cast iron yoke.
Step-by-step guide for attaching the mount bracket to a columnar yoke.
Instructions for adjusting the positioner linkage for optimal stroke range.
Explains how to select the actuator bolt position for optimal linearization.
Diagram and explanation for mounting actuator bolts directly onto the lever.
Diagram and explanation for mounting actuator bolts onto the valve stem.
Lists components and required tools for mounting on rotary actuators per VDI/VDE 3845.
Steps for determining the correct mounting position for the adapter on the feedback shaft.
Instructions for attaching the bracket to the positioner housing.
Steps for securing the positioner unit to the actuator.
Illustrates the electrical connections for the basic device and options, detailing terminal functions.
Details the electrical connection points and terminal functions for SP7-21/22.
Specifies electrical data for analog and fieldbus inputs, including voltage and current ratings.
Lists the functions supported by the digital input and their terminal connections.
Details binary output capabilities and analog feedback module specifications.
Describes the digital feedback modules SW1 and SW2, including their outputs and functions.
Specifies electrical details for limit monitoring using proximity switches.
Specifies electrical details for limit monitoring using 24V micro-switches.
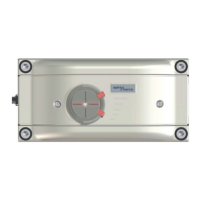
Describes the function of the mechanical position indicator disk.
Illustrates cable entry points and terminal connections for the device.
Details wire cross-sectional areas for basic device electrical connections.
Specifies wire cross-sectional areas for option modules and limit switches.
Specifies requirements for instrument air quality and pressure.
Information on pneumatic connections for double-acting actuators with spring-return.
Details purity standards, oil content, pressure, and air consumption for instrument air.
Outlines the sequence of operations for commissioning the positioner.
Specifies the recommended rotational angle ranges for linear and rotary actuators.
Explains how to select and navigate through the positioner's operating modes.
Details the indicators and descriptions for each operating mode.
Step-by-step guide for performing automatic adjustment for linear and rotary actuators.
Instructions on what to do if an error occurs during the auto-adjustment process.
Steps to access the configuration level and select parameter groups.
Guide to navigating and selecting specific parameters like zero position.
Procedures for saving new parameter settings and returning to the operating level.
Instructions for setting the mechanical position indicator on the housing cover.
Guide for setting limit switches using proximity sensors.
Guide for setting limit switches using 24V micro-switches.
Explains the menu structure, navigation buttons, and display elements of the positioner.
Describes the 7-segment and 14-segment displays and their indications.
Details the functions associated with each operating button (ENTER, MODE, etc.).
Explains the two main operating levels: Operating Level and Configuration Level.
Overview of the parameter structure for HART communication, showing operating and configuration levels.
Details parameters for actuator type, auto-adjust, setpoint range, and valve action.
Describes parameters related to messages, alarms, and stroke counters.
Details parameters for PID control, analog output configuration, and alarm settings.
Covers parameters for digital outputs, digital inputs, and I/P module types.
Overview of the parameter structure for SP7-21/22 models.
Details parameters for actuator type, auto-adjust, tolerance band, and setpoint ranges.
Covers parameters for PID control, Y-offset, tolerance band, and safe position.
Lists error codes, possible causes, impact, and troubleshooting steps for SP7-20.
Continues listing error codes, causes, impact, and troubleshooting for SP7-20.
Details common error codes for SP7-21/22, their causes, impact, and solutions.
Lists alarm codes, possible causes, impact, and troubleshooting steps.
Explains various message codes encountered during operation and their meanings.
Provides information on available spare kits and their part numbers.
Lists ATEX rating, certification number, and ambient temperature limits.
Lists IECEX rating, certification number, and ambient temperature limits.
Declares conformity with EU harmonisation legislation, standards, and notified bodies.
| Input Signal | 4-20 mA |
|---|---|
| Supply Pressure | 1.4 to 7 bar (20 to 100 psi) |
| Enclosure Rating | IP66 / NEMA 4X |
| Housing Material | Aluminum |
| Action | Single-acting or double-acting |
| Type | Electro-Pneumatic Valve Positioner |
| Ambient Temperature Range | -20 to +80°C (-4 to +176°F) |