


J
James CrossSep 15, 2025
How to troubleshoot NO_COMM error on Spirax Sarco Valve Positioners?
- MMr. Brian ChangSep 16, 2025
If the Spirax Sarco Valve Positioners displays 'NO_COMM', check the bus address and status bit (128).
How to troubleshoot NO_COMM error on Spirax Sarco Valve Positioners?
If the Spirax Sarco Valve Positioners displays 'NO_COMM', check the bus address and status bit (128).
How to reset the travel counter on Spirax Sarco Valve Positioners (ALARM 7)?
To reset the travel counter on Spirax Sarco Valve Positioners after ALARM 7, use a connected PC with suitable software.
What to do if Spirax Sarco Valve Positioners show ALARM 5?
If the Spirax Sarco Valve Positioners display ALARM 5, it means positioning has timed out because the settling time needed exceeds the configured stroke time. To resolve this, ensure that the actuator is not blocked, the supply air pressure is adequately high, and the specified time limit is higher than 1.5 times the longest stroke time of the actuator. If adaption cannot run uninterruptedly for an actuator, adaption should be switched on until the alarm does not occur anymore during controlling actions.
What to do if Spirax Sarco Valve Positioners display ERROR 10?
If your Spirax Sarco Valve Positioners are showing ERROR 10, it indicates that the supply voltage was interrupted for at least 20 ms. This error is displayed after resetting the device to indicate the reason for the reset. You should check the power source and the wiring to solve this problem.
What does ERROR 50 to 99 mean on Spirax Sarco SP7-10 Valve Positioners?
If the Spirax Sarco Valve Positioners displays ERROR 50 to 99, and the error can be reproduced in the same position after resetting, the device must be returned for repair to the manufacturer. This indicates an internal error.
What does NV_ERROR mean on Spirax Sarco SP7-10 Valve Positioners?
If the Spirax Sarco Valve Positioners displays 'NV_ERROR' it indicates a defective memory chip. Return the device for repair.
Why does my Spirax Sarco SP7-10 Valve Positioners show CALC_ERR error?
If the Spirax Sarco Valve Positioner displays 'CALC_ERR', this could be due to inconsistent data (e.g., a low value being higher than a high value) or incorrect configuration. You can correct the values or load the factory settings. Another cause could be that data cannot be saved locally because PROFIBUS saves data in the background. In this case, try again later.
What to do if Spirax Sarco Valve Positioners show ERROR 10?
If your Spirax Sarco Valve Positioners show ERROR 10, it means the supply voltage was interrupted for at least 20 ms. To resolve this, check the power source and the wiring.
What does ALARM 4 mean on Spirax Sarco SP7-10 Valve Positioners?
ALARM 4 on Spirax Sarco Valve Positioners indicates that controlling is inactive because the device does not operate in control mode or the binary input is active. To resolve this, switch to control mode or switch off the binary input.
What causes ALARM 1 on Spirax Sarco Valve Positioners?
ALARM 1 on Spirax Sarco Valve Positioners is caused by leakage between the positioner and the actuator. To address this, check the piping.
Details on retaining the manual, authorized personnel, and manufacturer contact.
Explains signal words DANGER, WARNING, CAUTION, and NOTE for hazard communication.
Defines the device's purpose for positioning pneumatically controlled actuators.
Lists examples of misuse, such as using as a climbing aid or for external loads.
Outlines conditions that void the warranty, including non-intended use and unauthorized alterations.
Provides CAUTIONary advice regarding incorrect parameter values and potential injuries.
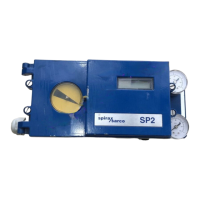
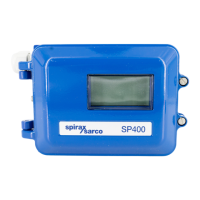
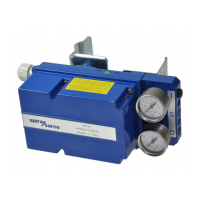
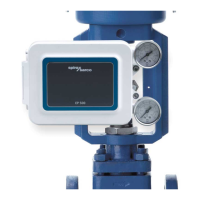
Explains how the LCD display and operating buttons enable device operation with the cover open.
Details the LCD display elements and button functions for menu navigation.
Explains the meaning of symbols like key, control loop active, manual adjustment, and configuration.
Details the functions of control buttons like ENTER, MODE, UP, and DOWN arrows.
Describes the two levels: Operating Level and Configuration Level.
Introduces the different operating modes, starting with Control with Adaptation.
Details the 'Control without adaptation' mode and how to display setpoint, temperature, and deviation.
Explains manual valve adjustment within the stroke range using arrow buttons.
Describes manual adjustment within the sensor range, referencing Mode 1.2.
Explains how to inhibit positioner operation partially or completely via digital input and parameters.
Discusses local parameter setting, access blocking, and parameter grouping.
Illustrates parameter display format and structure with an example.
Details parameters for SP7-10 and SP7-20 models, including display, function, and settings.
Provides a graphical overview of HART parameter structure and navigation between levels.
Covers standard parameters like Actuator Type and Automatic Adjustment.
Configures the positioner for operation on linear or part-turn actuators.
Details the automatic adjustment process for optimizing control parameters.
Defines the mode or scope of the Auto Adjust function (FULL, STROKE, CTRL_PAR, ZERO_POS, LOCKED).
Details the test function for activating the positioner and checking parameter group effects.
Enables device identification in the system via HART 7, offering Disable, One time, and Continuous options.
Allows leaving the configuration level, with options to save or discard changes.
Specifies the lower limit of the setpoint range for analog feedback.
Specifies the upper limit of the setpoint range for analog feedback.
Selects predefined or user-configurable curves to adjust positioner behavior to the analog input signal.
Defines the relationship between analog setpoint and pneumatic output (Increasing/Decreasing).
Specifies the operating range percentage from which the 0% position is approached.
Specifies the operating range percentage from which the 100% position is approached.
Increases stroke time for actuators; setpoint change is not directly transferred.
Increases stroke time for actuators; setpoint change is not directly transferred.
Allows leaving the configuration level, with options to save or discard changes.
Specifies the lower limit of the operating range for the positioner.
Specifies the upper limit of the working range for the positioner.
Assigns the display zero position to valve/fitting zero position and selects sensor shaft rotation.
Allows leaving the configuration level, with options to save or discard changes.
Sets the monitoring time until reaching the setpoint for alarm triggering.
Defines the switching point SW1 as a percentage of the operating range for signal activation.
Defines the switching point SW2 as a percentage of the operating range for signal activation.
Determines if a message is triggered for exceeding or falling below switching point SW1.
Allows leaving the configuration level, with options to save or discard changes.
Monitors for actuator leakage and issues a message via alarm output.
Triggers an alarm if the setpoint falls below or exceeds the defined range.
Signals an alarm when the configured operating range is exceeded by 4%.
Specifies signaling of an alarm if the positioner is inactive or control mode is interrupted.
Activates the 'Dead band time limit' function for alarms when setpoint is not reached.
Triggers an alarm when the movement counter exceeds a specified limit value.
Triggers an alarm when the travel counter exceeds a specified limit value.
Allows leaving the configuration level, with options to save or discard changes.
Specifies the lower limit of the operating range for manual adjustment.
Specifies the upper limit of the working range for manual adjustment.
Configures the positioner for operation on linear or part-turn actuators.
Specifies the end position for pneumatic actuator reset spring on power failure.
Cuts off unusable range for input signal 4.16 mA, defining the valve's 0% approach point.
Cuts off unusable range for input signal 19.84 mA, defining the valve's 100% approach point.
Specifies actuator bolt installation type for potentiometer signal linearization.
Allows leaving the configuration level, with options to save or discard changes.
Adjusts the KP value for the upward positioning direction to increase control speed and stability.
Adjusts the KP value for the downward positioning direction.
Adjusts the TV value (derivative time) for the upward positioning direction to counteract KP value dynamically.
Adjusts the TV value (derivative time) for the downward positioning direction.
Adjusts the Y offset for the upward positioning direction to compensate for system asymmetries or improve dynamics.
Adjusts the Y offset for the downward positioning direction to compensate for system asymmetries.
Defines a ± range around the position setpoint for a different control algorithm.
Specifies the speed at which the dead band is approached to prevent overshooting.
Tests controller effects by introducing setpoint changes or ramps; automatically stopped after two minutes.
Determines dead band, end positions, and control parameters during automatic adjustment.
Defines time range for detecting leakage by counting valve movements outside the dead band.
Specifies a range around the deadband to influence alarm behavior based on positioning timeout.
Allows leaving the configuration level, with options to save or discard changes.
Specifies the lower current range limit for the analog feedback.
Specifies the upper current range limit for the analog feedback.
Selects the characteristic curve for the analog feedback output.
Selects higher or lower alarm current for analog feedback signaling.
Determines if position indicator and feedback follow the CHARACT characteristic curve.
Simulates analog output effects during commissioning without affecting the normal process.
Enables or disables the alarm signal via the optional analog output module.
Enables extension of the permissible signal output range to 3.8 - 20.5 mA.
Allows leaving the configuration level, with options to save or discard changes.
Determines the logic level of the alarm output (ACTIVE HI/LO).
Defines the active state for switch output SW1 (ACTIVE HI/LO).
Defines the active state for switch output SW2 (ACTIVE HI/LO).
Determines the status of digital outputs (ACTIVE or INACTIVE).
Allows leaving the configuration level, with options to save or discard changes.
Selects protective functions for the digital input, including operation locks.
Allows leaving the configuration level, with options to save or discard changes.
Activates the safe position prior to loading factory settings or changing I/P module type.
Resets the positioner to factory settings, requiring checks of I/P module type.
Adapts positioner software to the installed I/P module type for correct operation.
Function reserved for Spirax Sarco Service only.
Allows selection between standard HART 5 and HART 7 communication protocols.
Allows leaving the configuration level, with options to save or discard changes.
Sets the PROFIBUS address for device communication; recommended range 3-125.
Adjusts the go pulse for upward positioning to compensate for system asymmetries or improve dynamics.
Adjusts the go pulse for downward positioning to compensate for system asymmetries.
Lists general error codes, their possible causes, impact, and troubleshooting steps.
Details specific error messages for SP7-11/12 and SP7-21/22, including meaning, impact, and measures.
Lists alarm codes, possible causes, impact, and troubleshooting guidance for positioner alarms.
Provides a list of message codes and their corresponding descriptions for status monitoring.
Provides steps to diagnose and resolve positioner vibration issues in control modes.
Provides a flowchart for troubleshooting positioners that are not functioning, including signal input checks.
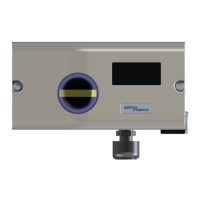
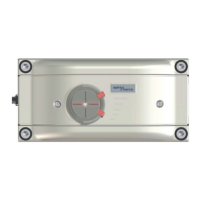
| Enclosure Rating | IP66 / NEMA 4X |
|---|---|
| Input Signal | 4-20 mA DC |
| Supply Pressure | 1.4 to 7 bar (20 to 100 psi) |
| Weight | 1.5 kg (3.3 lbs) |
| Materials | Internal parts: Stainless steel, brass, and plastic |
| Ambient Temperature Range | -20°C to +70°C (-4 to +158°F) |