Basic G3 operations UM1811
44/52 DocID026814 Rev 1
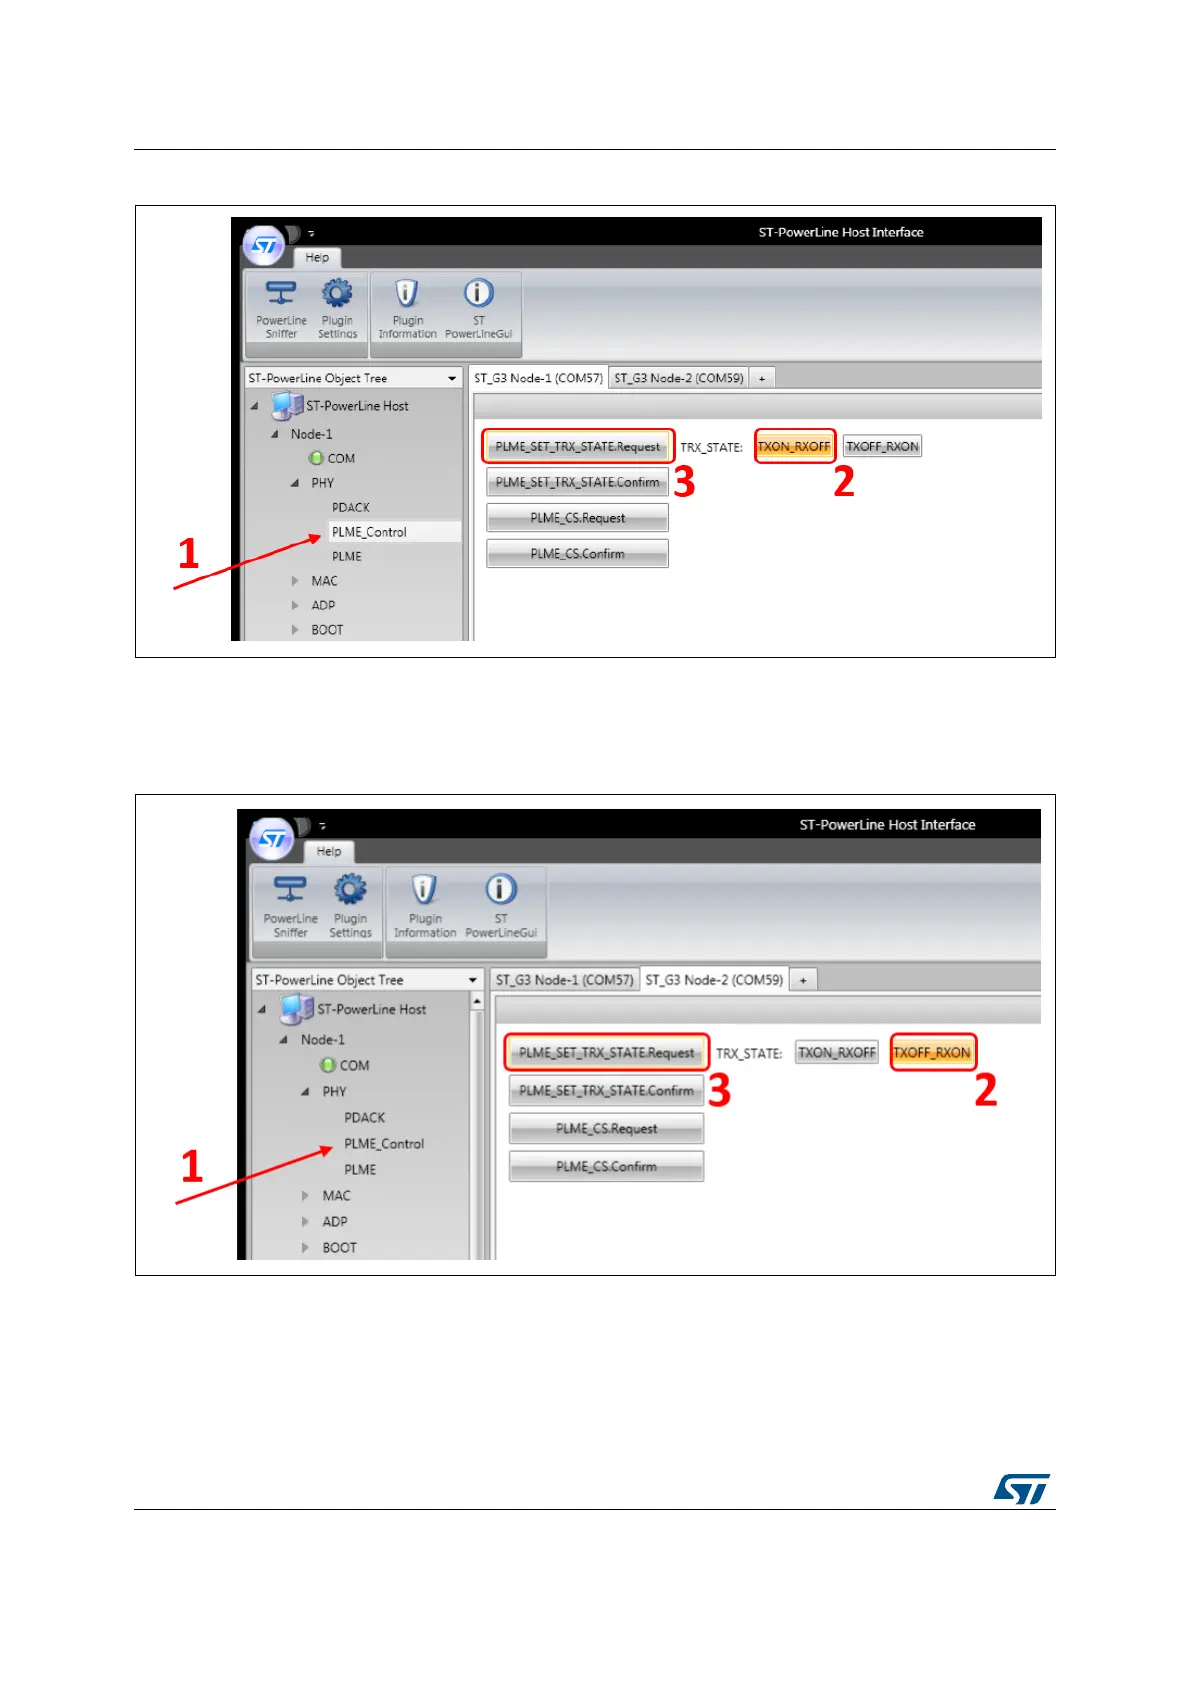
Figure 32. Configure Node 1 in TX
For the Node 2, as shown in Figure 32, go into the PHY menu / PLME_Control panel (1) to
configure the state of the node. Check the TXOFF_RXON (2) parameter and click on the
PLME_SET_TRX_STATE.Request button (3).
Figure 33. Configure Node 2 in RX
Now that the boards are plugged in the mains and the setup has been completed, data can
be sent at the PHY level, as represented in Figure 33. To do this, go to the PHY root menu
of the Node 1. Select the payload type to be ASCII (1), write the “TEST” string in the free
text area (2) and click on the PD_DATA.Request button (3).
In the trace window, it is possible to check that the Node 2 has received the data message
by checking that the PD_DATA.Indication message returned the SUCCESS status.