Maintenance Procedures – Base
62
LIFT HOUSING REMOVAL AND REPLACEMENT
Required Tools:
Standard Screwdriver Phillips Screwdriver Bungee Cord (or equivalent)
5/16” Socket Wrench 9/16” Socket Wrench Needle–Nose Vise Grip Pliers
3/8” Open End Wrench Small Standard Screwdriver 5/16” Open End Wrench
Side Cutters 5/16” Nut Driver 7/32” Hex Allen Socket Wrench
3/8” Hex Allen Socket (w/ approx. 6” extension) Sawhorses (or equivalent)
Procedure:
1. Unplug the bed power cord from the wall socket.
2. Using a 5/16” socket wrench, remove the six bolts holding the lower lift cover to the base and remove
the cover.
3. Using a #2 Phillips screwdriver, remove the three screws holding the upper lift cover to the base.
4. Using a #2 Phillips screwdriver, remove the four screws holding the litter access panel at the end of the
bed needing service.
5. Remove the lift motor and capacitor (refer to procedure on page 59).
6. Remove lift potentiometer (refer to procedure on page 66).
7. Using a 5/16” open end wrench, remove the cable clamps holding the power and sensor coil cords on
top of the lift housing. Cut the cable ties and disconnect the coil cords from underneath the lift housing.
The power and sensor coil cords are now free from the lift housing assembly. Drape them up out of the
way.
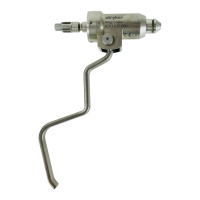
8. Using a 7/32” hex Allen socket, remove the two screws (A) holding the lift screws to the header crossbar
plate.
CAUTION
The bed litter retracts on rollers. Secure it to prevent it from rolling while the procedure is being done.
A
HEAD END