Maintenance Procedures – Litter
89
LOAD CELL REPLACEMENT (CONTINUED)
3. Using a 5/16” nut driver, remove the bolt holding the load cell cable connector cover and remove the cover.
4. Support the corner of the litter where the load cell is being removed.
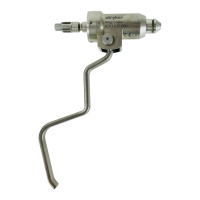
5. Unplug the load cell connector (A) from the load cell cable. Using side cutters, cut the cable ties.
6. Using a 1/4” hex Allen wrench, remove the two screws, washers, and nuts (B) holding the load cell to the
bed.
7. When removing the load cell at the head end of the bed, slide the load cell toward the center of the bed
to clear the bushing that supports the load cell. Remove the load cell by lifting it up and out. When remov-
ing the load cell at the foot end of the bed, slide the load cell with the roller bushing toward the center of
the bed to clear the litter frame. Remove the load cell and the roller bushing by lifting them up and out.
NOTE
If your bed is equipped with a scale system, there are two tapered shims (C) for each load cell. Refer to detail
1 on page 88 as reference for proper installation of the shims. Proper installation of these shims is very impor-
tant for scale accuracy.
8. Reverse the above procedure to install the new load cell.
CAUTION
Be sure the load cell’s strain gauge is facing up when installing a new load cell or the weigh system will not
work properly.
9. Recalibrate the weigh system (see page 87).