Installation, Operation, and Maintenance Manual
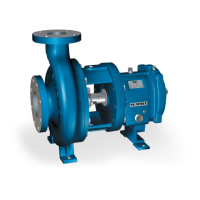
22 SUMMIT PUMP MODEL 2196 / 2196-LF / 2196-R / 2796
14. Install bearing housing bolts (370C) into bearing frame (228) and install jack bolts
(370D) and jam nuts (423). Hand-tighten evenly.
15. Attach frame (228) to adapter (108).
a. Align dowel pins (469B) and adapter bolt (370B).
b. Tighten using criss-cross pattern.
c. Rotate shaft 360 degrees. It should be free.
NOTE: These steps do not apply to the
6” STO Model.
16. Set frame (228) and adapter (108) upright. Clamp to bench for safety as assembly
continues.
17. Install inboard bearing labyrinth seal in adapter frame. Make sure that the seal’s
drain slots face down. Follow Maintenance instructions in Appendix E.
18. Put anti-seize compound on the shaft and, if equipped, install shaft sleeve (126)
onto shaft (122).
19. Align anti-rotation pin with notch in sleeve (126).
For mechanical seal pumps, read manufacturer’s instructions for assembly. (See
STUFFING BOX on page 5.)
20. Install stuffing box cover (184) onto adapter with studs (353) and nuts (353A).
21. Install impeller (101) with new O-ring (496A).
22. Using an impeller wrench or strap wrench on the coupling end of the shaft,
tighten by rotating clockwise. Make sure coupling is tight to the shaft.
23. For packed pumps, install the appropriate packing (106) in the stuffing box cover
(184) according to fluid being pumped (105).
a. First, insert two packing rings into bottom of box.
b. Next, insert the lantern ring (105). Make sure to stagger packing joints and
lantern ring joint by 90 and be sure lantern ring lines up with flushing
connection. Install gland halves (107).
c. Hand-tighten nuts (353A). You must make final adjustments after the pump
has begun operation.
For mechanical seal
pumps, continue by following manufacturer’s instructions
noted in Step 19.
24. Install casing gasket (351) onto stuffing box cover (184). At this point, the power
end is ready for reinstallation into the casing or for storage for future use.
25. If returning to service, slide assembly into casing (100).
26. Install casing bolts (370) into frame to pull assembly into casing.
27. Rotate the shaft to ensure that no rubbing exists.