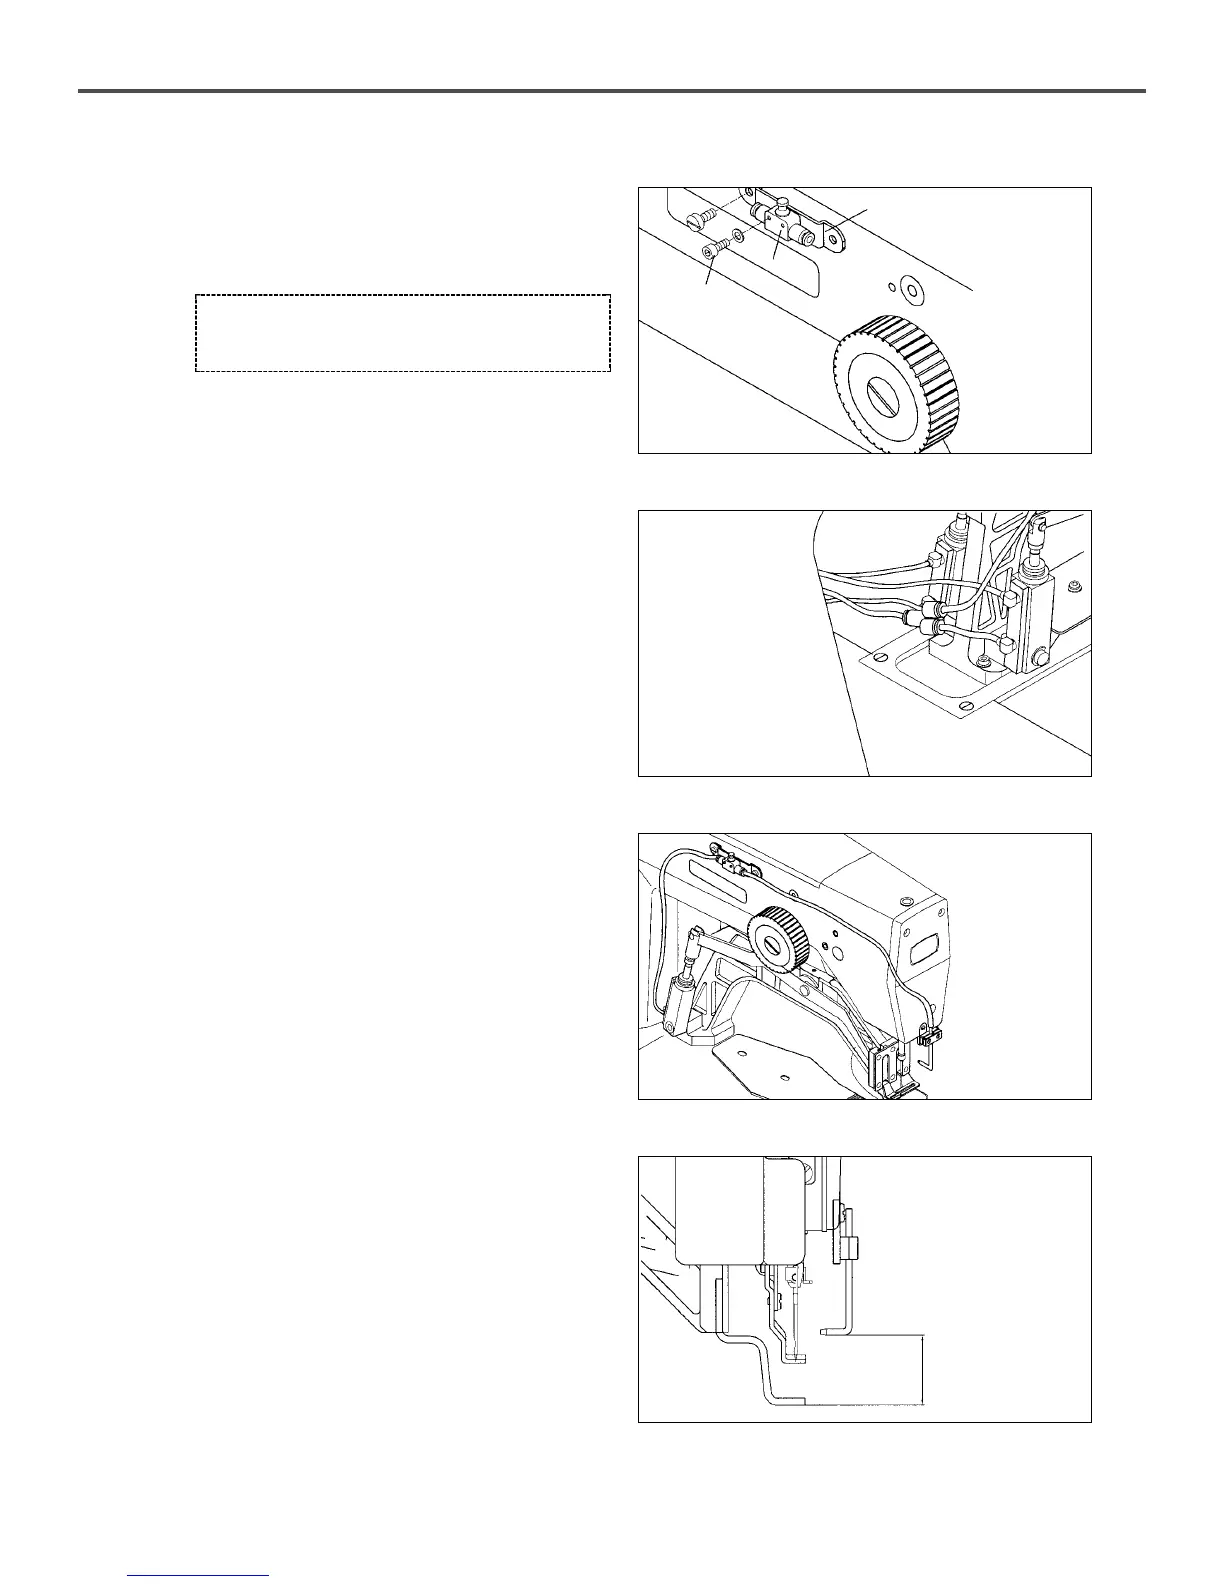
EasyManuals Logo

SunStar SPS/C-B1201 SERIES User Manual

SunStar SPS/C-B1201 SERIES
59 pages
To Next Page IconTo Next Page
To Previous Page IconTo Previous Page
Page #24 background imageLoading...
Page #24 background image
24
E. Use a screw to fix the speed controller onto the
speed controller bracket . Assemble it onto the arm
afterwards.
F. Cut off the lower hose of the presser foot-driving
cylinder. Connect it to the air hose of the needle
cooler, using the air fitting.
G. Link the hose with the left and right side of the speed
controller.
H. Fix the nozzle as shown in the figure and fix it firmly
with a screw.
[Figure 37]
[Figure 38]
[Figure 39]
[Figure 40]
[Caution]
Be careful of the assembly direction of the speed
controller.
31.8

Table of Contents

Questions and Answers:

Question and Answer IconNeed help?

Do you have a question about the SunStar SPS/C-B1201 SERIES and is the answer not in the manual?

SunStar SPS/C-B1201 SERIES Specifications

General IconGeneral
BrandSunStar
ModelSPS/C-B1201 SERIES
CategorySewing Machine
LanguageEnglish

Related product manuals