31
66
Maintenance and repair
Warning
The machine is set to be in optimal condition when it is shipped out from the factory. Do not make
arbitrary adjustments to the machine and replace only with standard OEM parts approved by SunStar.
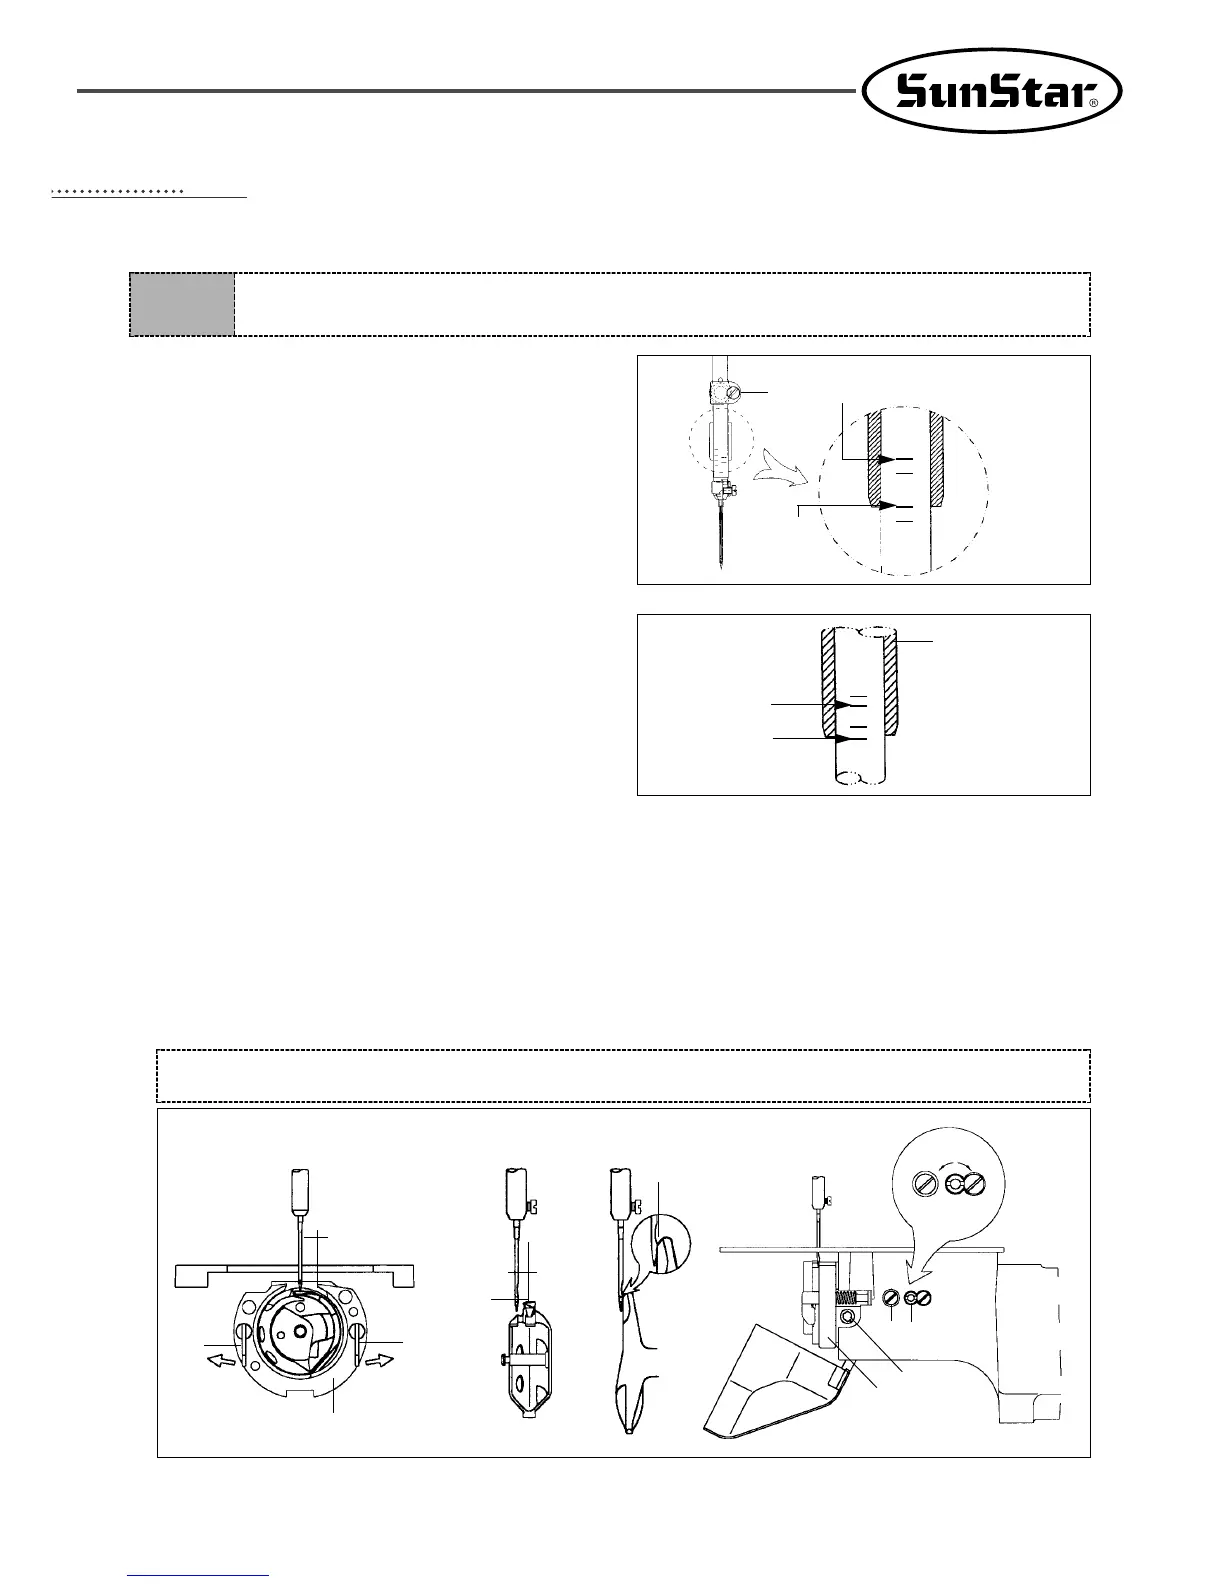
1) Adjustment of the needle bar height
Unfasten the needle bar holding screw① when the
needle bar is at its lowest position. Fit the upper carved
line (one that is suitable for the needle used) with the
lower side of the needle bar bushing to adjust the height
as shown in the Figure. Firmly tighten the screw①
afterwards.
[Figure 59]
[Figure 60]
2) Adjustment of the needle and the shuttle
A. At the lowest point of the needle bar, fit the lower
carved line (one that is suitable for the needle used)
with the lower side of the needle bar bushing as
shown in the Figure.
[Figure 61]
[Caution]
For safety, make sure to firmly tighten all the screws after shuttle (large) adjustments.
Needle Bar
Lower Bushing
DP×5
DP×17
7.5mm
②
②
⑥
③
→
→
0.05~0.1mm
→
→
⑤
①
④
0mm
DP×17
DP×5
①
B. After loosening the shuttle driver screw①, open the inner hook pressure bar② left and right to take the shuttle race
ring③ out from the shuttle (large)④.
C. Make sure the shuttle hook point is parallel to the needle center. Be sure to press the needle and the front side of
the shuttle driver firmly together to prevent the needle from bending. Then, tighten the shuttle driver screw① firmly.
D. Unfasten the shuttle (large) screw⑤. Turn the large hook control shaft⑥ left and right, then adjust the front/back
position of the shuttle (large)④ to set a clearance of 0.05~0.1mm between the needle and the shuttle hook point.
E. After adjusting the front/back position of the shuttle④, adjust the rotating direction of the shuttle④ to set a gap of
7.5mm between the needle and the shuttle④. Fasten the shuttle screw① tightly afterwards.
 Loading...

