EasyManuals Logo

SunStar SPS/C-B1201 SERIES User Manual

SunStar SPS/C-B1201 SERIES
59 pages
To Next Page IconTo Next Page
To Previous Page IconTo Previous Page
Page #23 background imageLoading...
Page #23 background image
23
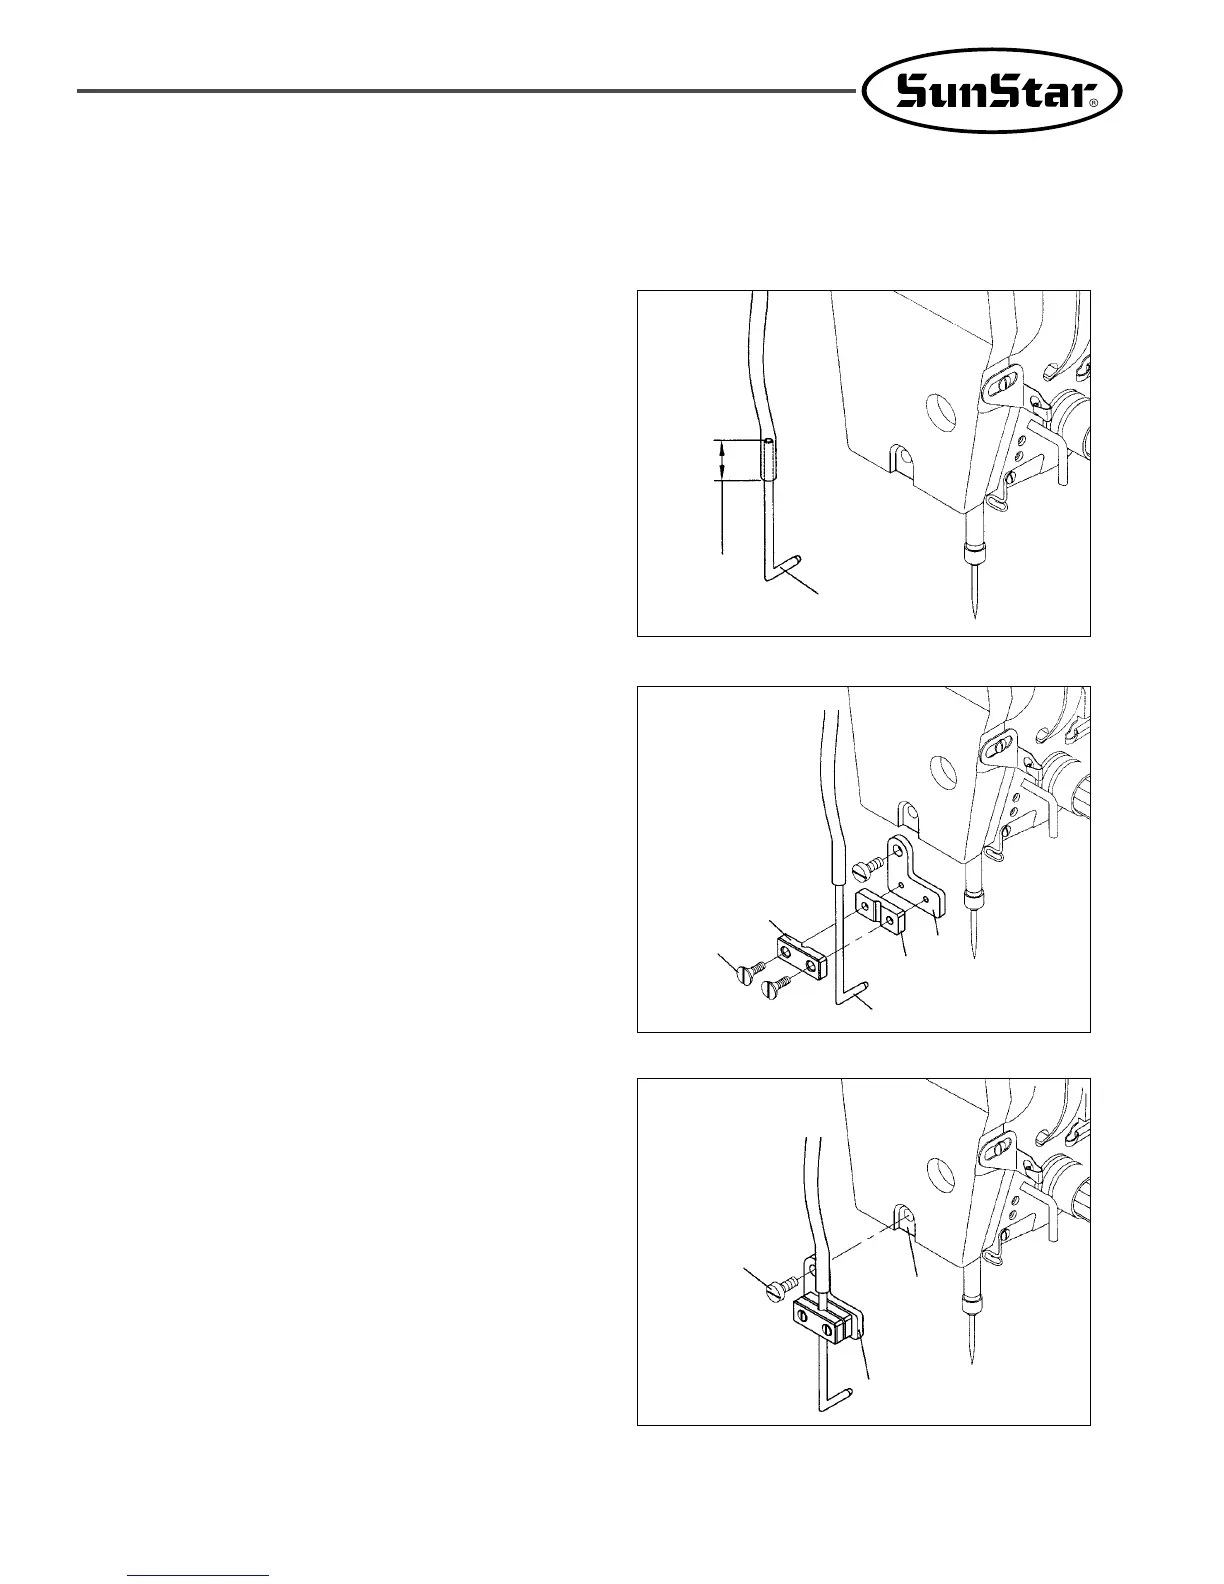
9) Installing the needle cooler
A. Before installation, check if all the parts are in place as described in the Parts Book.
B. Insert the nozzle 5~8mm into the one end of the air
hose as shown in the figure.
C. Use the guide A and guide B to fix the nozzle
onto the guide bracket as illustrated in the figure,
and fix temporarily with a screw .
[Figure 34]
[Figure 35]
[Figure 36]
D. Assemble the guide bracket assembled on the
nozzle, onto the lower fixing screw part of the
faceplate, using a screw .
5~8mm

Table of Contents

Questions and Answers:

Question and Answer IconNeed help?

Do you have a question about the SunStar SPS/C-B1201 SERIES and is the answer not in the manual?

SunStar SPS/C-B1201 SERIES Specifications

General IconGeneral
BrandSunStar
ModelSPS/C-B1201 SERIES
CategorySewing Machine
LanguageEnglish

Related product manuals