38
B. Set the thread winder driving wheel 4mm apart from
the upper shaft busing (front) and tighten the screw.
[Figure 79]
Bobbin Winder
Driving Wheel
Upper Shaft Busing
(Front)
Upper Shaft
4mm
10) Adjustment of the bobbin winder
A. Use the starting (initial) position of the winder control
plate to adjust the winding capacity of the bobbin
winder. Unfasten the screw to turn the control plate in
the A direction for a large winding capacity, and turn it
in the B direction for a small winding capacity.
[Figure 78]
Bobbin Winder Control Plate
Bobbin
A
B
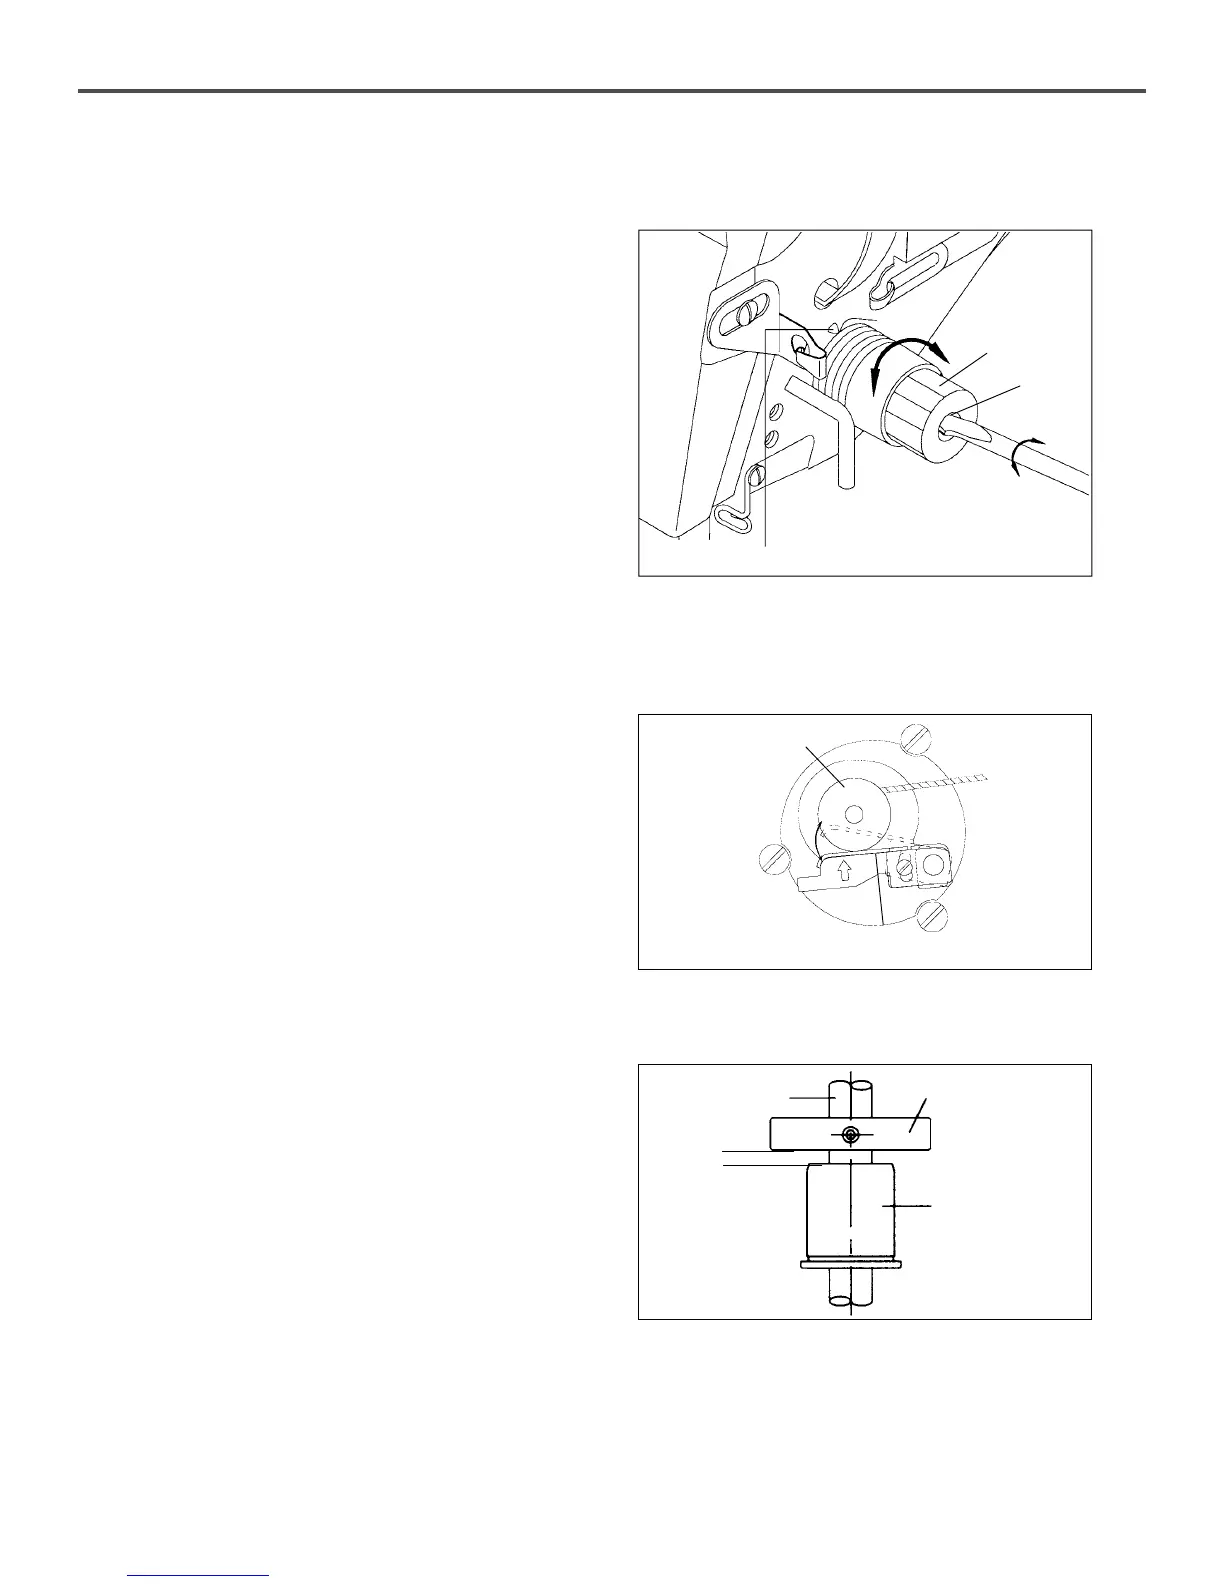
9) Adjustment of the main thread adjustment device
A. To increase tension of the upper thread, turn the nut①
of the thread control device in a clockwise direction,
and turn it counterclockwise to lower the tension.
Adjust the tension depending on various sewing
conditions, e.g., sewing materials, threads, number of
stitches, etc.
B. For controlling tension of the thread take-up lever
spring, use a driver to turn the groove on the edge of
the thread tension control device② clockwise for more
tension on the spring, and counterclockwise for less
tension on the spring. (Normally, it moves 6~8mm and
has tension of 30~50g)
[Figure 77]
①
Thread Take-up Spring
②
 Loading...

