110 Disassembly and Reassembly TP9100 Service Manual
© Tait Electronics Limited May 2005
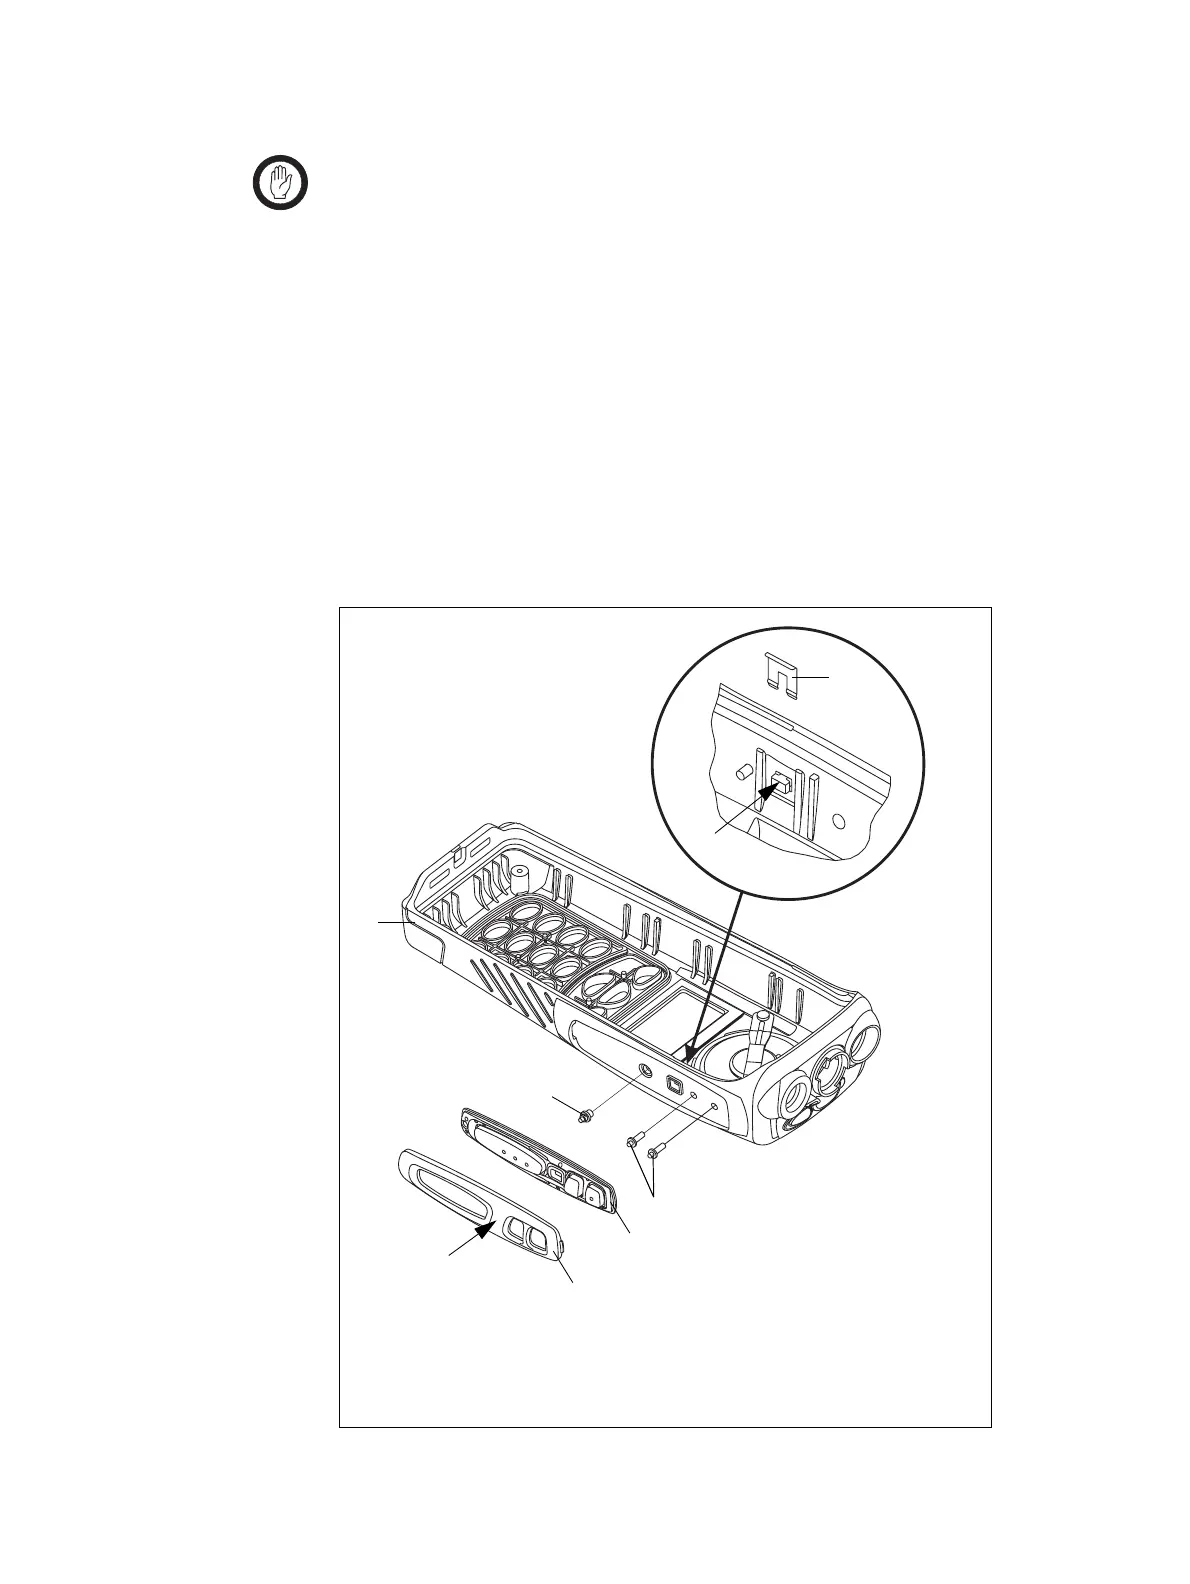
Removing the
PTT Keypad
The circled numbers in this section refer to the items in Figure 5.8.
Important When removing the PTT lock spring
B, care must be
taken to avoid damaging the mating surface for the main
seal inside the front-panel assembly.
1. While pushing on the ridge (
B) between the PTT key and the lower
function key, use pliers to remove the PTT lock spring
B.
2. Place a small screwdriver on the T-shaped protrusion (
C) on the
inside of the PTT frame
E, and push the PTT frame off the front
panel
C.
3. Remove the PTT keypad
D from the PTT frame E.
4. Remove the blue PTT pressel
F and the two red function key
pressels
G.
Figure 5.8 Removing the PTT keypad
B
PTT lock spring
E
PTT keypad
C
front-panel assembly
F
PTT pressel
D
PTT frame
G
function key pressel (x2)
C
B
3655z_01
D
E
G
F
C
B