TP9100 Service Manual Disassembly and Reassembly 123
© Tait Electronics Limited May 2005
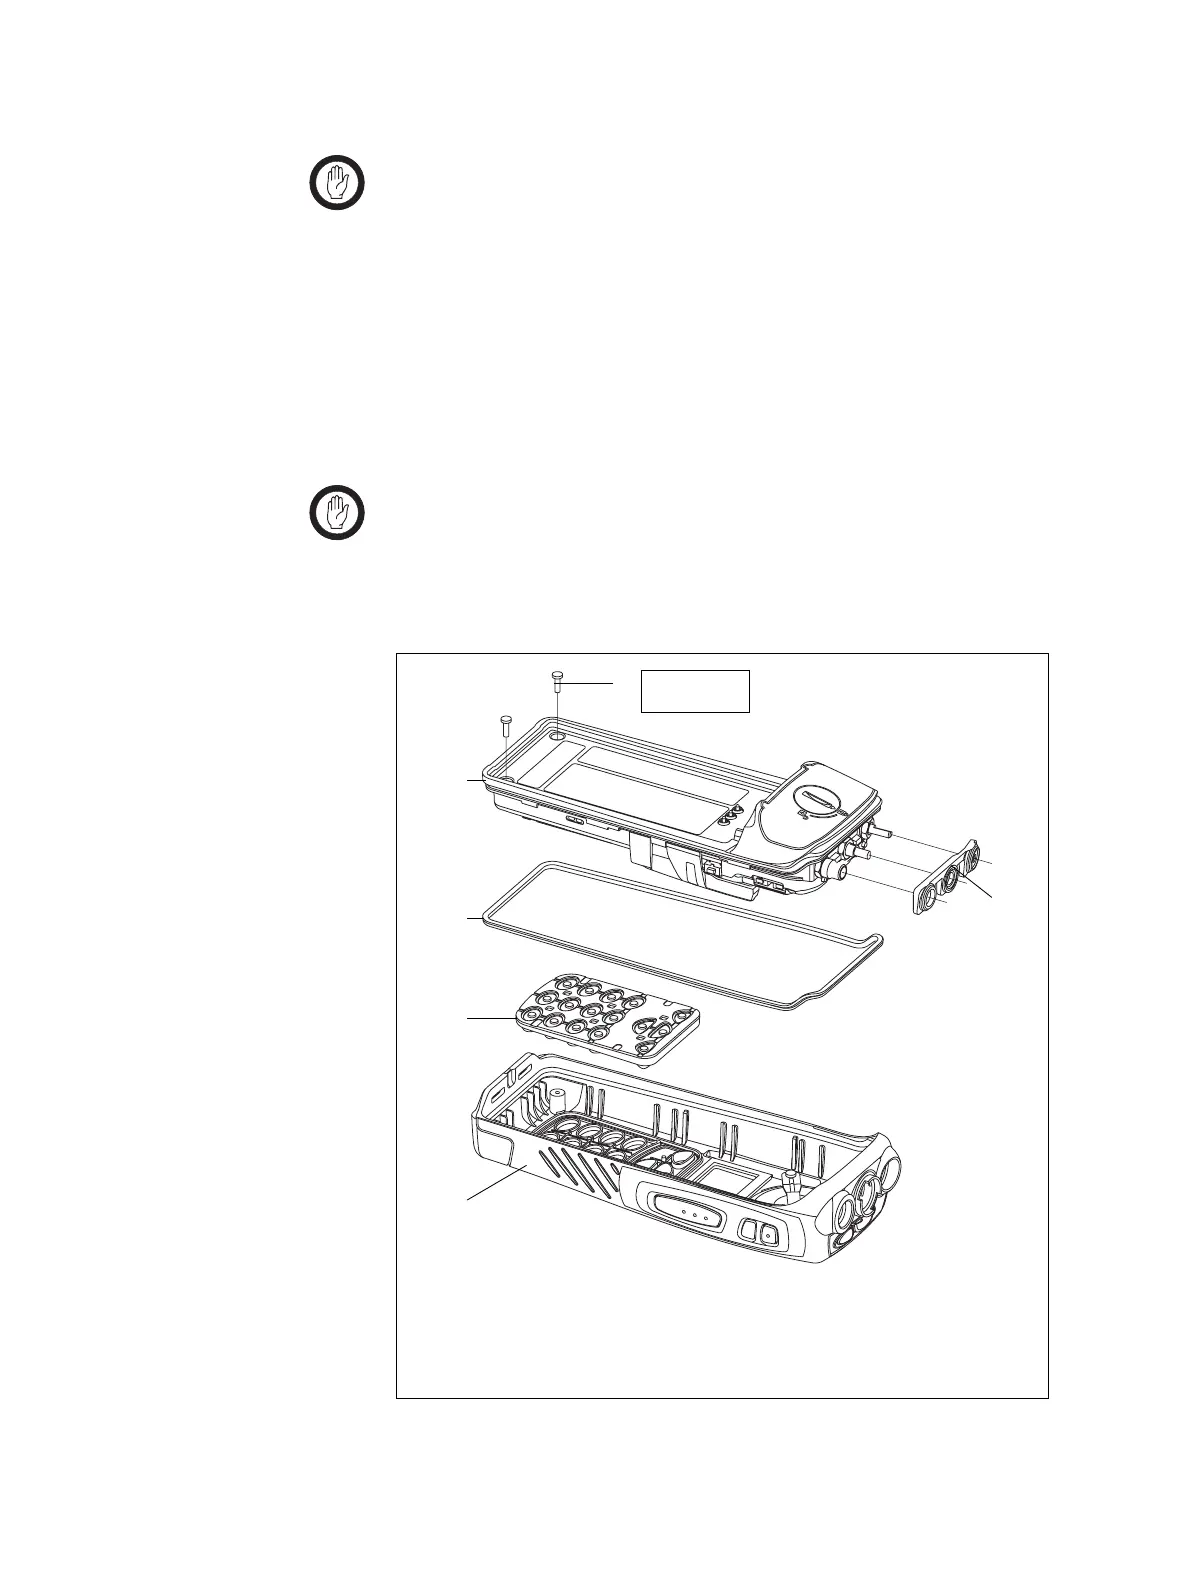
Fitting the Chassis
Assembly to the
Front Panel
The circled numbers in this section refer to the items in Figure 5.16.
Important Do not stretch or twist the main seal.
1. To fit the main seal
E to the chassis assembly C:
a. Place the pre-shaped main seal next to the chassis assembly and
identify the correct orientation, in particular around the bends
near the top corners.
b. Insert the top two corners of the main seal and hold them in place.
c. Insert the bottom two corners of the main seal.
d. Lift the main seal into place around the bends near the top of the
chassis.
Important Do not stretch the main seal by pulling it or rubbing into
place with your fingers.
e. With your fingers, tap the main seal into the groove of the chassis.
Figure 5.16 Fitting the chassis to the front panel
B
Torx T6 screw M2x8 (x2)
E
main seal
C
chassis assembly
F
keypad
D
top seal
G
front-panel assembly
C
B
B
x2
D
C
E
F
G
3652z_01
Torx T6
3lb·in (0.34N·m)

 Loading...


