6. LSServer, Scanner Shell and Download
2004-11 Operating Manual for the LS Series Scanner No. 30001798 Rev. No. 1.5 6-27
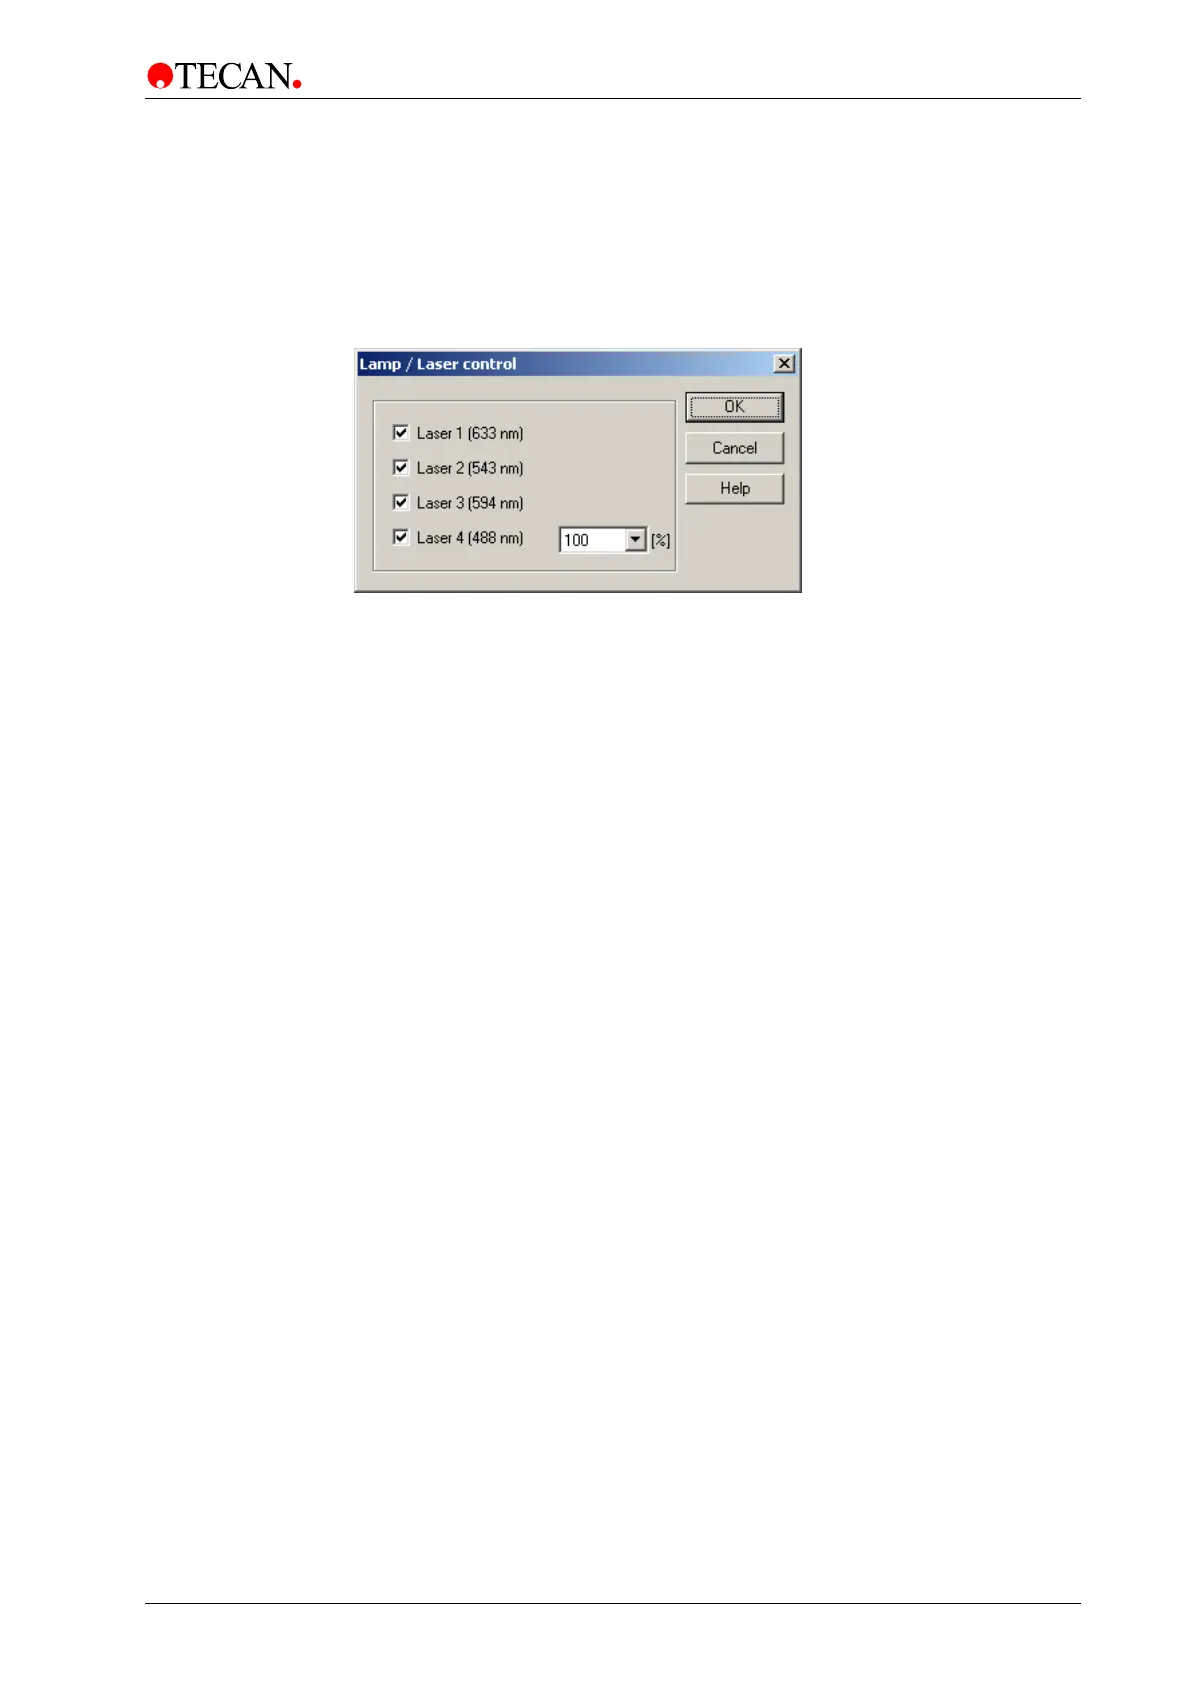
Laser Control
In the Measurement Control dialog box, select Laser Control… and the Lamp /
Laser Control dialog box appears.
All lasers installed in your instrument are shown in the dialog box:
Click OK to save the changes and close the dialog box.
In the Laser Control dialog box specific lasers (1-4) can be activated /
deactivated and laser power can be set (Laser 4).
The Laser Control dialog box contains the following elements:
Laser 1 (633 nm)
check box
Select Laser 1 check box to activate the 633 nm laser.
Red LED is switched on at the rear of the instrument.
Laser 2 (532 nm)
check box
Select Laser 2 check box to activate the 532 nm laser.
Green LED is switched on at the rear of the instrument.
Laser 3
check box
Select Laser 3 check box to activate the 594 nm laser and
the orange LED is switched on at the rear of the
instrument.
Laser 4
check box
Select Laser 4 check box to activate the 488 nm laser and
the blue LED is switched on at the rear of the instrument.
(The blue laser can be power controlled).
OK button Click OK to save the selected options and close the dialog
box.
Cancel button Click the Cancel button to close the dialog box.
The selected options are not saved.
Help button Click the Help button to display the online help for the dialog
box.