18
Tempest900 2-Channel Operating Manual
BeltStation Overview
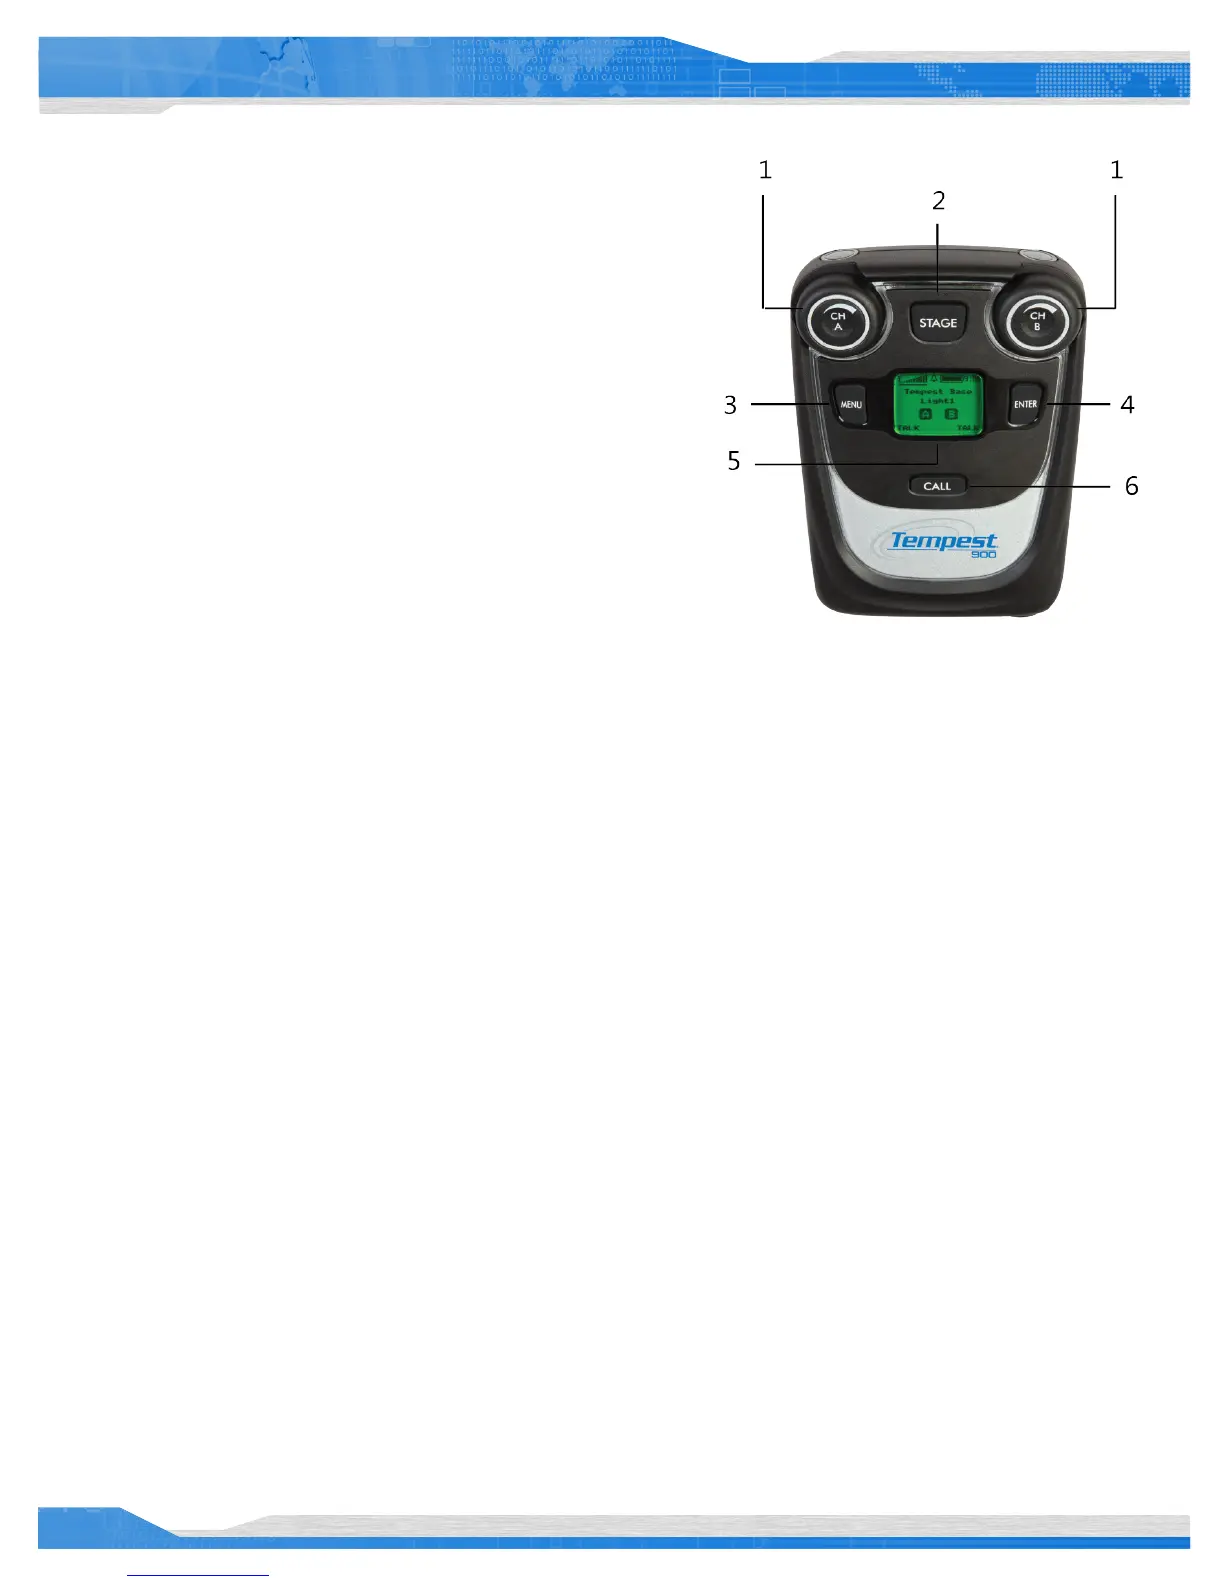
Front
1- Volume- CH A and CH B
In Operational Mode, turning the Volume control adjusts the volume of the audio.
Volume indicators appear on the display during adjustment and are expressed in
Decibels (dB).
The Volume control has an option to be set to “Volume Press” where it requires
a “press and turn” to adjust the volume level. The “Volume Press” option can be
adjusted under the “Set Controls” section of the BeltStation menu.
Pressing the Volume control in “Dual-listen” mode does nothing. In “Single-
listen” mode, pressing “CH A” enables channel A, and pressing “CH B” enables
channel B . The Volume control has a channel “Delay Switch” option which
requires the knob to be pressed and held slightly longer in order to switch from
one channel to the other. This feature can be enabled under the “Set Controls”
section of the BeltStation menu.
In Menu Mode, turning either Volume control allows the user to scroll the options of the current menu screen. Pressing the Volume control
selects the option.
2- Stage Button
The Stage Announce (STAGE) button re-routes the microphone signal of the BeltStation from the selected intercom channel to the BaseStation
rear panel Stage Announce (SA) output connector. If desired, when this button is pressed, a momentary relay contact closure is made at the
Relay connector. See the section on GPO Relays.
Pressing the Stage Announce button automatically enables the microphone, regardless of Talk Button status. The Stage button settings may be
adjusted at the Stage Announce menu screen under the “Set Controls” section of the BeltStation menu.
3- MENU Button
Pressing MENU while the BeltStation is in Operational mode will select Menu Mode, and the Main Menu screen will be displayed. Once in Menu
Mode, pressing MENU again will act as an escape key and will back out of the current menu screen moving the user up one level. Pressing the
MENU button while at the Main Menu screen will exit Menu Mode and return to Operational mode. The menu can be locked via a “Menu Lock”
feature per BeltStation.
4- ENTER Button
The ENTER button operates differently depending on the mode of the BeltStation. In Menu Mode, pressing the ENTER button selects the current
menu option and is the same as pressing a Volume control. A menu item is not selected until the ENTER button (or Volume control) is pressed.
The ENTER button can also activate Wireless ISO (wireless talk around), providing wireless communication isolated from any connected wired
intercom system.
The ENTER button is also one of the buttons that can be assigned to activate a Relay in the BaseStation. It is possible to activate the Relay
whenever the Wireless ISO feature is used.