ACT6000 User Guide – January 2021 Page 33 of 52
11.3. Resistance Measurement (Loop and/or Insulation)
Setup of the true copper resistivity
Knowing the exact length or exact resistive value of a line, by a special procedure it is
possible adjust the copper resistance to increase the lines length accuracy.
From the Main Menu select and enter the Digital Multimeter function, then select item 3.
Resistance/Insulation, then press “Enter”.
By the test-cable connect the line to a – b point of the RTX connector.
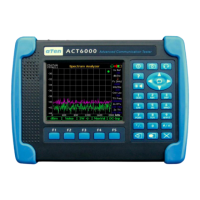
Select by F4 key “R-Set” then press F5 “Start”;
By set the right Line Length or the
right “Resistance”by command and
, then push F5 “Start”.
As suggested on the display, short the end of
this line then press F5 “Start”.
Finished the measurement, remove the short
circuit at the line end and push F5.
With the certainty of the right “Relative Value”,
press again F5 “Start” and then F1 “Save”.
From this moment all the tests related to the
resistance measurement will be always
calibrated with this resistivity value.
To restore the default (factory) standard copper resistance from the Main Menu select
“7. Config & Utility” and push F1 “Default”.
Loop Resistance with line length calculation
From the Main Menu select and enter the Digital Multimeter function, select item
3. Resistance/Insulation, then press “Enter”.
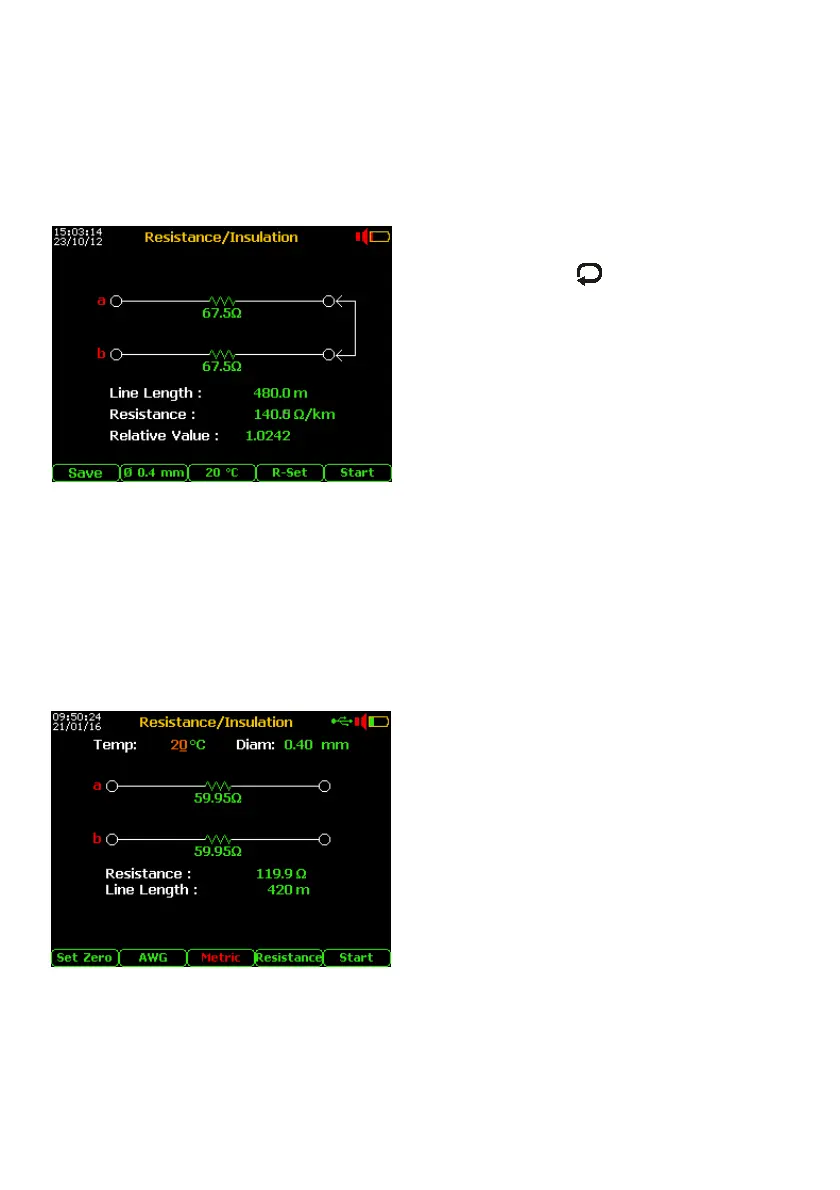
To improve the Resistance test accuracy, short the end of the test-cable (a – b points) and
press F1 “Set Zero”.
By the Cable Setup menu (see page 48)
select the presumed cable under test.
Short the line (a – b) at the opposite side.
By the test cable connect the line to a – b
points of the RTX.
If necessary correct the presumed cable
gauges by F2 key.
By F3 set the presumed temperature of the
cable then press F5 “Start” *
When the loop resistance between a-b is
congruent with typical resistance value of
copper line (under 5 kOhm), an estimation of
the length related to the loop resistance value
per meter is automatically shown.
* if found an extraneous voltage over 2.0 Volt, the test will be blocked !