Chapter 2 – Using the F4T Front Panel
Page 8 TestEquity F4T Controller
Navigating and Understanding the User Interface
Home Screen
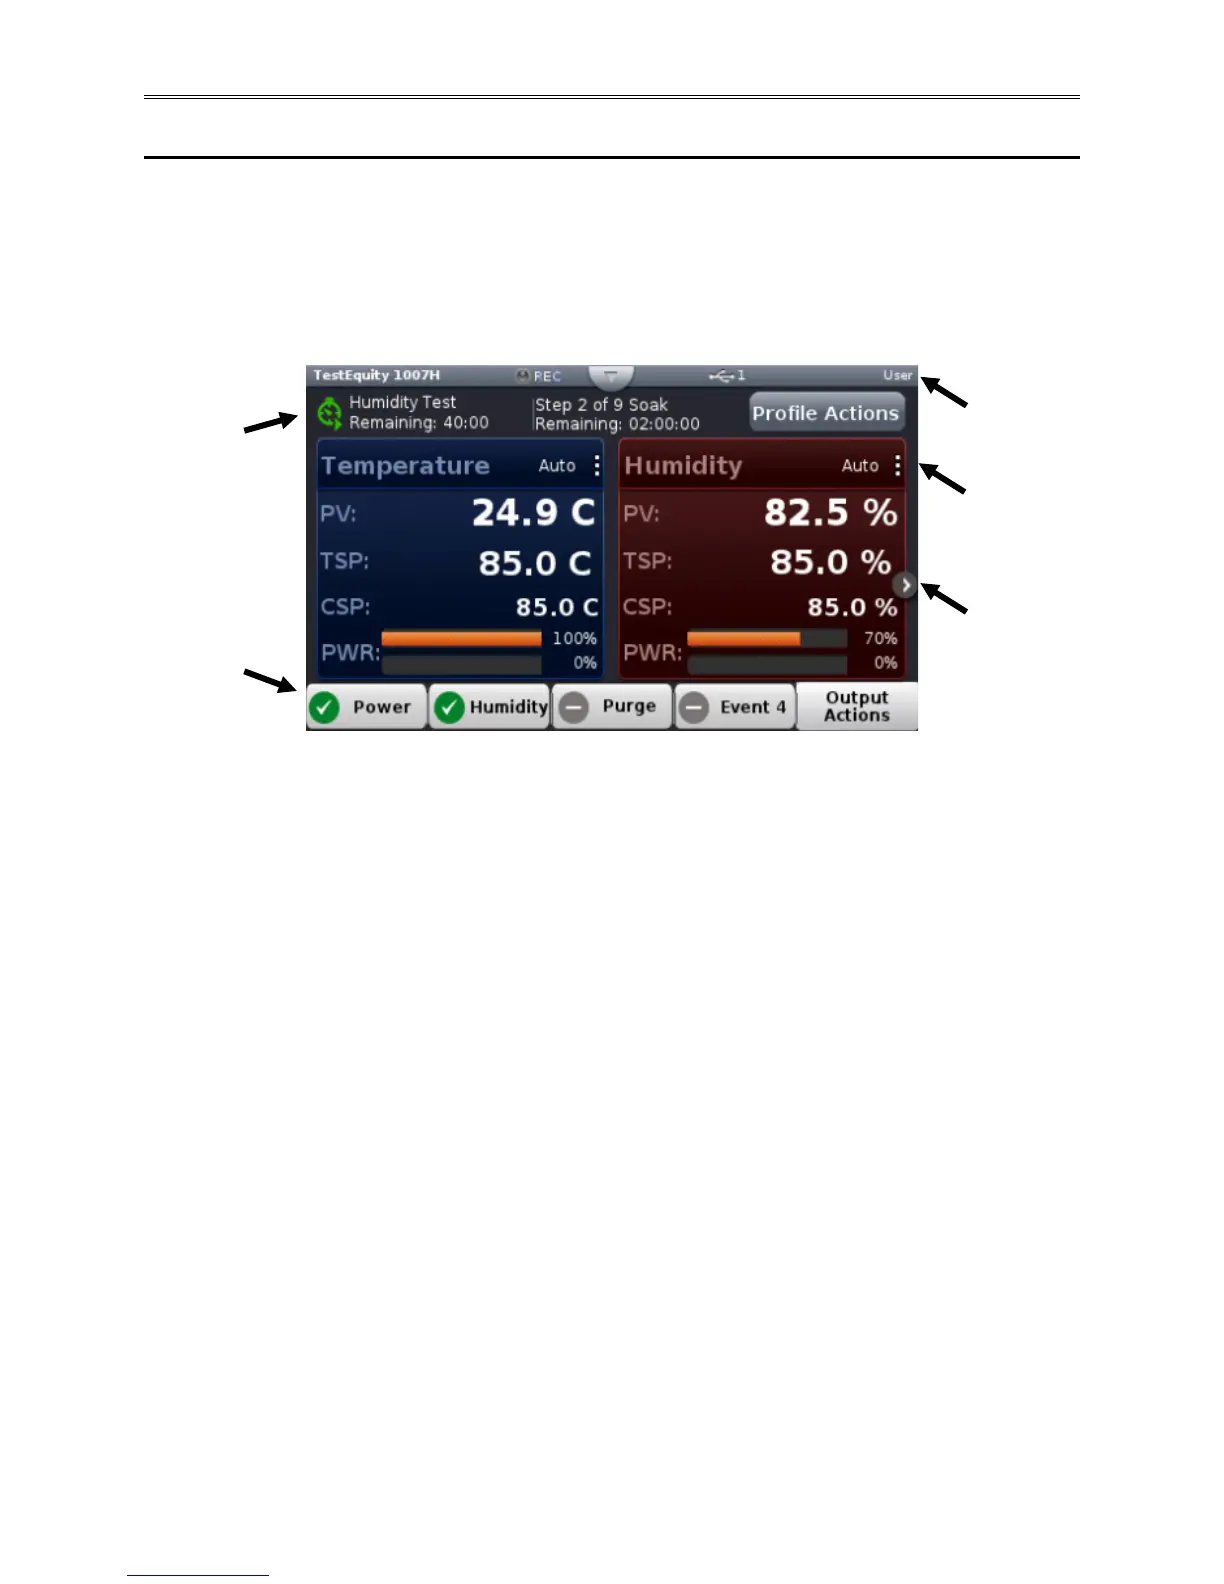
After powering up the controller a white screen will appear first while initializing. Once the
startup process is complete the Home Screen will be presented as shown below. The image
below shows a configured Home screen for a TestEquity Temperature/Humidity Chamber while
it is running a profile.
① Controller Status: Indicates alarms and errors if they occur while also showing the current
security level if enabled (see “Security” section). Also indicates if Data Logging is enabled
and if a USB thumb drive is plugged into the USB host port. The button shown in the center
of the status bar allows you to view alarm and error messages when pressed.
② Profile Status Bar: Provides visibility and information pertaining to running profiles as well
as access to available profile actions (see “Creating and Editing Profiles” section).
③ Vertical Ellipsis: Displays current control mode while also providing access to other
operational parameters such as the Closed Loop Set Point, Autotune, PID Settings, and more
(see “Changing Loop Operational Parameters” section).
④ Next Page: If the controller has more than one control loop (like temperature and humidity)
and the Home screen has been setup to display multiple pages (loops), the left and right
arrows on each side of the home screen provides navigation from one to the other (see
“Personalizing the Home Screen” section).
⑤ Output Widget Bar: Function keys or output status (ON/OFF).
4. Next Page
(if configured)