Chapter 5 – Event Board Option TE-0033
TestEquity F4T Controller Page 53
Chapter 5 – Event Board Option TE-0033
Introduction
The F4T Controller has several uncommitted outputs which can be used to turn remote devices
on and off. Option TE-0033 provides four Solid State Relays that are controlled by Event
Outputs in the F4T Controller.
Connections
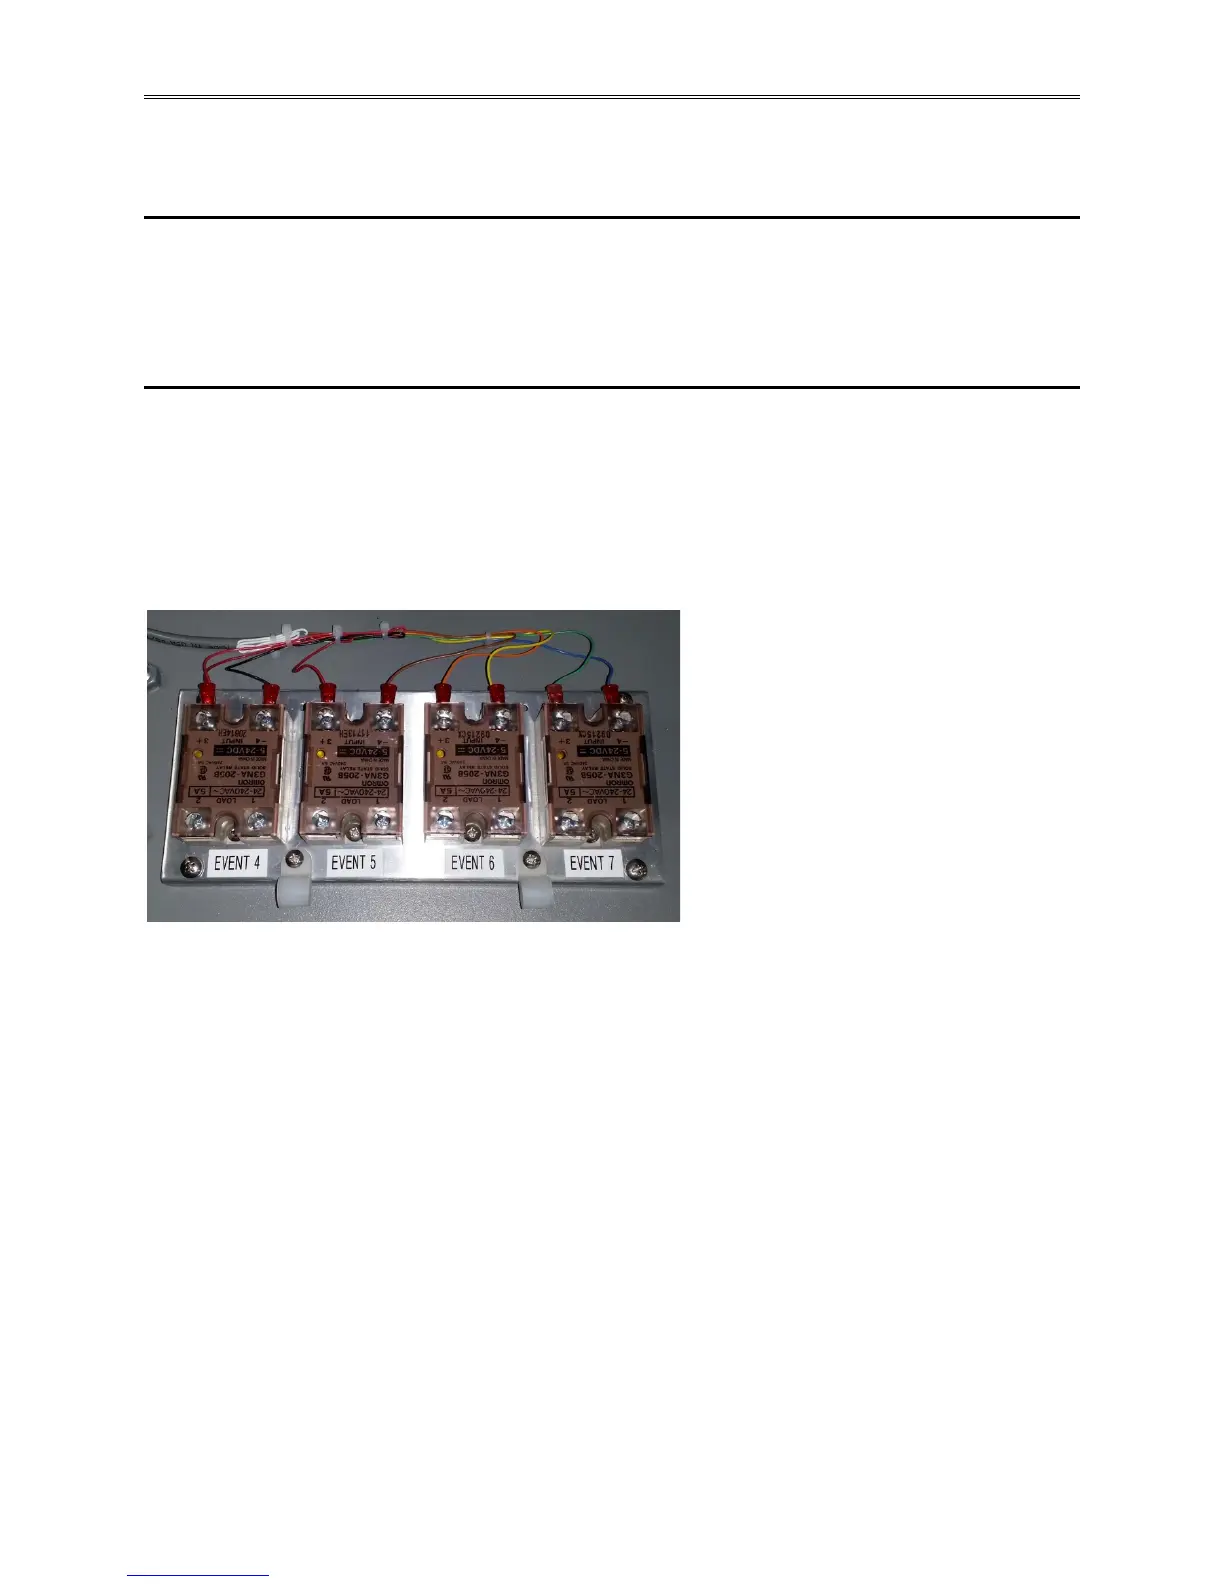
The Event Board has four Solid State Relays which have TRIAC outputs that are rated for
24 VAC to 240 VAC at 5 Amps each. These Solid State Relays are just switches; they do not
provide a voltage output by themselves. You must provide power from an external source.
The image below shows an Event Board in a 1000 Series Chamber. Connections are made
directly to the Solid State Relay’s AC Load terminals.
Connecting to the Event Board (for 1000 Series Chambers)
1. Turn the Main Disconnect Switch (big knob on the front panel) to the OFF position.
2. Remove the lower door retaining screw located on the right side. Open the lower door.
3. 1007 Series: The Event Board is located on the bottom of the chamber frame, towards the
left side.
1016, 1027 Series: The Event Board is located to the left of the electrical subpanel.
4. A 1/2-inch conduit hole is provided on the left side of the lower door to route your wires
through. Use the appropriate wire/cable management fittings.
5. The Main Disconnect Switch AND selector knob must both be in the off position before
closing the door. Failure to do this will damage both switch and the selector knob.
Connecting to the Event Board (for Models 140 and 115A)
1. Unplug the chamber from the wall socket.
2. Remove the top cover (two top covers on the Model 140).
3. A 1/2-inch conduit hole is provided on the rear panel to route your wires through. Use the
appropriate wire/cable management fittings.
4. Replace the top cover(s) before plugging the chamber back into the wall socket.