1-17
CONTROL VALVE 1.3
C2380
C2381
C2382
C2383
Disassembly Repair (cont’d)
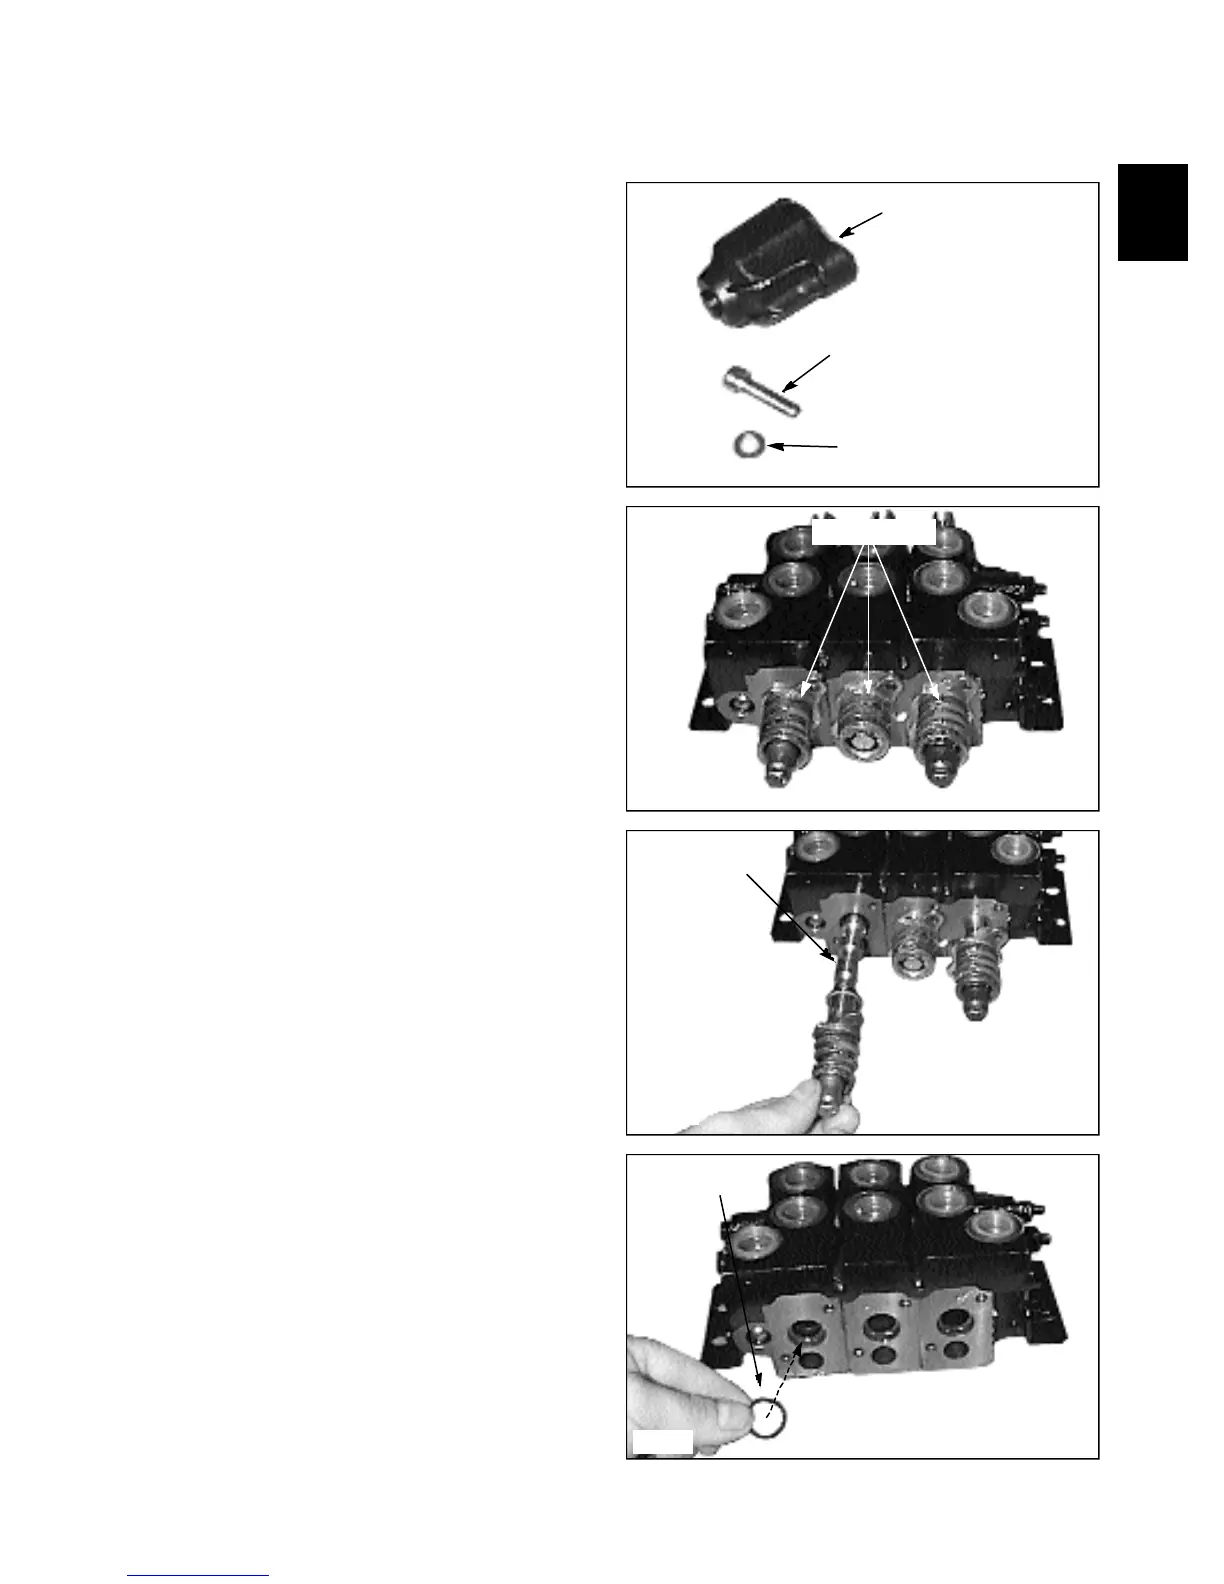
13 Note: The plastic cap over the tilt spring has flat
washers to distribute the load of the mounting screws to
prevent cap damage. (fig. C2380). Be sure to install the
flat washers when reassembling to the control valve.
15 Remove the section spools noting their location to
the appropriate bores. (fig. C2382). Do not replace the
spools in any other spool bores than the one it came out
of. Clean the spools and valve sections with solvent and
inspect for gouging or chipping. Replace sections as
required. Minor scratches on the spool may be removed
with fine emery cloth. Be sure to remove all solvent from
the control valve body if no further disassembling of the
control valve is to be performed.
16 Install new O-ring seals at time of assembly. (fig.
C2383) Lubricate the seal, bore and spool with system oil
when reassembling the components.
14 Figure C2381 shows spring assemblies and detent
mechanisms as viewed with the caps removed.
Tilt spring return cap
Mounting screws
Flat washers
Return springs
Remove spools
Spool O-ring