STEP 5
• If mount is not attached to the interferometer:
o Make sure the locking lever is in the unlocked
position by pushing the lever up. (Picture A)
o Use compressed air to blow dirt/dust off the
surface of the mount area. (DO NOT use
compressed air when the mount is attached
to the microscope.)
o Place the mount onto the interferometer so
the groove on the bottom of the mount rests
on the locating pin on the left and the cutout
rests on the pin on the right.
• Secure the mount into place using the two
thumb screws.
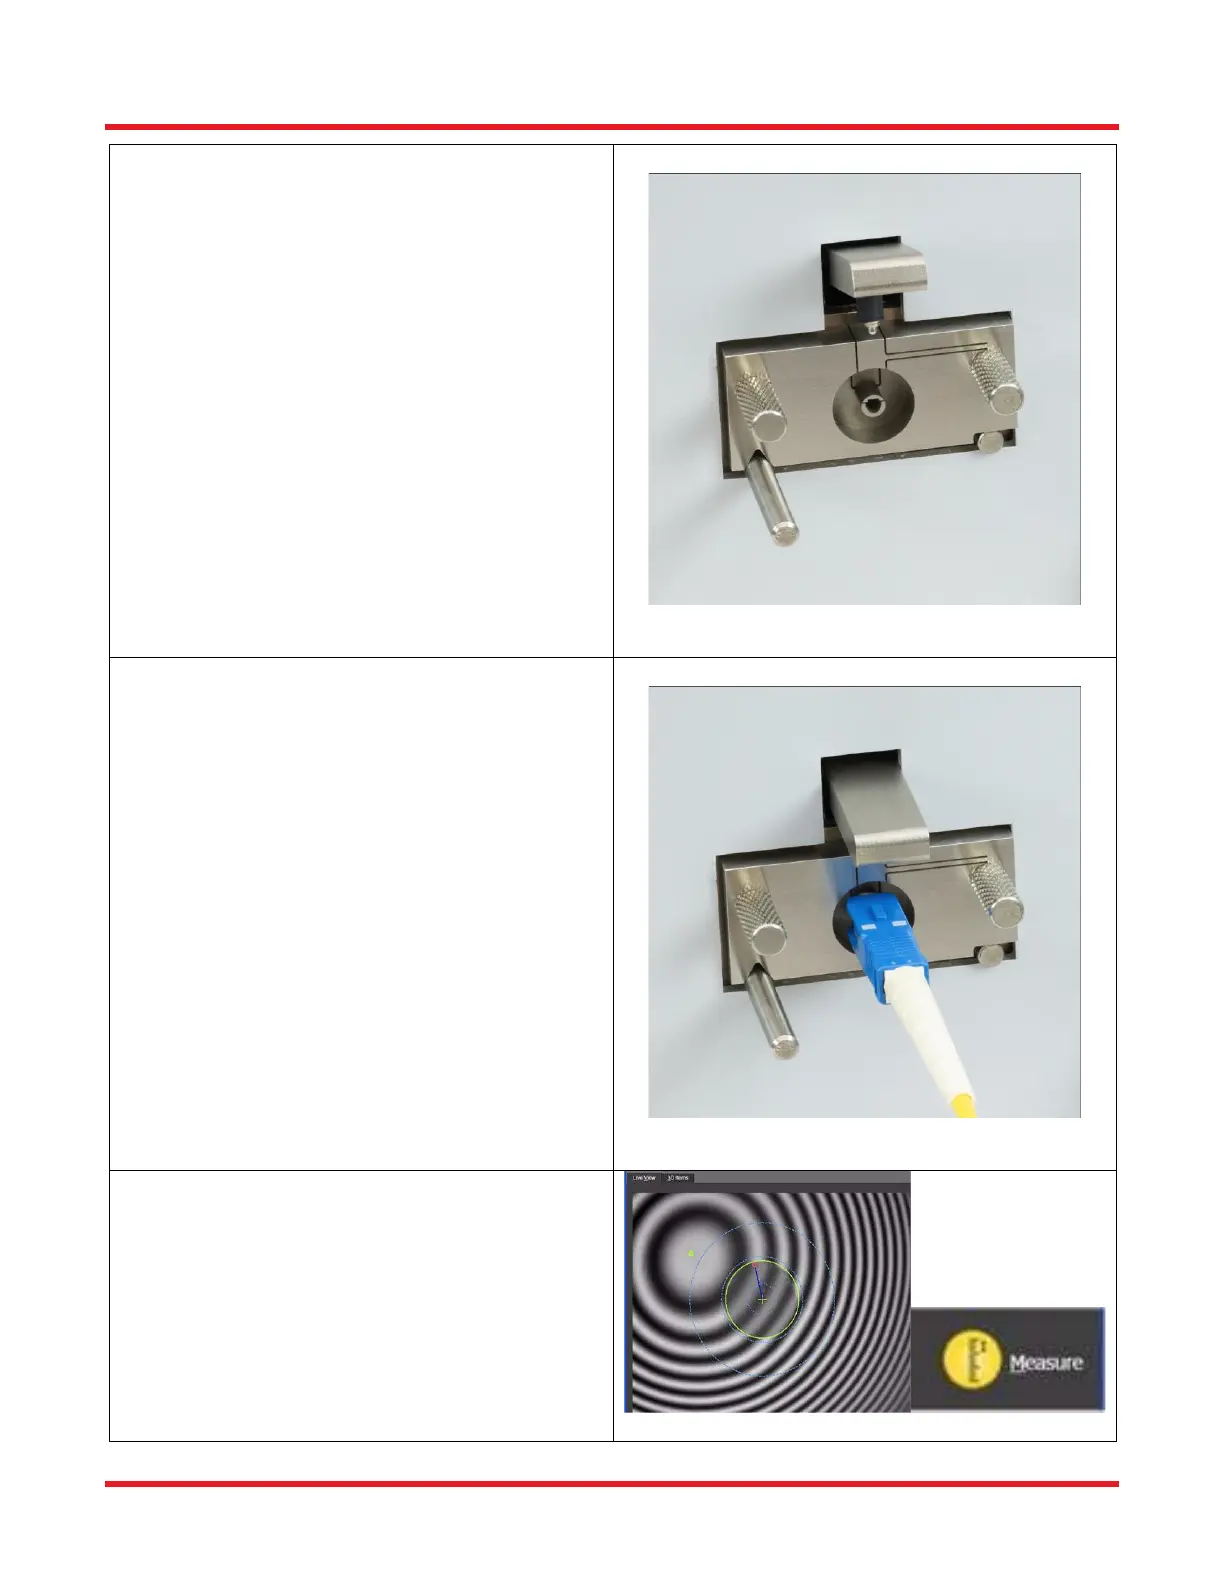
STEP 6
• Make sure the mount is in the unlocked position
by pushing the locking lever up.
• Clean the connector.
• Insert the connector into the mount until it is fully
inserted.
• Lock the connector into place by pushing the
locking lever down.
STEP 7
• Adjust the focus knob to maximize the fringe
pattern (i.e. greatest contrast between black and
white fringes).
• Click the "Measure” button.
• Make sure not to cause any vibrations.