Document Ref 941113-001 Rev 2 Page 5-15
Quantium 310 Maintenance Manual Maintenance Procedures - Electronics
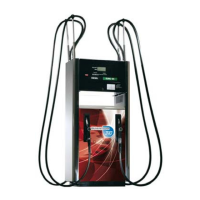
5.8 Replacing the Calculator Door Plexi Glass & Seal
Before starting the maintenance procedure, please refer to section 2.
Ensure the dispenser is isolated and all power is turned off.
The calculator doors are accessed from either side of the calculator head (see section 2.3
for the identification of the dispenser sides).
Tools required
•Replacement Plexi Glass or Seal (refer to the Parts Manual for exact part identification)
•Replacement W&M seals
•Wirecutters
•7mm nut runner
Description of Parts
INSTRUCTIONS
1) Follow the instructions given in section 2.5 to gain access to the calculator head on the
relevant side of the dispenser.
2) Where fitted, use the wirecutters to cut the W&M seals on
the EMT security bracket.
3) Where fitted, use a 7mm nut runner to loosen and remove the
four sealing nuts and washers securing the EMT security
bracket to the display bracket.
4) Where fitted, remove the EMT security bracket completely
and place in a safe position.
5) Use a 7mm nut runner to remove the calculator door earth
cable from the display bracket.
6) Use a 7mm nut runner to loosen and remove eight nuts on the
display bracket to release the display bracket from the
calculator door.
WARNING : KEEP HOLD OF DISPLAY BRACKET
AND GLASS WHILST REMOVING THE NUTS AS
THE GLASS IS NOT ATTACHED AND WILL FALL.
RUBBER SEAL
SCREEN-PRINTED
GLASS/PLEXI GLASS
CSD/EMT
BRACKET