3-4
3.3 Adjustment and Setting
3.3.1 Main power on and screen adjustment
Confirm the following items before turning the power on.
xx
xx
x
Make sure the battery is sufficiently charged. If not, con-
nect the AC adapter for power supply. (With battery opera-
tion and 3 minutes of non operating time, the unit goes
into Auto Power off mode and measured data will be lost)
xx
xx
x Make sure the Probe has been connected.
xx
xx
x Make sure the tip of the Probe is dry.
Tilt the LCD screen on the proper position in order to get bet-
ter view from the front
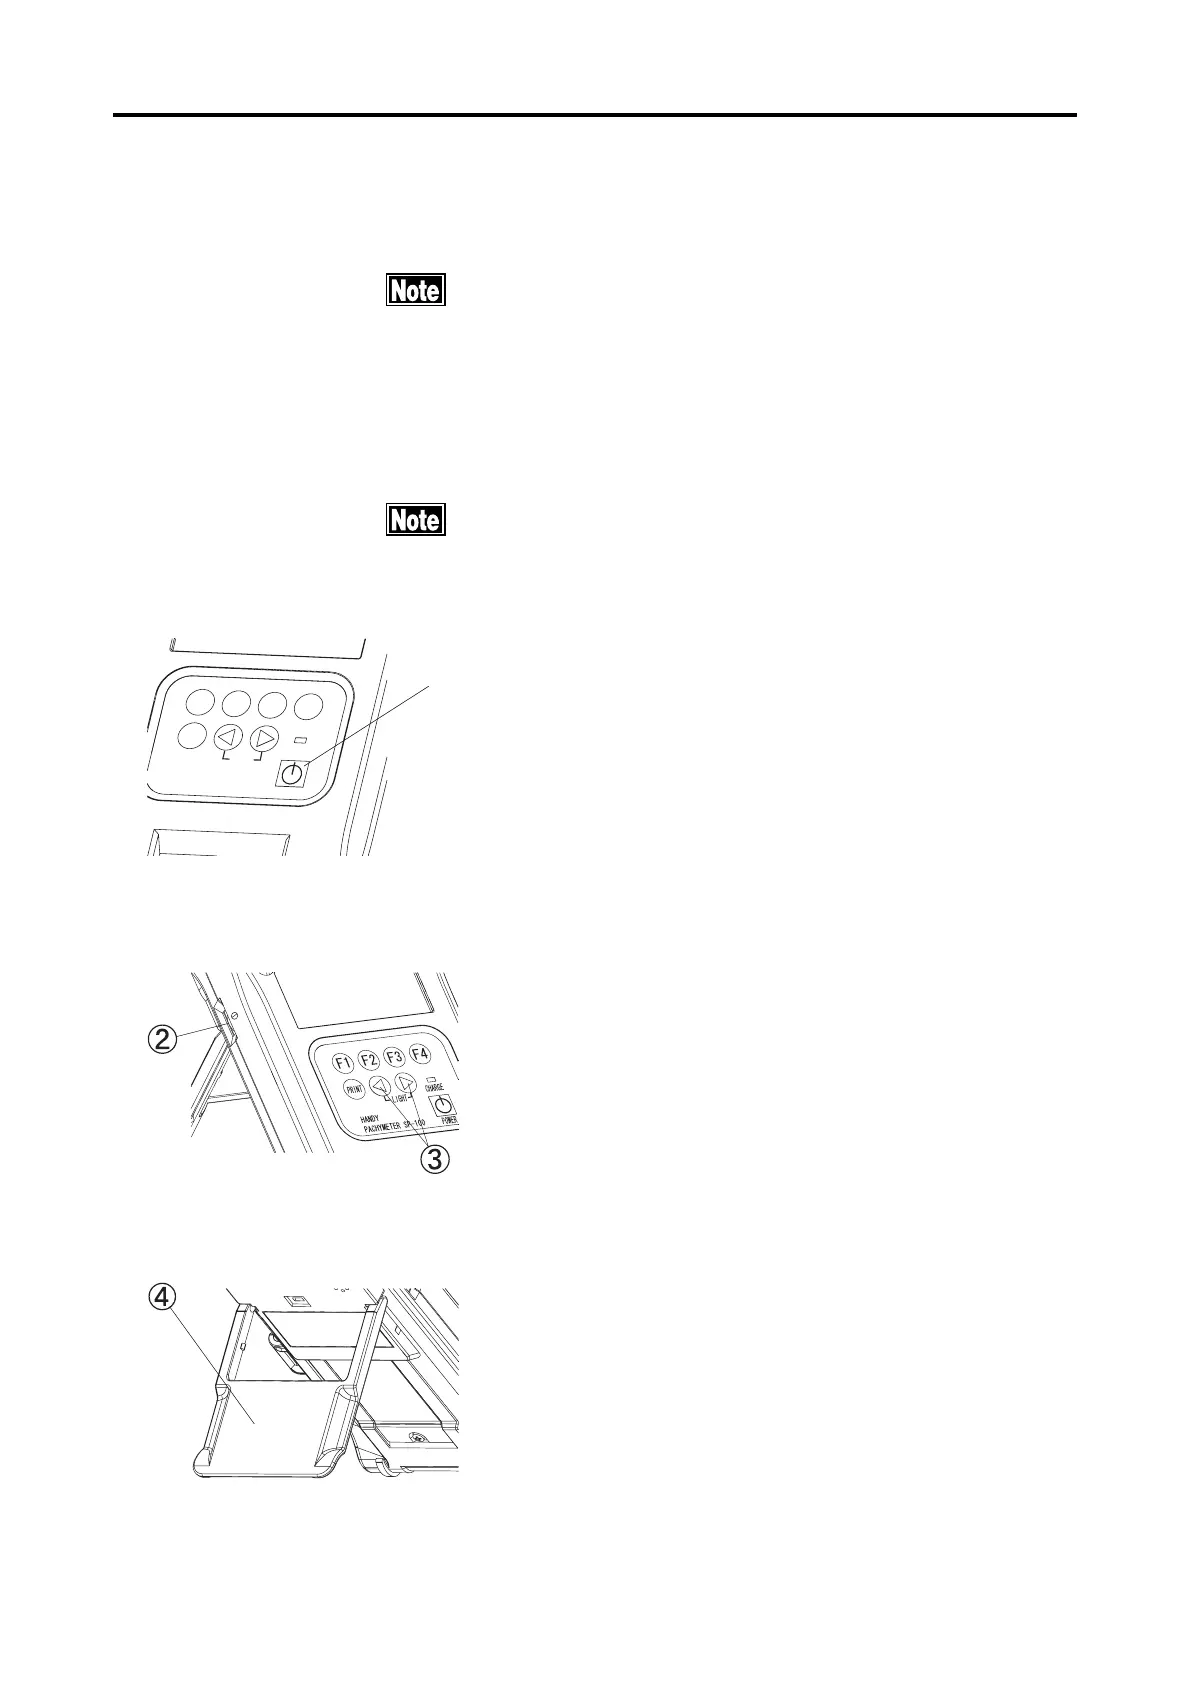
1) Press the power key A to start operation. The
instrument will automatically calibrate the con-
nected Probe. If "PROBE ERROR!" is displayed
on the screen, check if the tip of the Probe is dry.
(Refer to [3.3.2 Startup Display] for details)
2) Adjust the LCD contrast, according to the
brightness of the clinical room by using con-
trast adjusting dial B on the left side of the
unit.
When the room is dark, press the "W " and "X"
keys C simultaneously to turn the lighting LED
on.
3) Adjust Instrument Stand D on back of the unit to
tilt it to get better screen view.
Ԙ
(
(
(
(
24+06
.+)*6
219'4
%*#4)'
*#0&;
2#%*;/'6'452
3.3 Adjustment and Setting
(Fig. 1)
(Fig. 2)
(Fig. 3)

 Loading...