7. SETTING UP THE INSTRUMENT
36
4. Adjust the levelling foot screws to center the
survey point in the optical plummet reticle.
5. Continue to the levelling procedure.
C"7.2 Levelling"
PROCEDURE
1. Perform the centering procedure.
C"7.1 Centering"
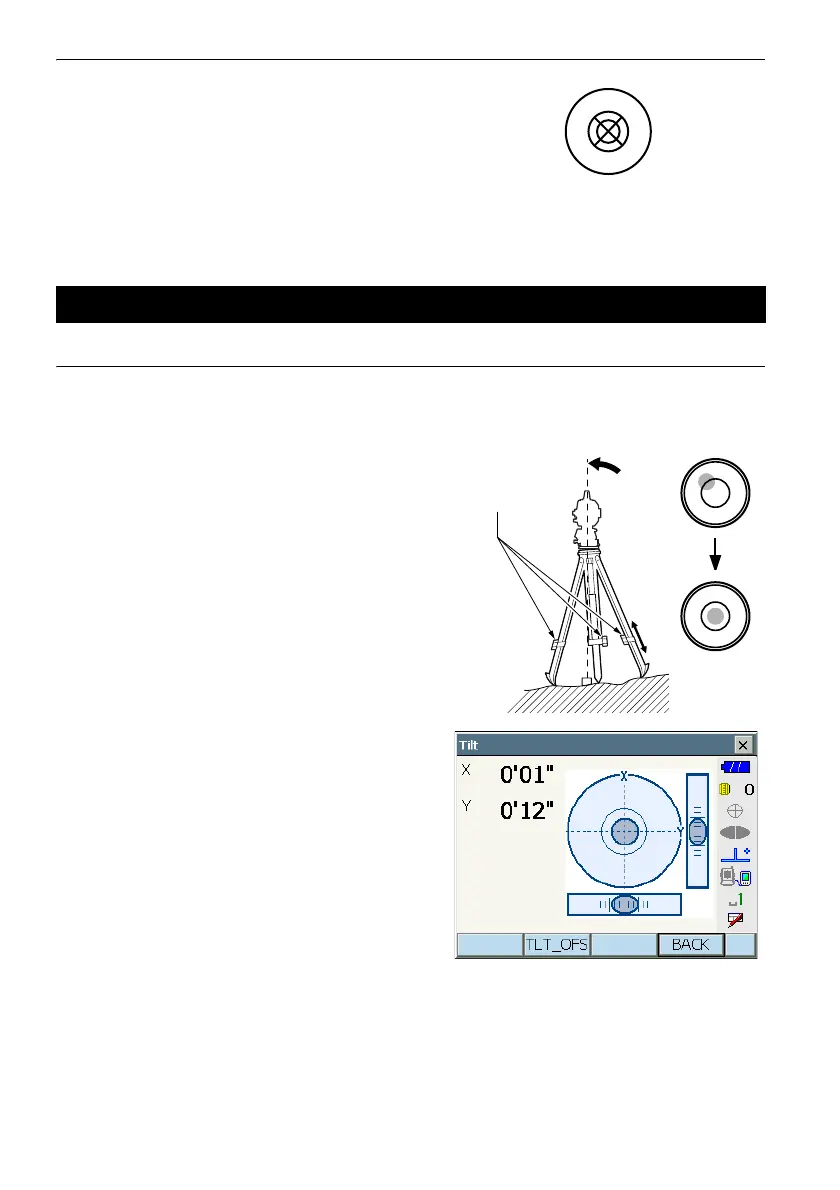
2. Center the bubble in the circular level by either
shortening the tripod leg closest to the offcenter
direction of the bubble or by lengthening the tripod
leg farthest from the offcenter direction of the
bubble. Adjust one more tripod leg to center the
bubble.
Turn the levelling foot screws while checking the
circular level until the bubble is centered in the
center circle.
3. Power ON the instrument.
C"8. POWER ON/OFF"
The electric circular level is displayed on the <Tilt>.
“z” indicates the bubble in circular level. The range
of the inside circle is ±1.5' and the range of the
outside circle is ±6'.
4. Center “z” in the circular level.
When the bubble is in the center, proceed to step
7.
7.2 Levelling
 Loading...