22. CHECKS AND ADJUSTMENTS
154
G
• Be careful that the tightening tension is identical for all the adjusting screws.
• Also, do not over-tighten the adjusting screws as this may damage the circular level.
PROCEDURE Checking
1. Carefully level the instrument and center a survey
point precisely in the reticle of the optical
plummet.
2. Turn the upper part through 180° and check the
position of the survey point in the reticle.
If the surveying point is still centered, no
adjustment is necessary.
If the survey point is no longer centered in the
optical plummet, perform the following adjustment.
PROCEDURE Adjustment
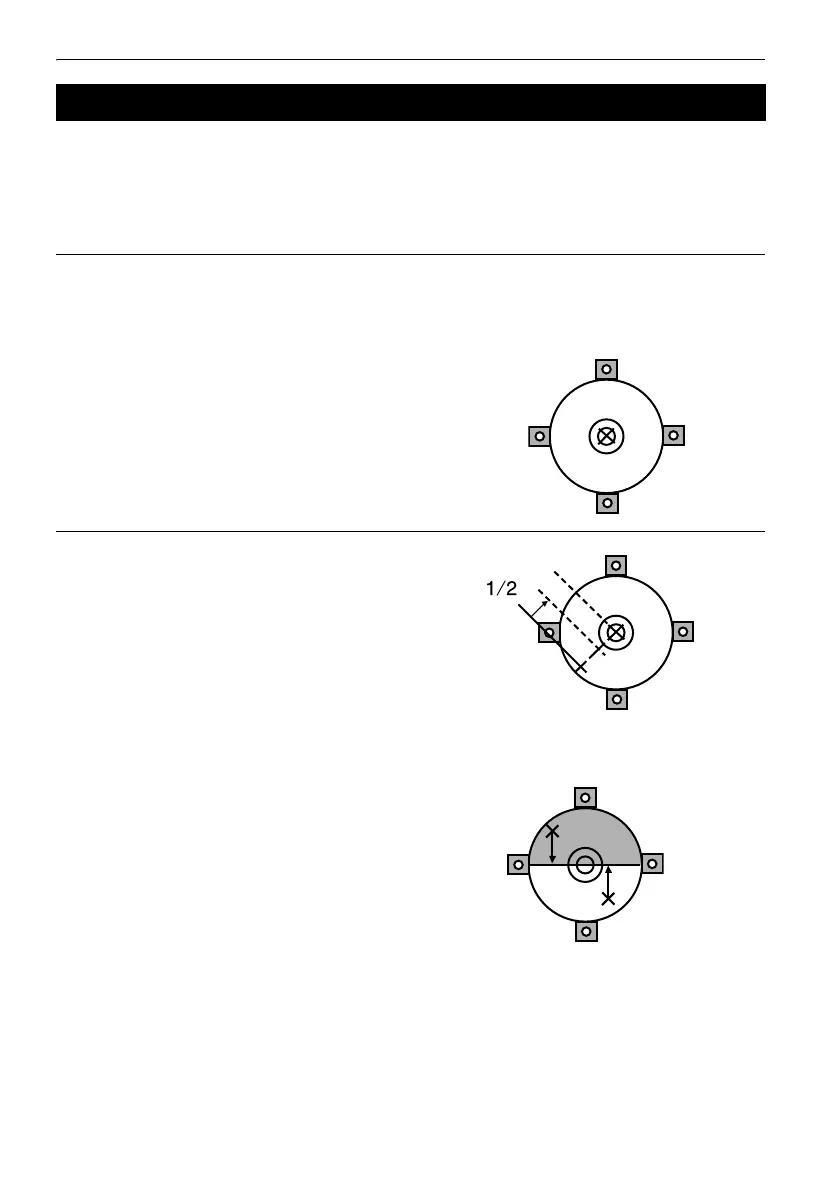
3. Correct half the deviation with the levelling foot
screw.
4. Remove the optical plummet reticle cover.
5. Use the 4 adjusting screws of the optical plummet
to adjust the remaining half of the deviation as
shown below.
When the survey point is on the lower (upper) part
of the illustration:
Loosen the upper (lower) adjusting screw slightly,
and tighten the upper (lower) adjusting screw the
same amount to move the survey point to a point
directly under the center of the optical plummet.
(It will move to the line in the figure on the right.)
22.6 Optical Plummet
 Loading...