20
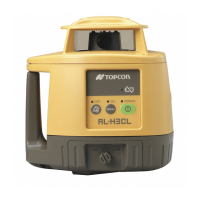
6. BASIC OPERATION
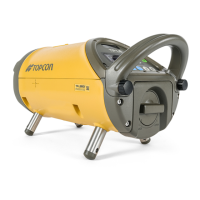
1. Always position the instrument so the bubble in the digital level vial is centered.
• The laser might move from side to side in order to adjust the position of laser beam after the instrument is
turned ON (See WAIT display on p.15). The instrument is not operable during this adjusting process (for
about 30 seconds).
The instrument has a self-leveling range of ±10%. To assure proper self-leveling the instrument must be
positioned to within 10% of the grade entered.
• A warning indication will appear depending on the instrument's installed condition.
"Warning indications" (p.15)
• For the details of Self-centering Feet to be used, "Self-centering Feet" (p.42)
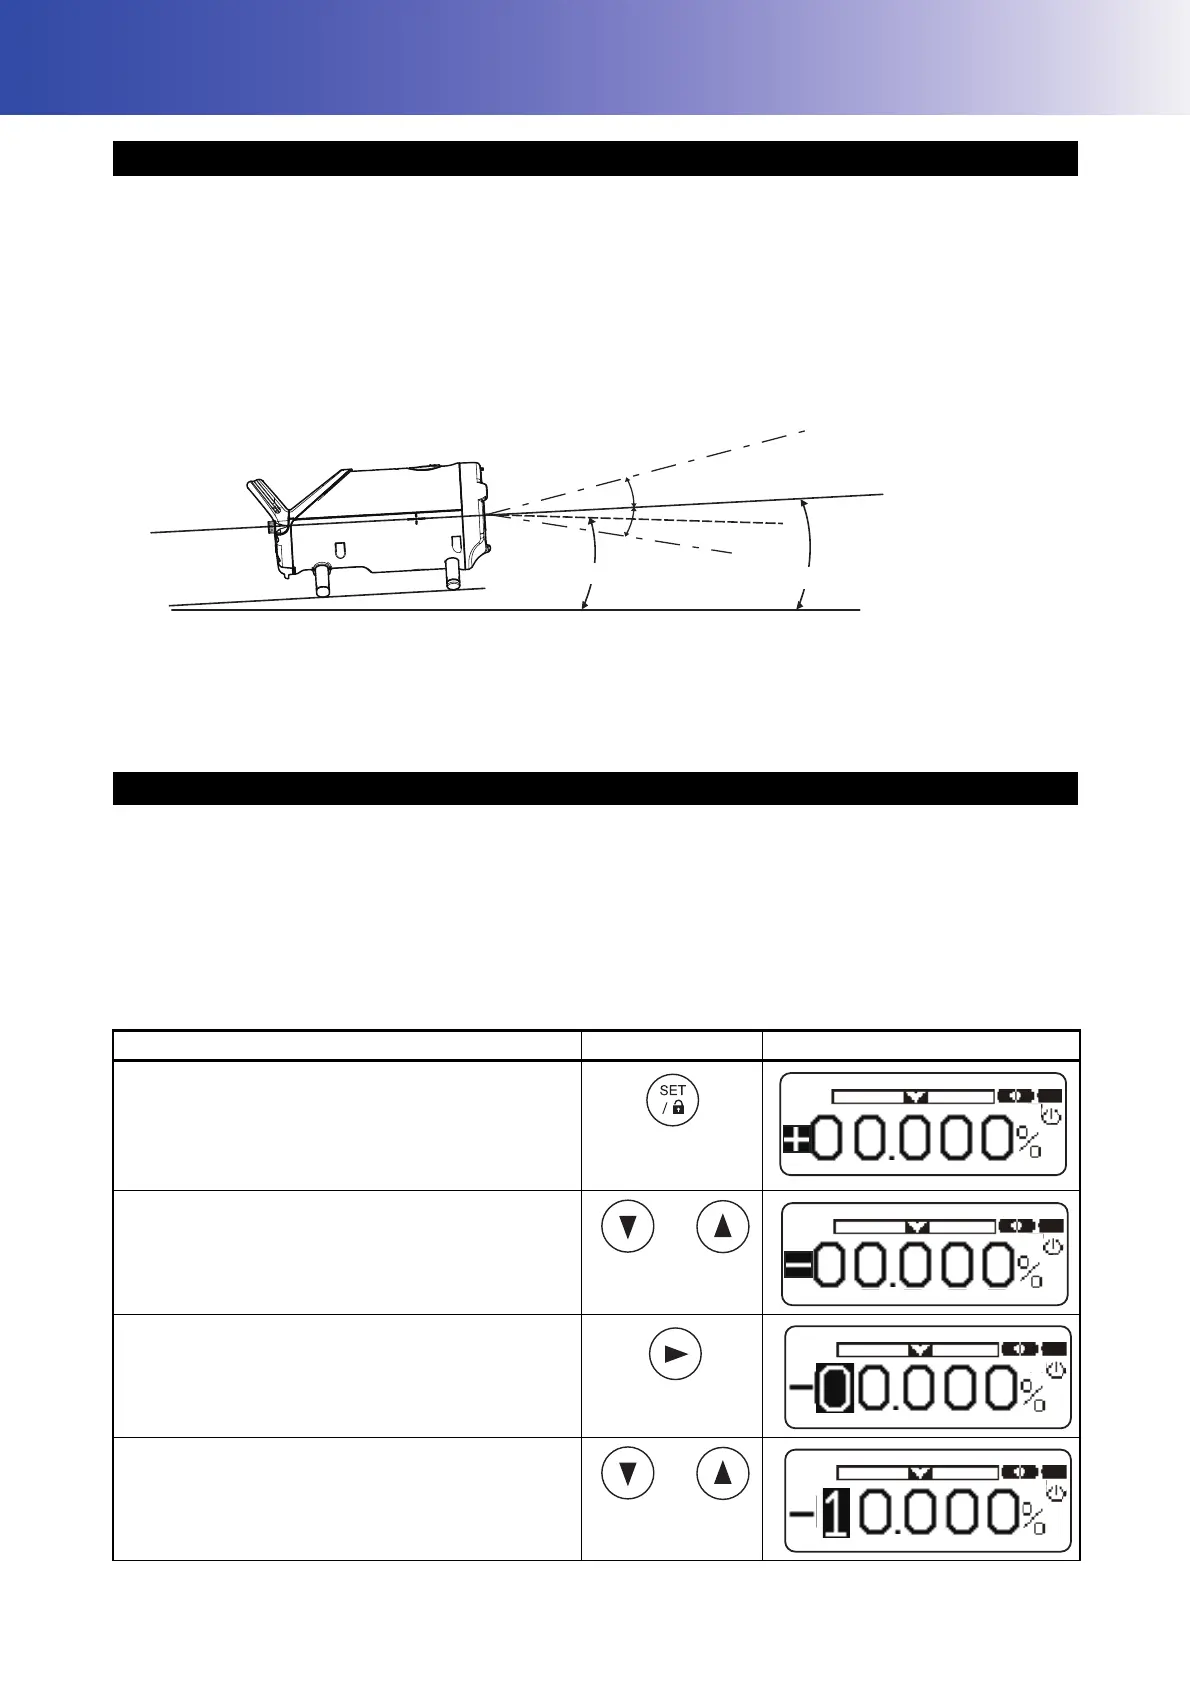
Direct entry of grade value
(Example) Setting grade of -12.345% (Format ± AB.CDE%)
• Input range: -15.000 to 40.000% (-150.00 to 400.00‰)
• Setting grade is not possible when the instrument is locked.
6.1 Setting up the Instrument
6.2 Grade setting procedure
Procedure Key operation Display
1. Press [Set/Lock] key.
The previous data will be shown, and ± mark is
highlighted.
2. Press [Down] or [Up] key to change the sign
to -.
3. Press [Right] key to shift to digit A.
Disit A is highlighted.
4. Press [Down] or [Up] key to change value to
"1".
+10% (+100‰)
Inclination of the instrument
Setting grade
-10% (-100‰)
 Loading...