EngineMaintenance
EngineSafety
Shutofftheenginebeforecheckingtheoiloraddingoilto
thecrankcase.
Air-CleanerMaintenance
Checktheair-cleanerbodyfordamagethatcouldcauseanair
leakandreplaceitifitisdamaged.Checktheentireintake
systemforleaks,damage,orloosehoseclamps.Also,inspect
therubberintake-hoseconnectionsattheaircleanerand
turbochargertoensurethattheconnectionsarecomplete.
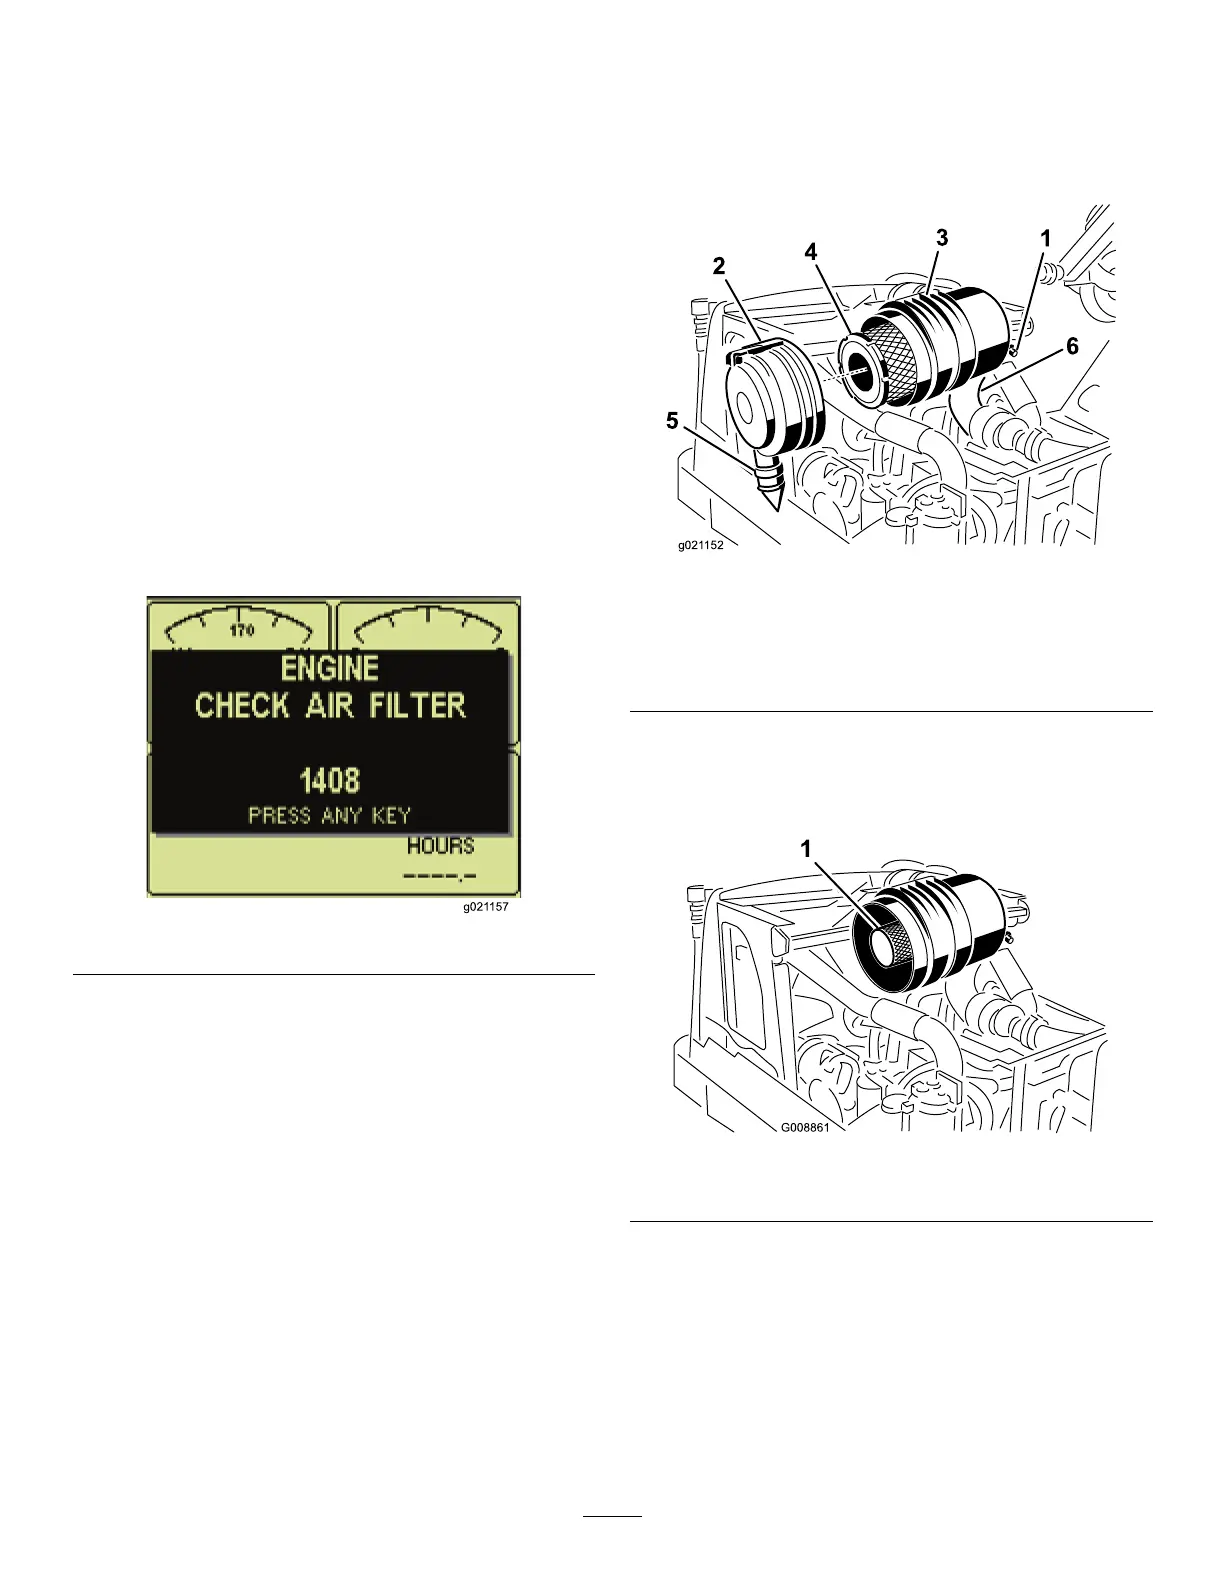
Servicetheair-cleanerlteronlywhenthe“CheckAirFilter”
messageisdisplayedontheInfoCenter(Figure56).Changing
theairlterbeforeitisnecessaryonlyincreasesthechanceof
dirtenteringtheenginewhenyouremovethelter.
Ensurethatthecoverisseatedcorrectlyandsealswiththe
air-cleanerbody.
Figure56
ServicingtheAir-CleanerCover
ServiceInterval:Every50hours—Removeaircleanercover
andcleanoutdebrisDonotremovelter.
1.Pullthelatchoutwardandrotatetheair-cleanercover
counterclockwise(Figure57).
2.Removethecoverfromtheair-cleanerbody.
3.Cleananydebrisfromthecoverandinstallthecover.
Donotremovetheairlters
ServicingtheAir-CleanerFilter
1.Beforeremovingthelter,uselowpressureair275kPa
(40psi,cleananddry)toremovelargeaccumulations
ofdebrispackedbetweenoutsideofprimarylterand
thecanister.
Note:Avoidusinghigh-pressureair,whichcould
forcedirtthroughthelterintotheintaketract.This
cleaningprocesspreventsdebrisfrommigratinginto
theintakewhenyouremovetheprimarylter.
2.Removetheprimarylter(Figure57).
Note:Donotcleanausedelementduetothe
possibilityofdamagetotheltermedia.
Figure57
1.Air-cleanerrestriction
sendingunit
4.Air-cleanerprimarylter
2.Air-cleanerlatch5.Rubberoutletvalve
3.Air-cleanerbody6.Rubberintakehose
Important:
Do not
removethesafetylter.Never
attempttocleanthesafetylter(Figure58).
Replacethesafetylterwithanewoneafterevery
3primarylterservices.
Figure58
1.Safetylter
3.Inspectthenewlterforshippingdamage,checking
thesealingendofthelterandthebody.
Important:Donotuseadamagedelement.
4.Replacetheprimarylter(Figure57).
5.Insertthenewlterbyapplyingpressuretotheouter
rimoftheelementtoseatitinthecanister.
Important:Donotapplypressuretotheexible
centerofthelter.
42
 Loading...