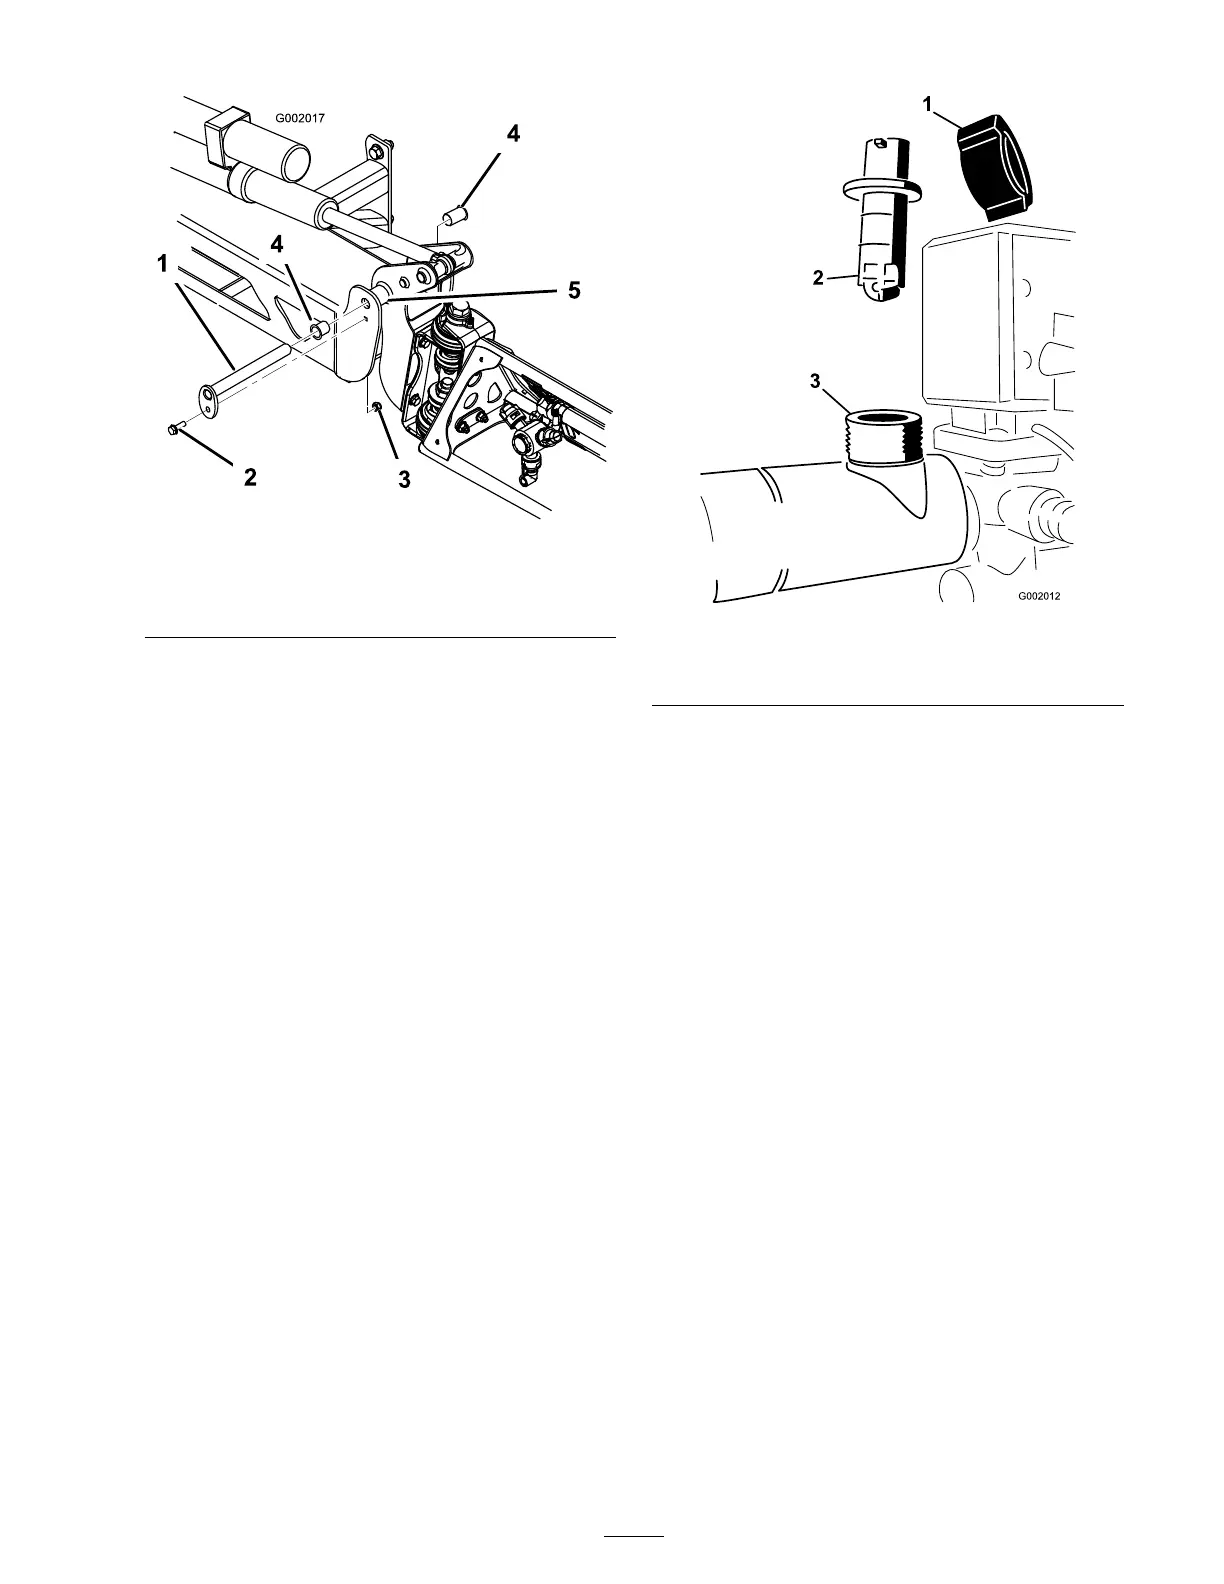
Figure 73
1. Pivot pin
4. Nylon bushing
2. Bolt 5. Pivot bracket
3. Nut
4. R emo v e the boom and pi v ot brac k et assembly
from the center frame to access the nylon
bushings .
5. R emo v e and inspect the nylon bushings from
the front and bac k sides of the pi v ot brac k et
( Figure 73 ). R e place any damag ed bushings .
6. Place a small amount of oil on the nylon
bushings and install them into pi v ot brac k et.
7. Install the boom and pi v ot brac k et assembly
into the center frame , aligning the openings
( Figure 73 ).
8. Install the pi v ot pin and secure it with the bolt
and n ut remo v ed previously .
R e peat the procedure for eac h boom.
Cleaning
Cleaning the Flowmeter
Occasionally , the flo wmeter ma y need to be
cleaned to remo v e an obstr uction.
Note: Mak e sure the pump is off when
perfor ming this procedure .
1. Disconnect the flo wmeter wire from wiring
har ness .
2. R emo v e the retaining cap from the flo wmeter
body ( Figure 74 ).
Figure 74
1. Retaining cap
3. Flowmeter body
2. Paddle wheel assembly
3. Carefully pull the paddle wheel assembly from
the body .
4. Use w ar m w ater , a soft-bristled br ush, and
a mild deterg ent as necessar y to clean the
flo wmeter body and paddle wheel. R emo v e
any small metallic debris .
Important: Do not use solv ents or fuel
to clean the flo wmeter .
5. Install the paddle wheel assembly into the
flo wmeter body .
Important: T he paddle wheel assembl y
will onl y fit into the body one w ay , in a
detent slot on the side of the body . Do not
f orce the paddle wheel assembl y into the
body in an y other orientation.
6. Install the retaining cap .
7. Connect the wire to the flo wmeter .
Cleaning the Suction
Strainer
Clean the suction strainer daily . If y ou are using
w etable po w ders , clean it after ev er y tank.
1. R emo v e the retainer from the red fitting
attac hed to the larg e hose on the top of the
tank.
59

 Loading...


