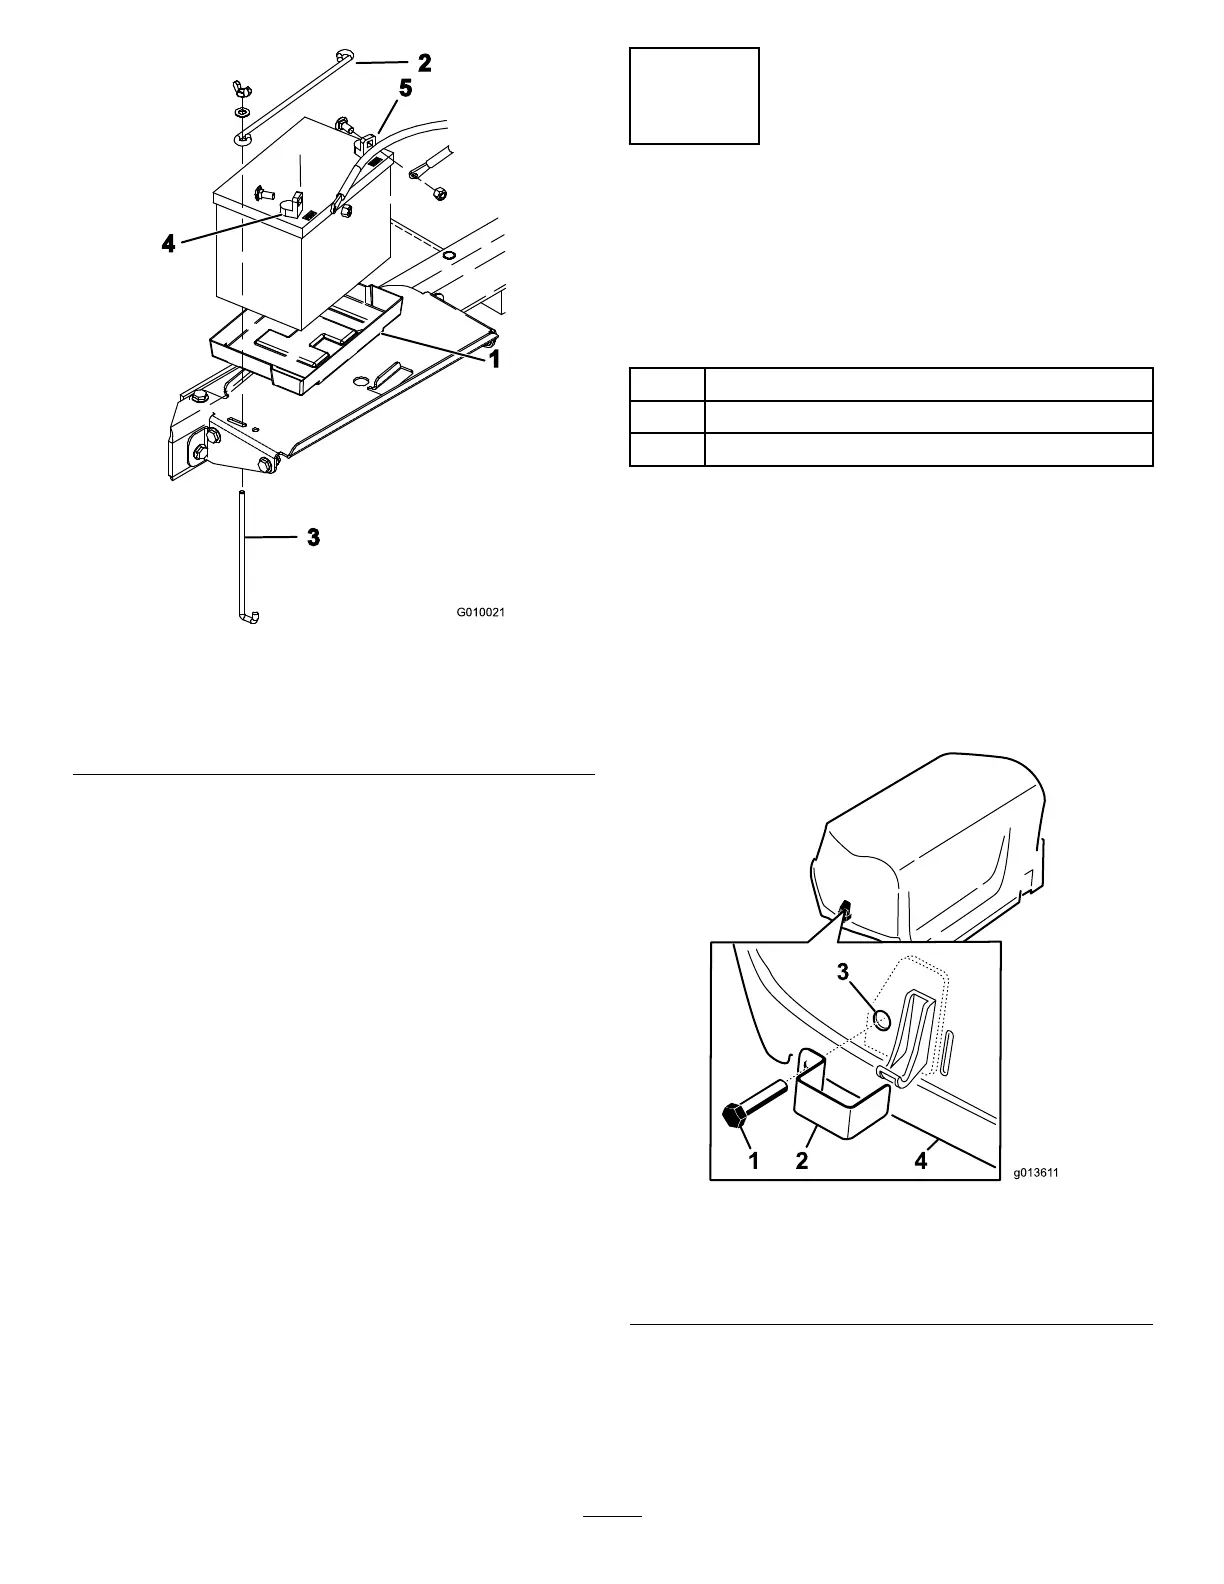
g010021
Figure13
1.Batterytray
4.Positiveterminal(+)
2.Hold-downrod
5.Negativeterminal(–)
3.J-rod
2.Securethebatterytothecompartmentbase
withahold-downrod,2J-rods,2atwashers,
and2wingnuts.
3.Securethepositivecable(red)tothepositive
(+)batteryterminalwithacarriageboltandnut.
4.Slidetherubberbootoverthepositiveterminal.
5.Securethenegativecable(black)tothenegative
(–)terminalofthebatterywithacarriagebolt
andnut.
6.Closeandlatchthebatterycompartmentdoor.
4
InstallingtheRearHood
LatchLock
CEMachines
Partsneededforthisprocedure:
2Latchlock
2Tapbolt
2Internaltoothlockwasher
Procedure
Ifyouaresettingupthismachineforuseinthe
EuropeanUnion(CE),installthehood-latchlock
ontotherearhoodasfollowstocomplywithCE
regulations.
1.Removetherearhood.
2.Installalatchlockoverthehoodlatch(Figure
14)withatapbolt(2total).
g013611
Figure14
1.Tapbolt3.Internallockwasher
(insideofhood)
2.Latchlock4.Hood
3.Useapliersandawrenchtothreadaninternal
lockwasherontoeachbolt(1to2threads)to
securetheboltstothehood.
4.Repeatsteps2through3attheothersideof
thehood.
16