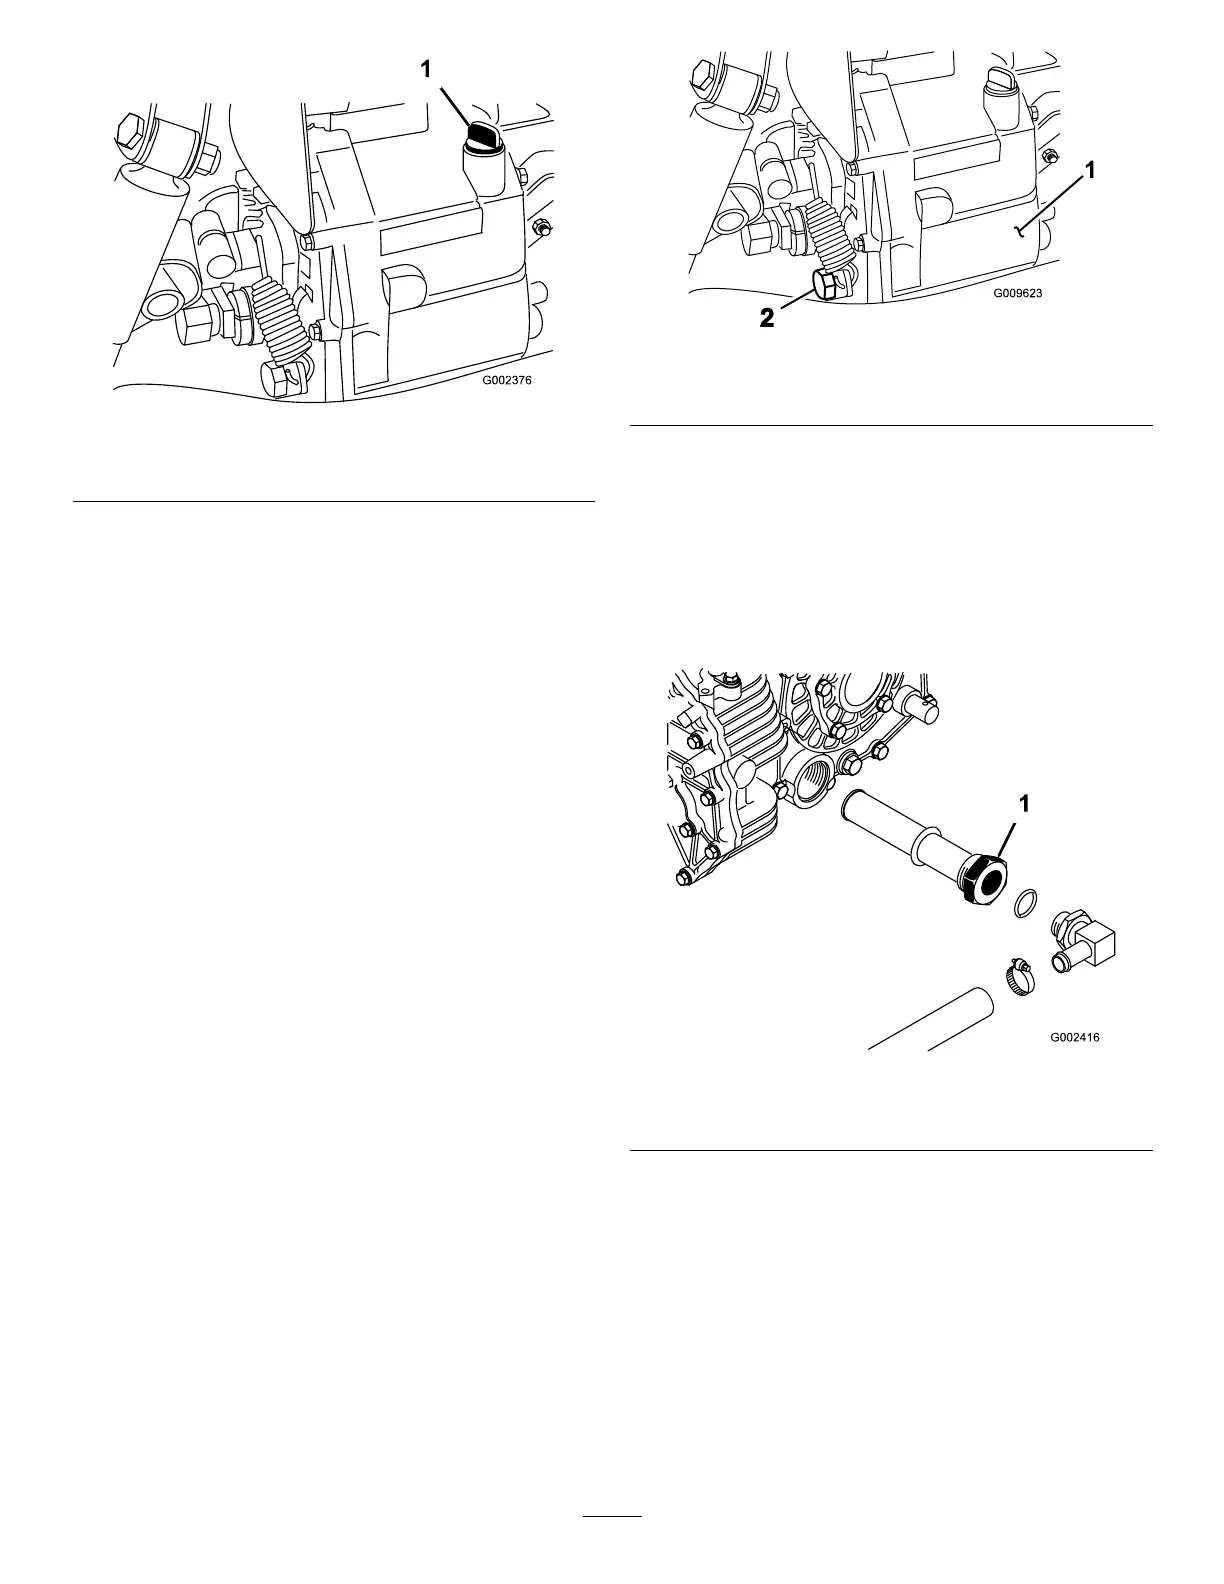
g002376
Figure 66
1. Dipstick
5. Unscrew the dipstick from the top of the
transaxle and wipe it with a clean rag.
6. Screw the dipstick into the transaxle and ensure
that it is fully seated.
7. Unscrew the dipstick and check the uid level.
Note: The uid should be up to top of the at
portion of the dipstick.
8. If the level is low , add enough of the specied
uid to achieve the proper level; refer to
T ransaxle/Hydraulic Fluid Specications ( page
57 ) .
Changing the Hydraulic Fluid and
Cleaning the Strainer
Service Interval : Every 800 hours —Change the
hydraulic uid and clean the strainer .
Hydraulic-uid capacity: 7 L (7.5 US qt)
1. Park the machine on a level surface.
2. Engage the parking brake.
3. Shut of f the engine and remove the key .
4. Remove the drain plug from the side of the
reservoir , and let the hydraulic uid ow into a
drain pan ( Figure 67 ).
g009623
Figure 67
1. Hydraulic reservoir 2. Drain plug
5. Note the orientation of the hydraulic hose and
90° tting connected to the strainer on the side
of the reservoir ( Figure 68 ).
6. Remove the hydraulic hose and 90° tting.
7. Remove the strainer and clean it by back
ushing it with a clean de-greaser .
Note: Allow it to air dry before installing.
g002416
Figure 68
1. Hydraulic strainer
8. Install the strainer .
9. Install the hydraulic hose and 90° tting to the
strainer in the same orientation.
10. Install and tighten the drain plug.
1 1. Fill the reservoir with approximately 7 L (7.5
US qt) of the specied hydraulic uid; refer to
Checking the T ransaxle/Hydraulic-Fluid Level
( page 57 ) .
12. Start the engine and operate the machine to ll
the hydraulic system.
58