3
© 2008 - 2011 TOSHIBA TEC CORPORATION All rights reserved e-STUDIO2020C/2330C/2820C/2830C/3520C/3530C/4520C
ADJUSTMENT
3 - 71
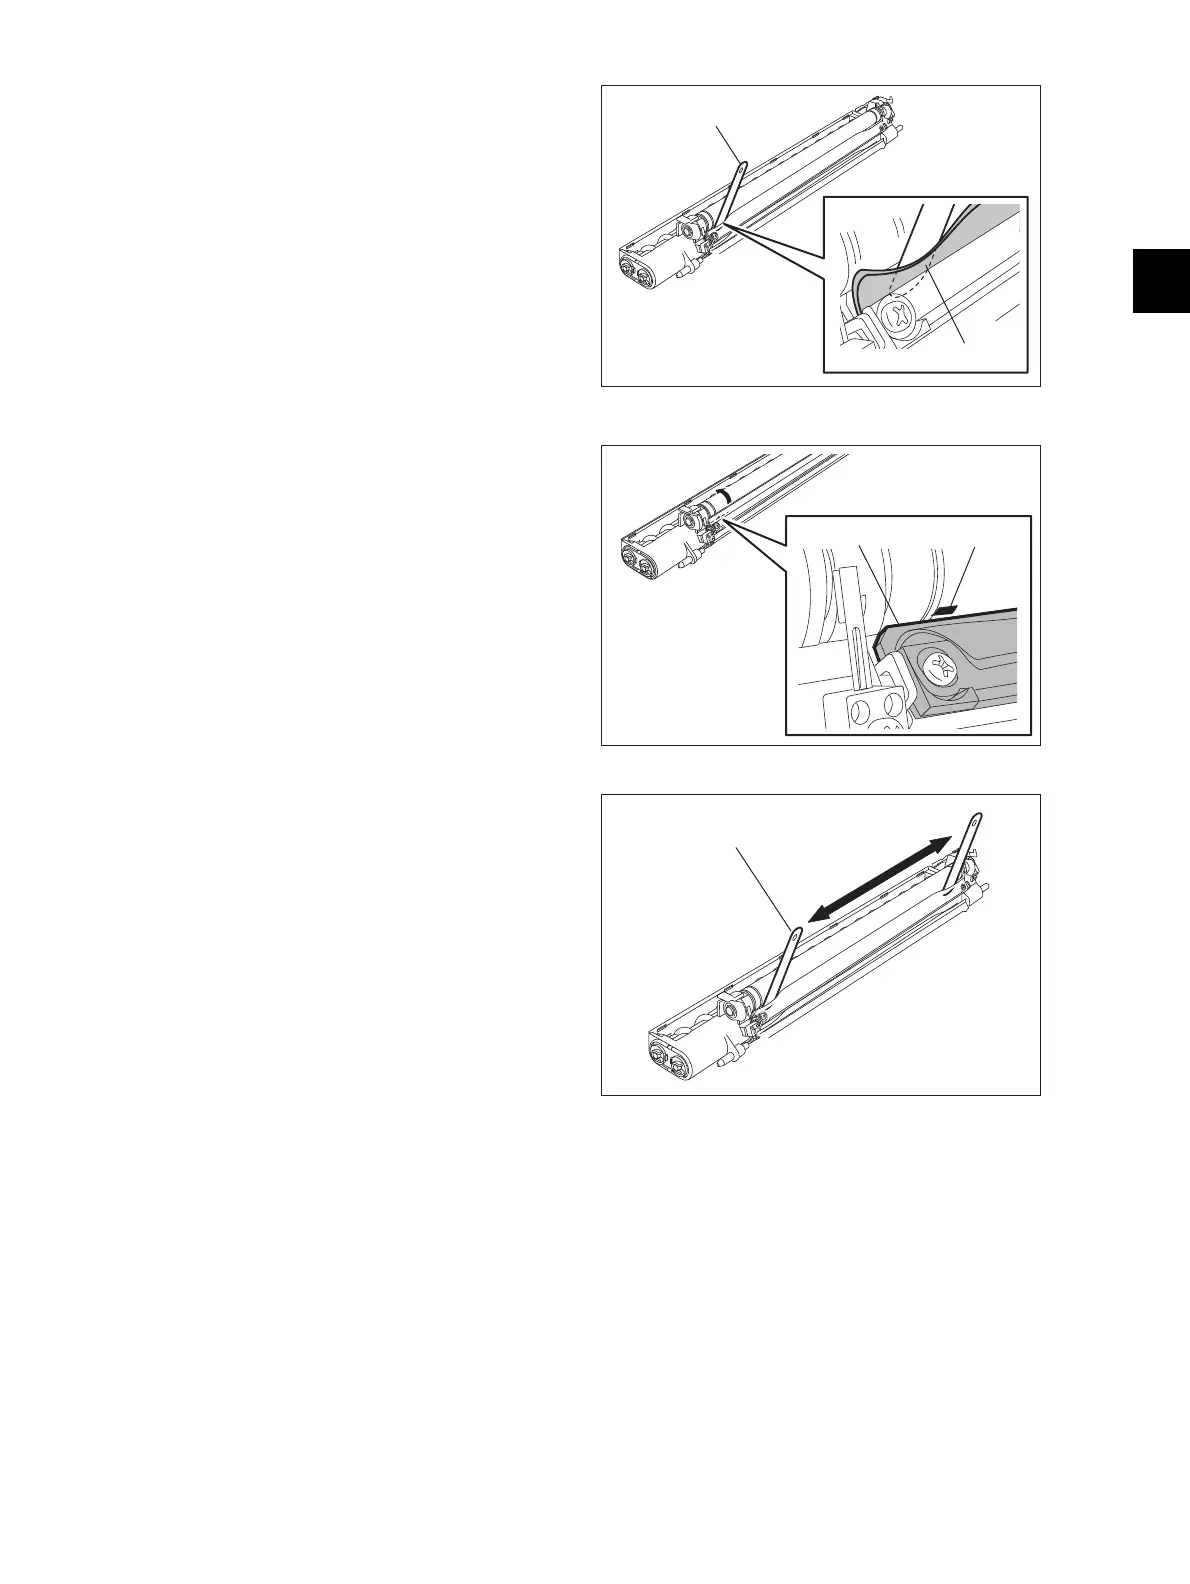
1. Flip up 2 protection sheets for the doctor
blade from the sleeve before inserting the
gauge. Also, be sure not to damage the
protection sheets.
2. When confirming and adjusting the gap
between the developer sleeve and the
doctor blade, insert the gauges into the
gap after rotating the developer sleeve so
that its marking faces the doctor blade.
Fig. 3-38
Fig. 3-39
(6)
• Using the sandblasted magnetic roller:
Insert the gauge "0.60" of the doctor-
sleeve gap jig between the developer
sleeve and the doctor blade to make sure
that the gauge can move smoothly in the
front/rear direction and the gauge "0.70"
cannot be inserted into the gap.
• Using the knurled magnetic roller:
Insert the gauge "0.65" of the doctor-
sleeve gap jig between the developer
sleeve and the doctor blade to make sure
that the gauge can move smoothly in the
front/rear direction and the gauge "0.75"
cannot be inserted into the gap.
Fig. 3-40
Doctor-sleeve gap jig
Protection sheet
MarkingDoctor blade
Doctor-sleeve gap jig

 Loading...