e-STUDIO2020C/2330C/2820C/2830C/3520C/3530C/4520C © 2008 - 2011 TOSHIBA TEC CORPORATION All rights reserved
ADJUSTMENT
3 - 78
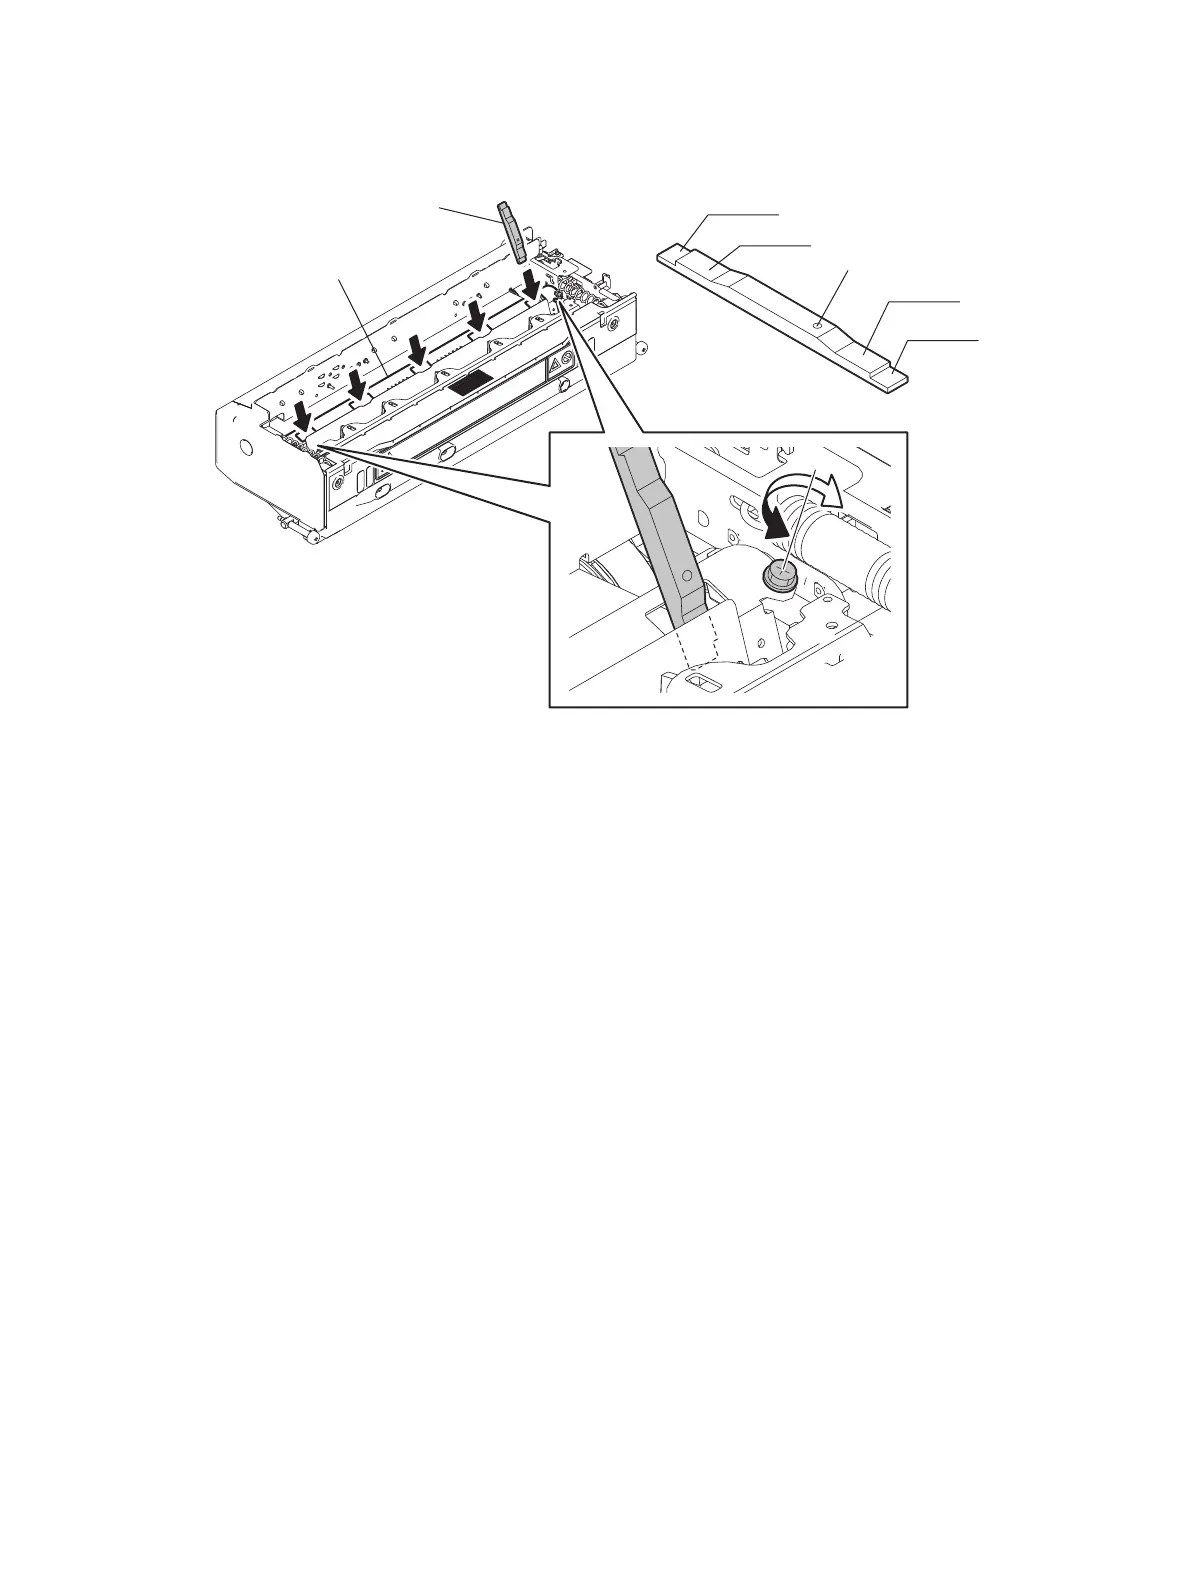
(4) Insert the jig into the remaining three windows on the separation plate, and then adjust them in
the same manner.
* If the 0.6 mm jig cannot be inserted, the gap is too narrow. Adjust it again.
* If the 1.0 mm jig can be inserted, the gap is too wide. Adjust it again.
Fig. 3-45
• When thin paper or paper with a small leading edge margin is used, the gap needs to be
narrower. In this case, use the jig end (without a hole). (The procedure is the same.)
- Using the jig end (with a hole): The gap is between 0.6 mm and 1.0 mm.
- Using the jig end (without a hole): The gap is between 0.6 mm and 0.8 mm.
• Paper jams tend to occur in equipment in which thin paper such as 64g/m
2
(17lb. Bond) paper
is used or a large amount of high density images such as pictures are output. For this
equipment, we recommend that you adjust the gap of the separation plate within the range of
0.6 mm to 0.8 mm in order to prevent paper jamming.
Hole
0.6 mm
0.8 mm
1.0 mm
0.6 mm
Separation plate
Separation plate gap j
ig

 Loading...