2.SETTING ITEMS (ADMIN)
SECURITY 105
2 SETTING ITEMS (ADMIN)
5
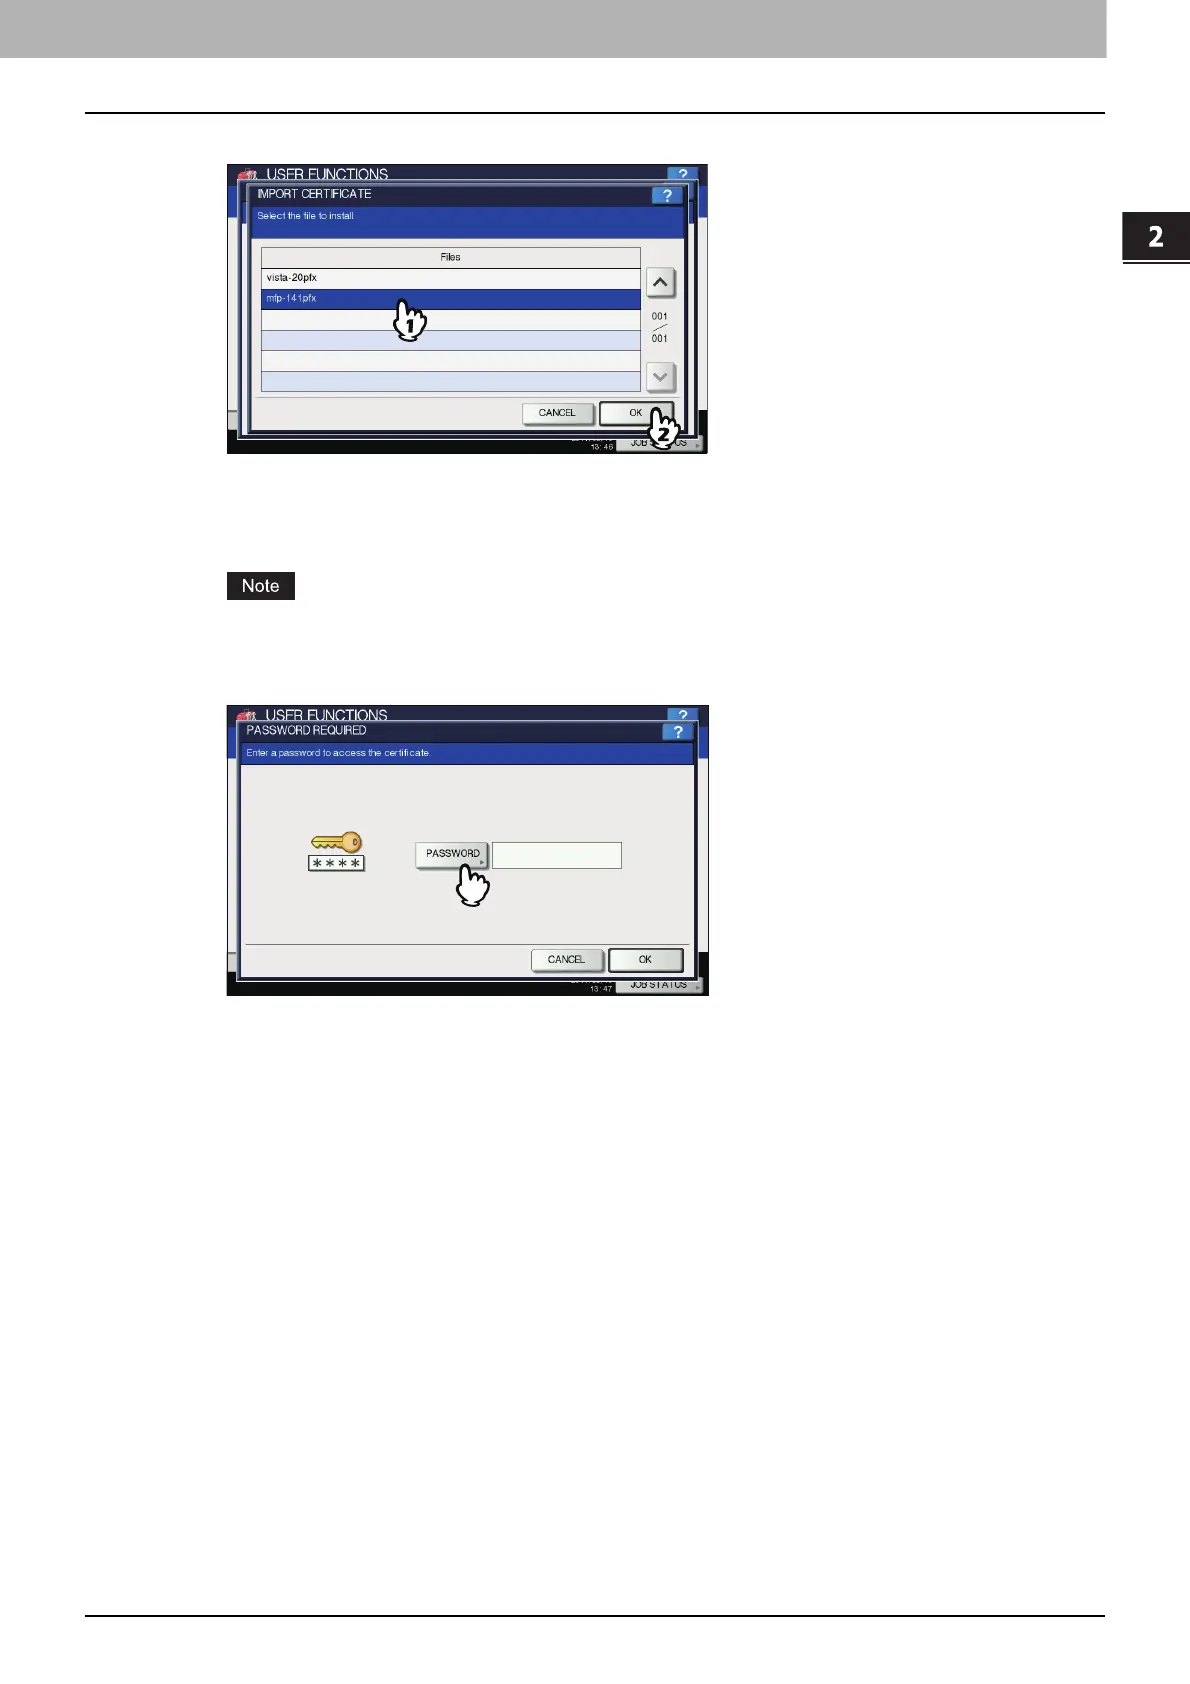
Select the certificate that you want to import, and press [OK].
When the file extension is “.pfx” or “.p12”, the PASSWORD REQUIRED screen will be displayed.
Proceed to the next step.
When the file extension is any other than above, importing the certificate will begin.
Proceed to step 9.
Do not remove the USB storage device until the data transfer is complete. Removing the device while data are
being transferred could destroy them or cause a malfunction of the equipment.
6
Press [PASSWORD].
The on-screen keyboard is displayed.
For details of the on-screen keyboard, see the following page:
P.154 “On-screen keyboard”
7
Enter the password and press [OK].
The input password appears as asterisks (*).
You will be returned to the PASSWORD REQUIRED screen.
 Loading...


