1.SETTING ITEMS (USER)
ADDRESS 31
1 SETTING ITEMS (USER)
2
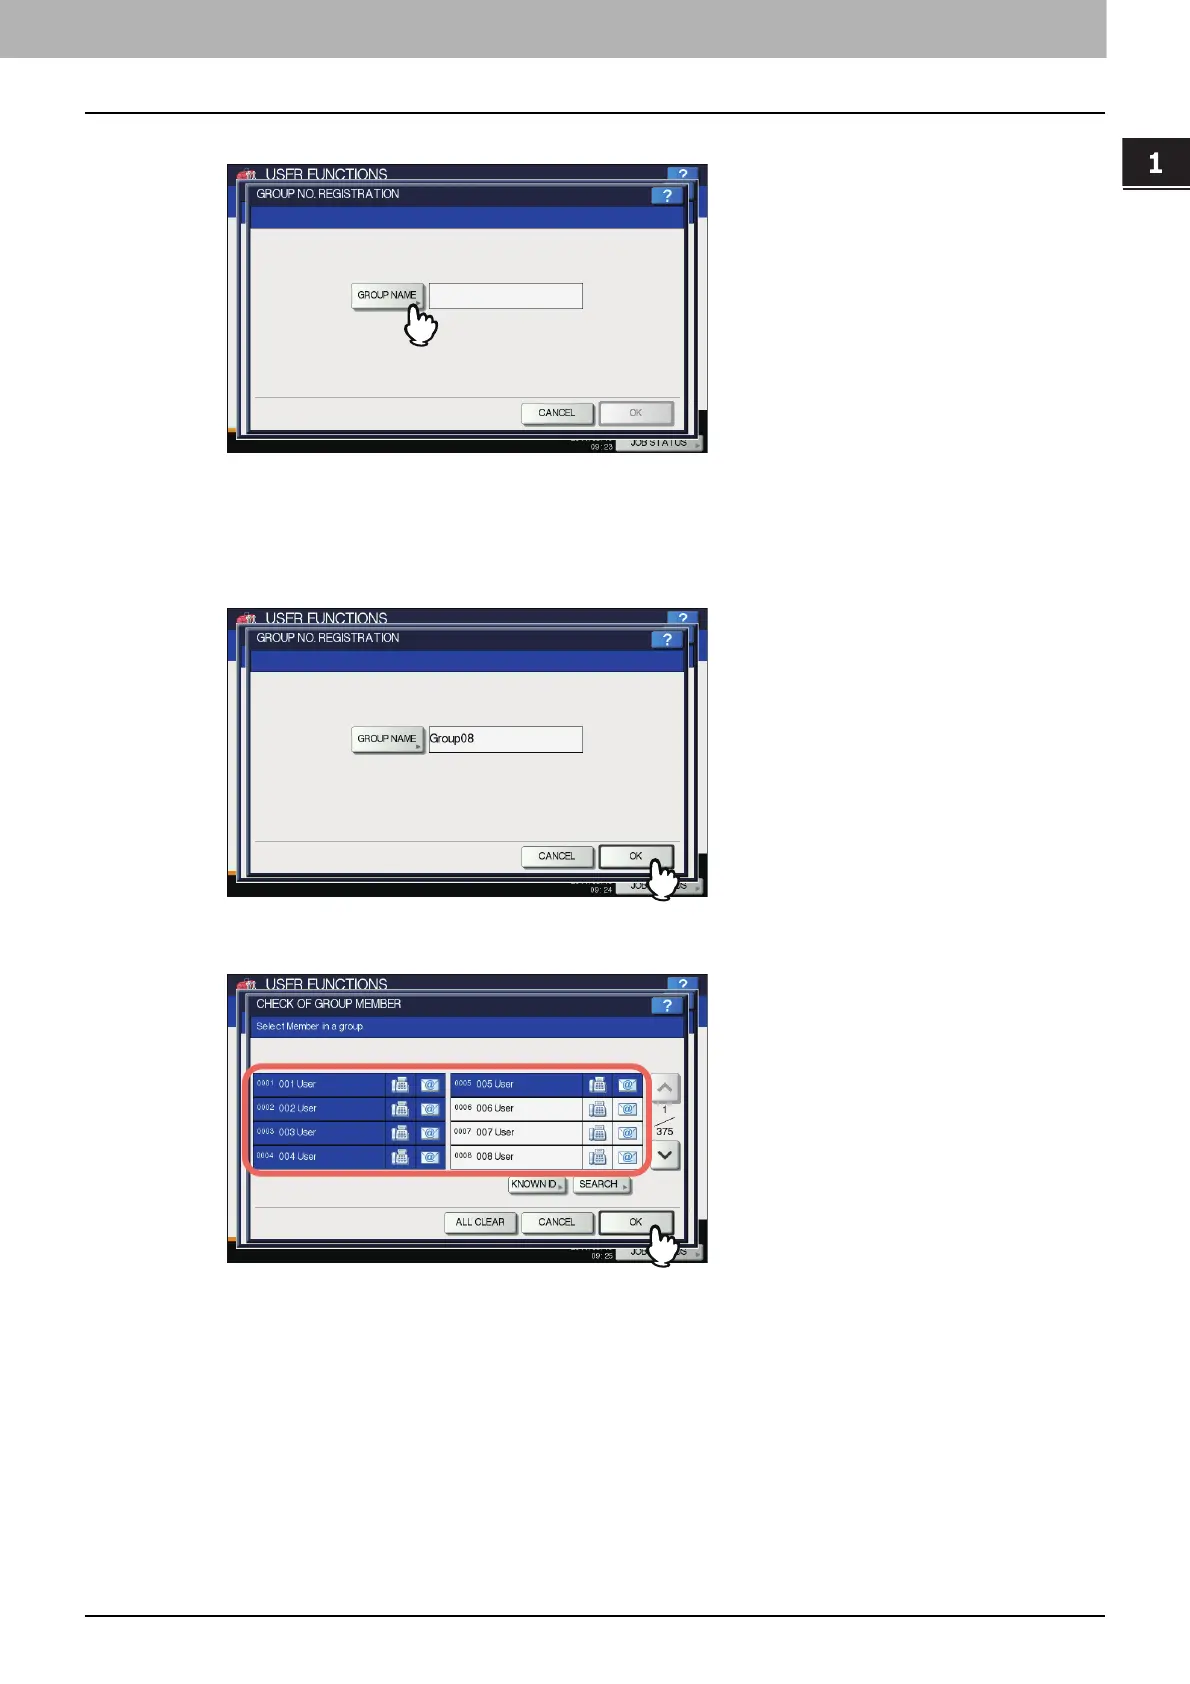
Press [GROUP NAME].
The on-screen keyboard is displayed.
For details of the on-screen keyboard, see the following page:
P.154 “On-screen keyboard”
3
Enter the group name and press [OK].
4
Press [OK].
The CHECK OF GROUP MEMBER screen is displayed.
5
Select the contacts that you want to add to the group and press [OK].
To add contacts by selecting each contact manually, see the following page:
P.35 “Adding or removing contacts”
To add contacts by searching for them by ID number, see the following page:
P.35 “Adding or removing contacts by searching by ID number”
To add contacts by searching for them with a search string, see the following page:
P.36 “Adding or removing contacts by searching with a search string”
 Loading...


