2.SETTING ITEMS (ADMIN)
NETWORK 85
2 SETTING ITEMS (ADMIN)
2
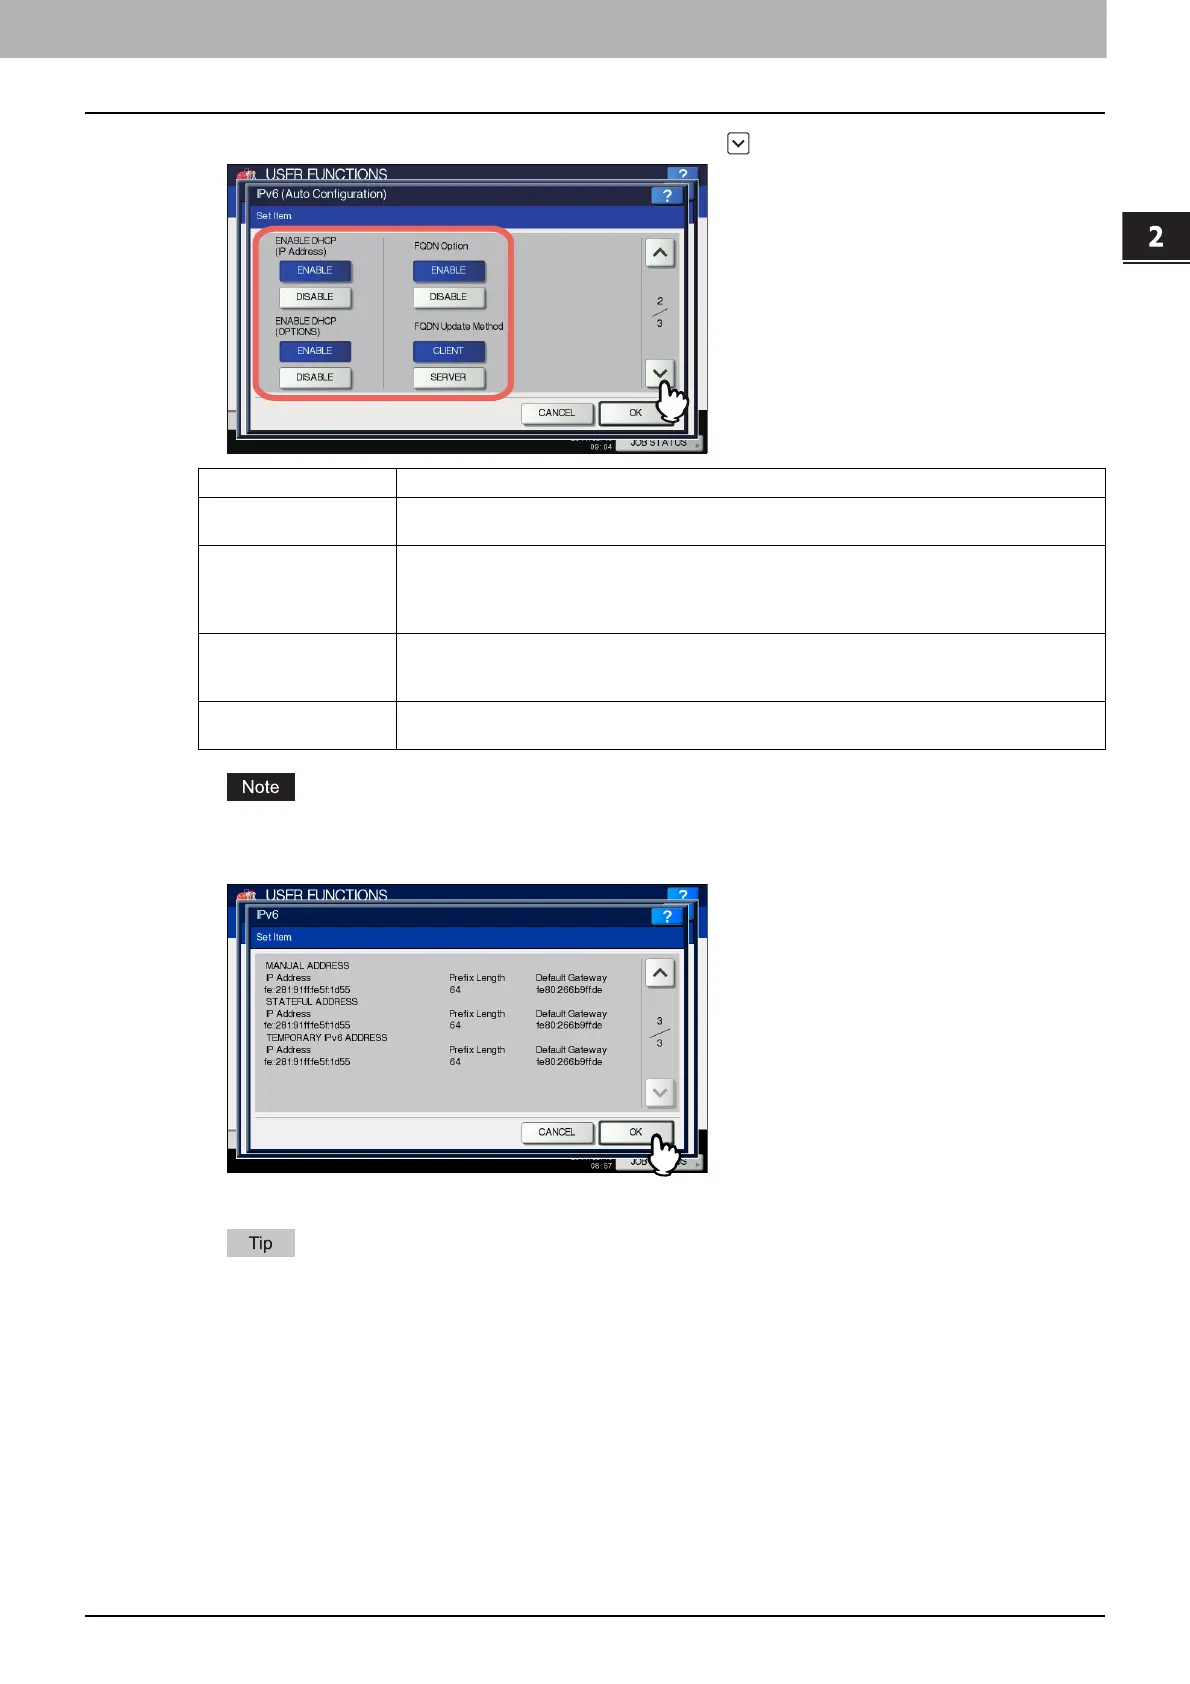
Specify the following items as required and press .
[ENABLE DHCP (IP Address)] and [ENABLE DHCP (OPTIONS)] cannot be disabled simultaneously.
3
Confirm the settings and press [OK].
You will be returned to the NETWORK menu.
The IPv6 address acquired from the DHCPv6 server is displayed.
Item name Description
ENABLE DHCP (IP
Address)
ENABLE — Press this button to use the IPv6 address issued by the DHCPv6 server.
DISABLE — Press this button to disable the IPv6 address issued by the DHCPv6 server.
ENABLE DHCP
(OPTIONS)
ENABLE — Press this button to use the optional information (IPv6 address for the DNS
server, etc.) other than the IPv6 address for this equipment issued by the DHCPv6 server.
DISABLE — Press this button to not use the optional information other than the IPv6 address
for this equipment issued by the DHCPv6 server.
FQDN Option ENABLE — Press this button to assign a FQDN (Fully Qualified Domain Name) using the
DNS server.
DISABLE — Press this button to not assign a FQDN using the DNS server.
FQDN Update Method CLIENT — Press this button to update the DNS server from this equipment.
SERVER — Press this button to update the DNS server from the DHCPv6 server.
 Loading...


