B
BODY
Read all of SAFETY and this section before attempting any procedure. Pay particular attention to Notices, Cautions, Warnings and Dangers.
25
Repair and Service Manual
10002660
Cowl Replacement
Tool List Qty.
Drill .............................................................................. 1
Drill Bit......................................................................... 1
Punch, Small ............................................................... 1
Rivet Gun .................................................................... 1
Pry Bar ........................................................................ 1
To prevent personal injury, discon-
nect negative (-) battery cable
before servicing vehicle.
1. Disconnect the wiring harness from the headlights
(See Headlight Bulb Replacement (LED) on
page 46).
2. Remove the gauge panel (5) (See Gauge Panel
Replacement on page 24).
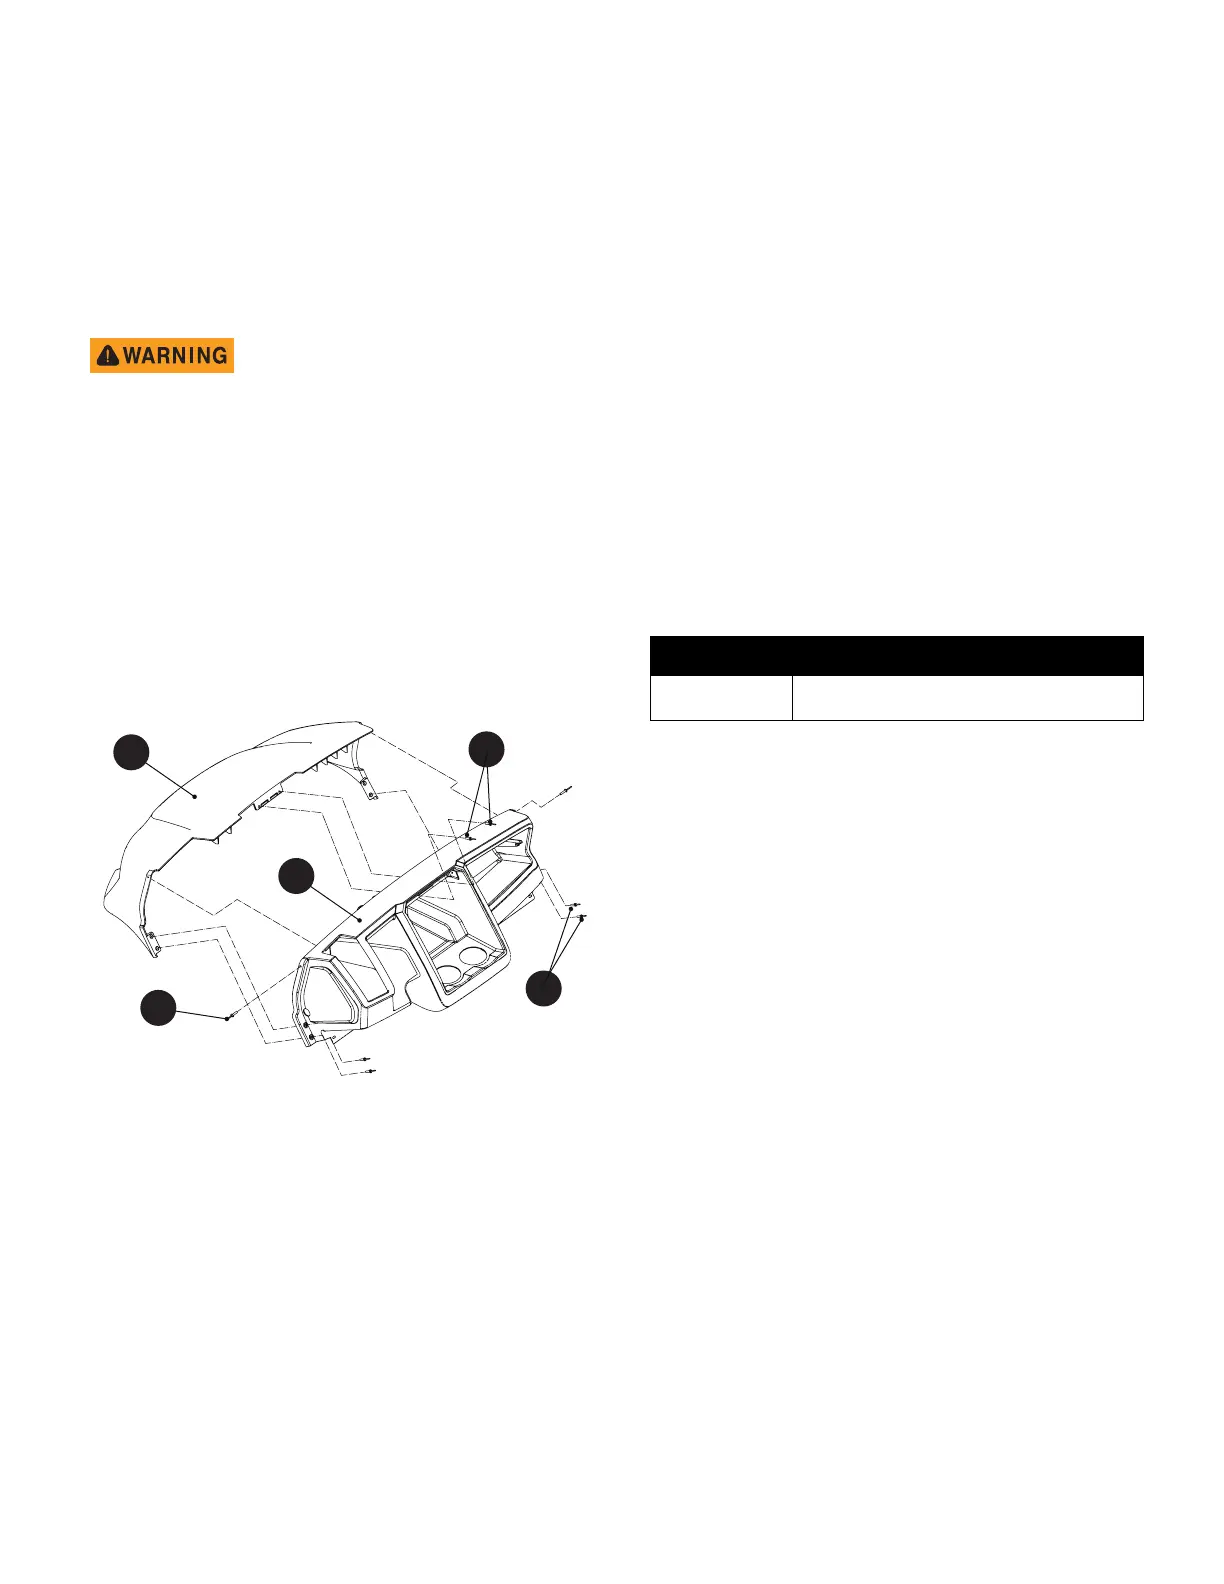
3. Drill out the upper rivets (12) connecting the cowl
(15) to the instrument panel (10).
4. Drill out the remaining rivets (11).
5. Remove cowl assembly (15) from vehicle (Ref. Fig.
6).
Assemble in the reverse order of removal using new riv-
ets.
Fig. 6 Cowl Removal
Removal of Headlight Grille Assembly
Tool List Qty. 1
Socket, 10mm..............................................................1
Wrench, 10mm ............................................................1
Ratchet ........................................................................1
Pry Bar.........................................................................1
Torque Wrench, in. lbs .................................................1
1. Disconnect the wire harness (16) from the headlight
bulb (17).
2. Remove the eleven nuts (18) from the rear of the
headlight grille assembly (20), that secure the head-
light grille assembly to the cowl (15).
3. Remove the headlight grille assembly (20) from the
outside of the cowl (15). It may be necessary to pry
the headlight grille assembly gently away from the
cowl (Ref. Fig. 7).
Assemble in the reverse order of removal.
Tighten the nuts (18) to the torque values specified below.
Item Torque Specification
18 17 - 25 in. lbs. (1.9 - 2.8 Nm)