B
REAR AXLE AND SUSPENSION
Read all of SAFETY and this section before attempting any procedure. Pay particular attention to Notices, Cautions, Warnings and Dangers.
85
Repair and Service Manual
10002660
REAR AXLE AND SUSPENSION
REAR AXLE
Maintenance
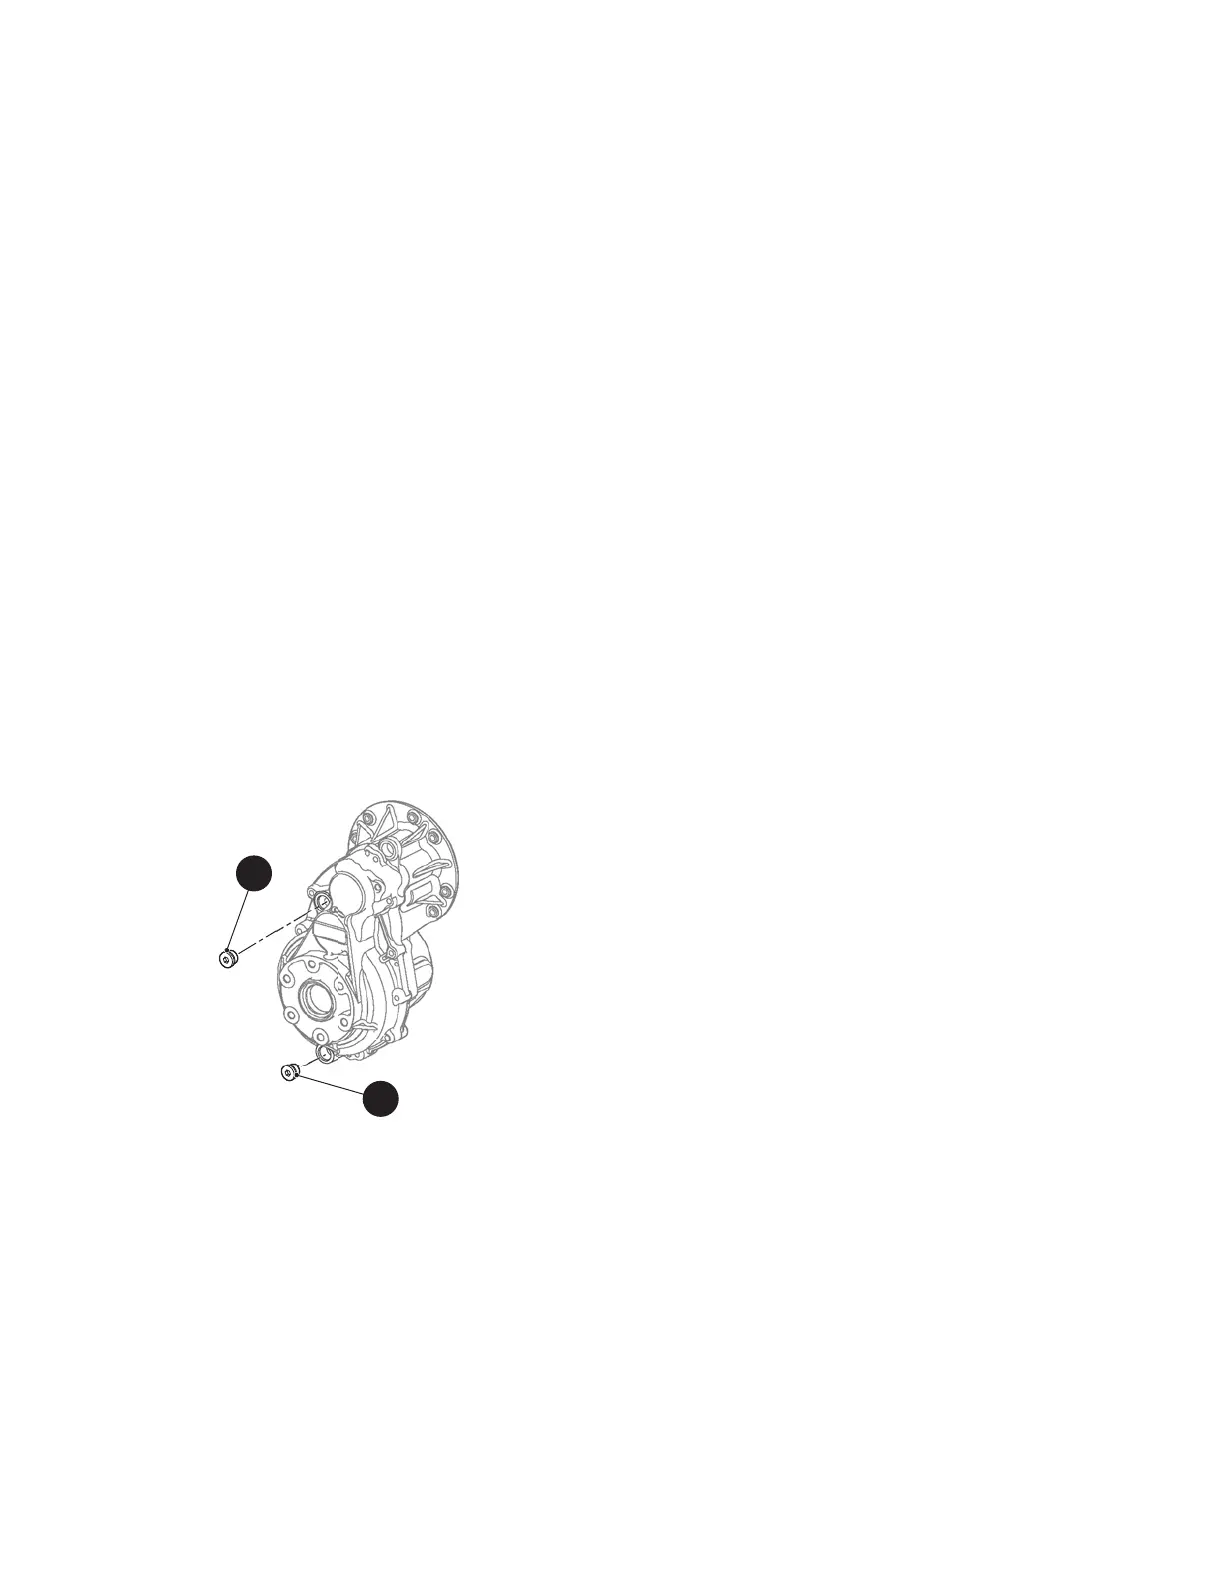
The rear axle has a plug to check and fill the lubricant
level. The plug is located on the driver side at the rear of
the housing. Unless leakage is found, an annual lubricant
check is sufficient.
Checking the Lubricant Level
Tool List Qty.
Allen Socket, 5/16” ...................................................... 1
Ratchet........................................................................ 1
Extension..................................................................... 1
Funnel ......................................................................... 1
Clean the area around the check/fill plug (11). Remove
the check/fill plug (11) (Ref. Fig. 1).
If lubricant needs to be added, remove the check/fill plug
(11) and use a funnel to add lubricant (SAE 80W-90 gear
oil). Add slowly until lubricant reaches capacity.
If the lubricant needs to be replaced, a drain plug (12) for
removing the lubricant is located at the bottom of the dif-
ferential housing.
The capacity of the axle is 13.5 oz. (410 mL).
Fig. 1 Check, Add or Drain Rear Axle Lubricant
Rear CV Axle Removal
Tool List Qty.
Lug Wrench, 3/4” .........................................................1
Wheel Chocks..............................................................1
Jack Stands .................................................................1
Floor Jack ....................................................................1
Ball Joint Separator .....................................................1
Pry Bar.........................................................................1
Rubber Mallet ..............................................................1
Wrench, 24mm ............................................................1
Wrench, 5/8” ................................................................1
Socket, 24mm..............................................................1
Socket, 5/8”..................................................................1
Ratchet ........................................................................1
Anti-Seize Compound..................................................1
1. Remove the flip seat (See Rear Seat Removal and
Installation on page 75).
2. Loosen the lug nuts at the rear wheels.
3. Lift the rear of the vehicle (See Lift Rear of Vehicle
on page 9).
4. Remove the rear wheels (See WHEEL AND TIRE
SERVICE on page 128).
5. Remove the cotter pin (15) from the CV Axle (10).
6. Remove the castellated nut (16) securing the CV
axle (10) to the strut assembly (13) (Ref. Fig. 2).