Installing the System MicronNav System
0656-SOM-00001-07 23 © Tritech International Ltd.
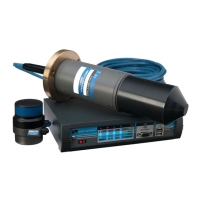
Connecting the Micron Responder via a Sonar AUX port
Surface to Sonar Communication Configuration
An example of a Micron Responder being used with a Sonar is:
MICRON RESPONDER
MICRON SONAR
4
5
1 2
86
3
7 9
4
5
12
8
10
6 37
12
9
1114
13
15
4
5
1 2
86
3
7 9
4
1
3
2
6
5
AIF (ARCNET)
COMMUNICATION PORTS
PC-USB
SUPPLY
A B
D
C
4
5
1 2
86
3
7 9
4
5
12
8
15
6
3
7
17
14
1619
1820
11
12
9
22
13
10
24
21
23
25
TRANSDUCER
MICRONNAV HUB (REAR)
MAIN - CONNECTED TO AUX PORT OF
MICRON SONAR
UNIT ONLY TALKED TO ACOUSTICALLY
MAIN - CONNECTED TO PORT B OF
MICRONNAV HUB
AUX - CONNECTED TO MAIN PORT OF
MICRONNAV RESPONDER UNIT
USBL DUNKING TRANSDUCER
DUNKING TRANSDUCER FITTED TO
25 WAY CONNECTOR ON MICRONNAV HUB
For systems where the MicronNav Reponser has been connected to the AUX Port of a
Tritech International Ltd Sonar, Seanet Pro will need to be setup to work with the ROV
communications link. For the appropriate Port on the MicronNav Hub (Port B or Port D) -
select Utilities from the top menu bar followed by Com Setup to open the Channel Setup
page and check the baud rate of the port matches that of the Sonar Main port (default
115200) and ROV communications link, if it requires changing click the settings button on
the row to open the AifSetupForm and adjust the baud rate accordingly, click Ok to confirm
the setting and close the form and then close the Channel Setup form.
Now check the communications protocol type of port B matches that of the Sonar Main port
and ROV communications link, click the action arrow in the SEAHUBNAV100 row followed by