CHANGING THE MOLD SIZE
With the 100-mm mold option, the user can create 100-mm
specimens with the Model 4140. Before making 100-mm
specimens, install the 100-mm loading head, change the mold size
stored in the control unit, and recalibrate the height and the angle of
gyration.
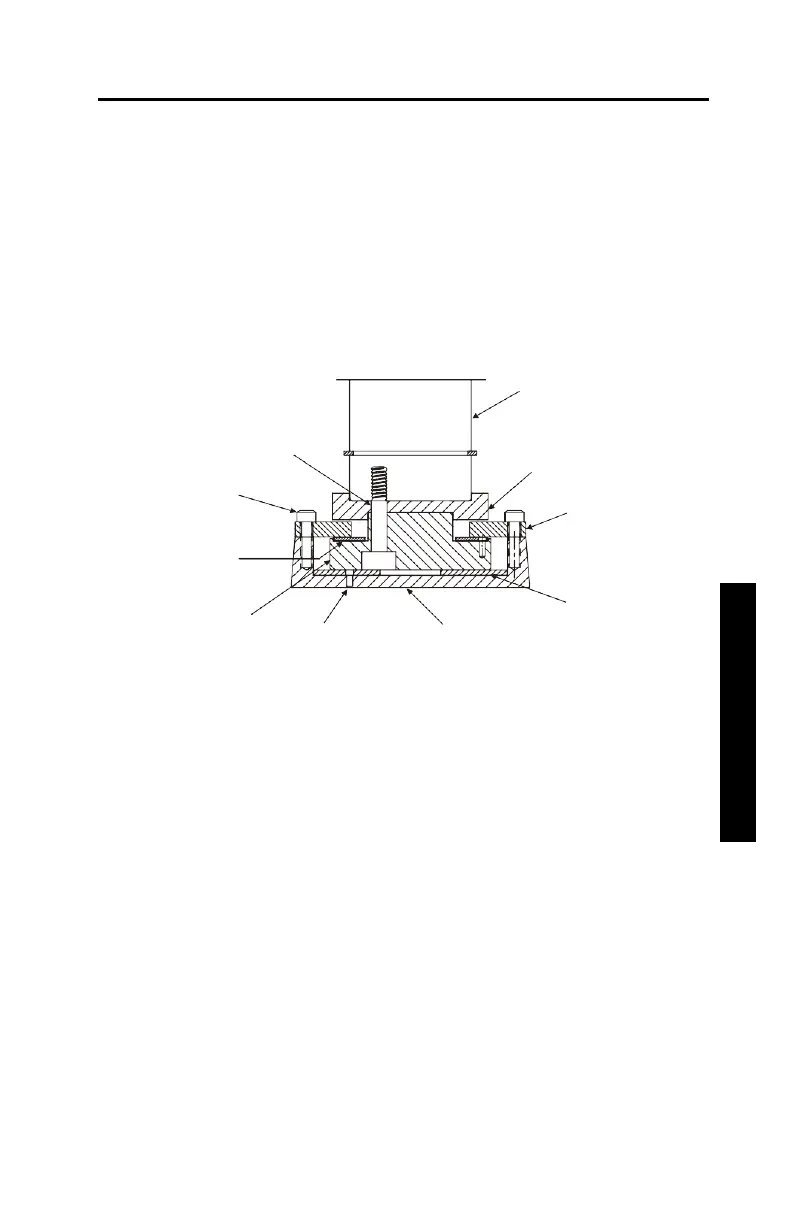
To install the 100-mm loading head, refer to Figure 3-6, and follow
the steps below:
RAM
LONG SCREW (3)
SMALL SCREW (8)
SMALL
THRUST WASHER
(GREY SIDE UP)
INTERFACE PLATE
PIN
100 MM
LOADING HEAD
ADAPTER PLATE
MOUNTING PLATE
LARGE
THRUST WASHER
(GREY SIDE UP)
Figure 3-6. Changing the Mold Size
✓
With the chamber door closed, lower the loading head until you
can see the eight hex head screws on the loading head.
✓
Open the chamber door.
✓
Holding the 150-mm loading head, use a 3/16" Allen wrench to
remove the eight screws and the washers under the screws.
✓
Carefully lower the loading head.
✓
Set the 150-mm loading head aside.
✓
Using a 3/16" Allen wrench, remove the three screws and
washers that secure the interface plate to the ram.