DAILY MAINTENANCE
7
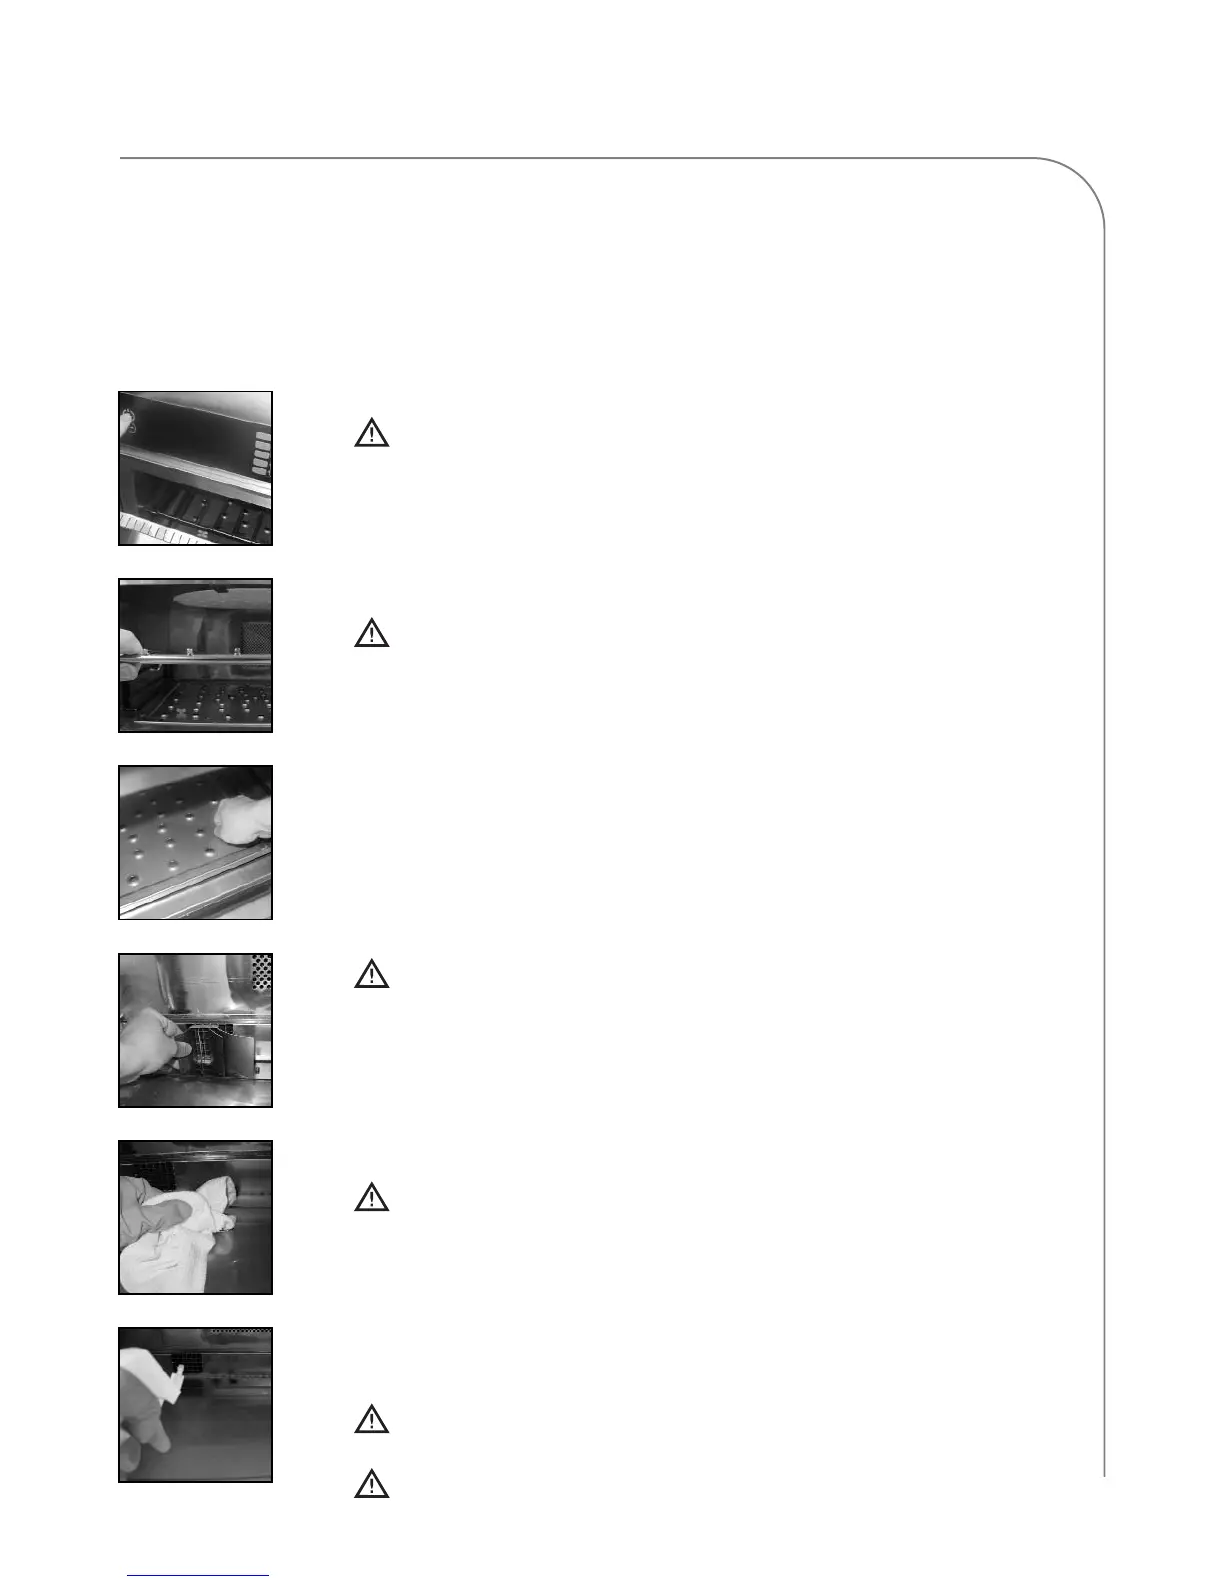
Step 1: Prepare the Oven
WARNING: The oven operates at approximately 500°F (260°C) and may
cause injury if not allowed to cool properly.
- Turn off the oven by pressing the On/Off key.
- Slightly open the oven door. Cooling takes approximately 40 minutes.
- DO NOT attempt to clean the oven until the oven displays “Oven Off.”
Step 2: Remove and Clean the Wire Rack
WARNING: Be sure the oven interior is cool before you remove the wire rack.
- Wash, rinse, sanitize, and dry the wire rack.
Step 3: Remove and Clean the Lower Jetplate
- Unscrew the two thumb screws on the lower jetplate.
- Lift the lower jetplate by gripping the thumb screws.
- Remove the lower jetplate.
- Wash, rinse, sanitize, and dry the lower jetplate.
Step 4: Remove and Clean the Lower Air Diverter
- Remove the lower air diverter.
- Wash, rinse, sanitize, and dry the lower air diverter.
WARNING: DO NOT discard the lower air diverter. The oven will not work
without the lower air diverter installed.
Step 5: Wipe the Oven Interior
- Wipe any large particles from the oven interior with a damp towel.
Step 6: Clean the Oven Interior
- Spray oven cleaner onto the top, bottom, and sides of the oven interior.
CAUTION: DO NOT spray oven cleaner into the holes on the back oven
wall. Doing so can damage critical oven components, resulting in a
non-warranty service call.
- Allow Oven Cleaner to penetrate stains for five minutes.
- Clean the oven interior with a nylon scrub pad.
NOTE: Depending on the model, the oven will utilize either a ceramic top jetplate
or a metal top jetplate that incorporates a glass insert.
CAUTION: DO NOT apply excessive pressure when wiping the top ceramic
jetplate or glass insert; breakage will result in a non-warranty service call.
CAUTION: DO NOT remove the top ceramic jetplate or glass insert; breakage
will result in a non-warranty service call.
Daily Maintenance
The following steps will help maintain your i3 oven.
Use only TurboChef Oven Cleaner and Oven Guard.
The use of any other cleaning products can damage
critical oven components, which will result in a
non-warranty service call.
Supplies and Equipment
- Oven Cleaner (Part Number: 103180)
- Oven Guard (Part Number: 103181)
- Nylon scrub pad, cleaning towel, disposable gloves,
protective eyewear, dust mask (optional), *pair of
tongs wrapped with towel (optional - see step 11)
Step 1
Step 2
Step 3
Step 4
Step 5
Step 6
 Loading...