OVEN SYSTEMS
23
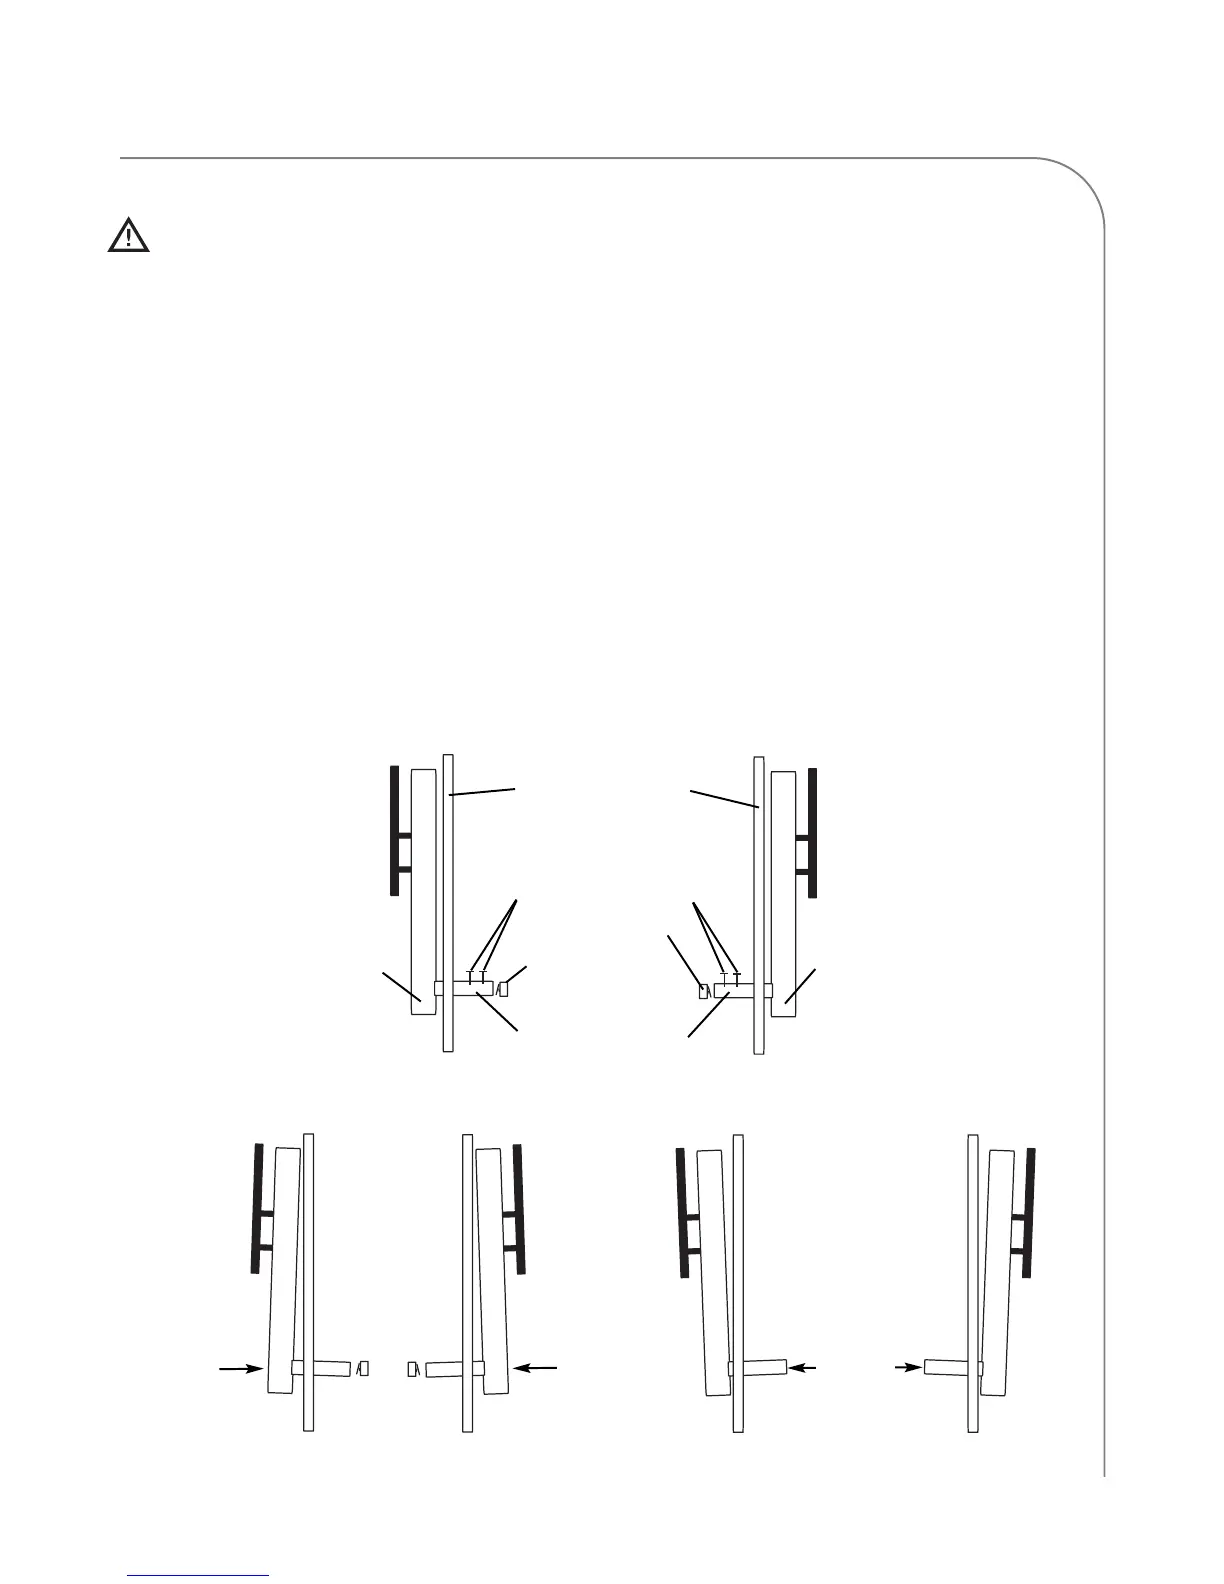
Figure 31A: Properly Adjusted Door - Side Views
Oven
Door
Oven
Frame
Hinge
SM Switches
Loosen
Screws
Hinge
P Switch
Figure 31B: Door Misaligned 1 - Side Views
Tap this
corner
Figure 31C: Door Misaligned 2 - Side Views
Tap this
corner
Loosen
Screws
Remove
switches
and tap here
Oven
Door
Oven
Frame
CAUTION: This procedure should be
performed while oven is hot. To avoid burns,
be careful when adjusting the oven door.
1. Turn the oven on and warm it to its operating
temperature. If two temperatures are present,
warm the oven to the higher of the two
temperatures.
2. Remove the oven side panels.
3. Remove the switch assemblies from each side.
4. Loosen the four screws that hold the hinge
assembly to the gusset plates (Figure 31A).
5. Slide the door in and out of the cavity, making
sure the gaps between the door and cavity face
are the same distance on each side. Figures 31B
and 31C show misaligned doors.
6. Tighten the four screws and open/close the
door multiple times to confirm adjustment.
7. Reinstall the door switches.
8. With the door closed, set the left side switch
(primary) so the paddle is closed but not
pushing or binding on itself.
9. Set the right side switches (secondary and
monitor) so they are completely closed but not
pushing or binding on themselves.
10. Turn the oven on and enter
TEST MODE (page
16 for more details).
11. Observe the status indicators when opening
and closing the door and confirm the sequence
(PSM open, MSP closed). If necessary, adjust the
switches (page 24) and reconfirm the sequence.
12. Reinstall the side panels.
13. Perform a MW Leak Test (pages 25-26).