22
UltiMaker S8 Installation and user manual
With Material Station
Changing materials in the Material Station is easy and intuitive. This is possible for pre-loaded materials during
printing as well as in an idle state.
Note: You can only change or remove material spools that are not currently active. Active spools are indicated
with a blue light on the Material Station.
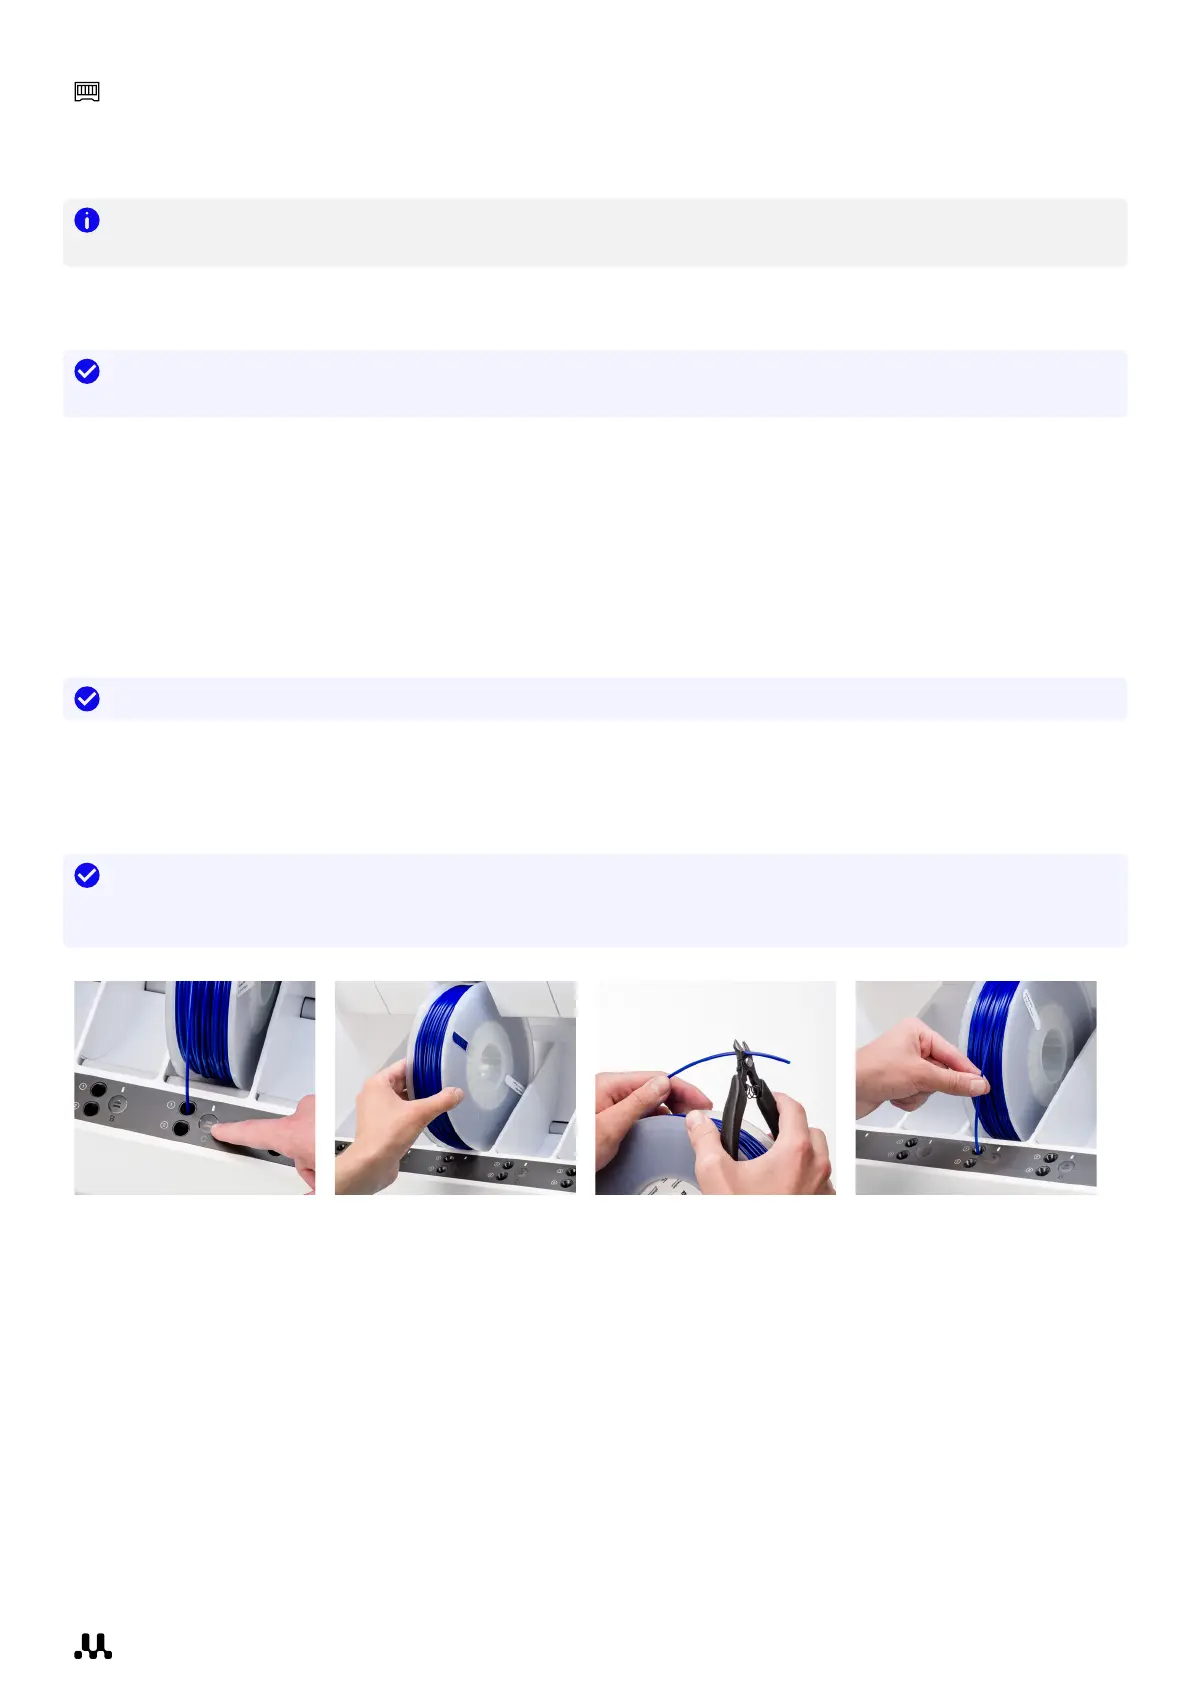
Changing materials in the UltiMaker Factor 4 is easy and intuitive. This is possible for pre-loaded materials during
printing as well as in an idle state.
Tip: You can select Load or Unload for the relevant material bay in the Configuration menu to see
instructions on the display.
1. Open the glass door of the Material Station.
2. Press the eject button of the corresponding material bay to eject the pre-loaded filament.
3. Remove the material spool from the material bay. Put the end of the filament through one of the holes in the
spool to prevent unwinding.
4. Take a new spool and use the wire cutters to ensure the filament has a short, sharp tip before
loading the filament.
5. Place the spool of filament into the material bay with the NFC tag on the left side.
6. Insert the tip of the material into filament entry port 1 or 2 until the prefeeder grabs the material.
7. Wait for the Material Station to detect the material and select Confirm to continue.
Tip: When using a third-party material, you can select the material type manually.
8. Close the Material Station door again.
The materials will remain pre-loaded in the Material Station and will be automatically forwarded to the print head
when a print is started.
Tip: You can pre-load any material, even if no compatible print core is currently installed in the print head.
You can change the print core type later. The printer will show a configuration change prompt when a
print job is started.