14
Mounting Using ISO Technique
Some vehicles can take advantage of another approach to mounting a radio in a vehicle, called
the ISO technique. However, this technique requires a very detailed and thorough knowledge of
the technique. Therefore, we strongly suggest that if you have any doubt about your experience
and abilities, please consult with a professional installer who is familiar with the ISO approach to
radio installation.
To begin the process, it is rst necessary to remove the scanners outer metal sleeve from the
inner chassis. Unthread the four screws in the rear of the unit. Slide the cover toward the rear and
off. Once the sleeve is removed, you will see threaded, metric machine screw holes on either side
of the chassis cabinet. Uniden does not supply these screws. Their diameter, length, and screw
type should be chosen by a qualied installer based on the internal vehicle bracket which will be
used in securing the scanner chassis.
Once the original radio is removed from the vehicle dash and the t of the scanner is correct,
be sure to connect all the power, audio, antenna, and any other cables or wires, to the scanner
before the scanner is secured.
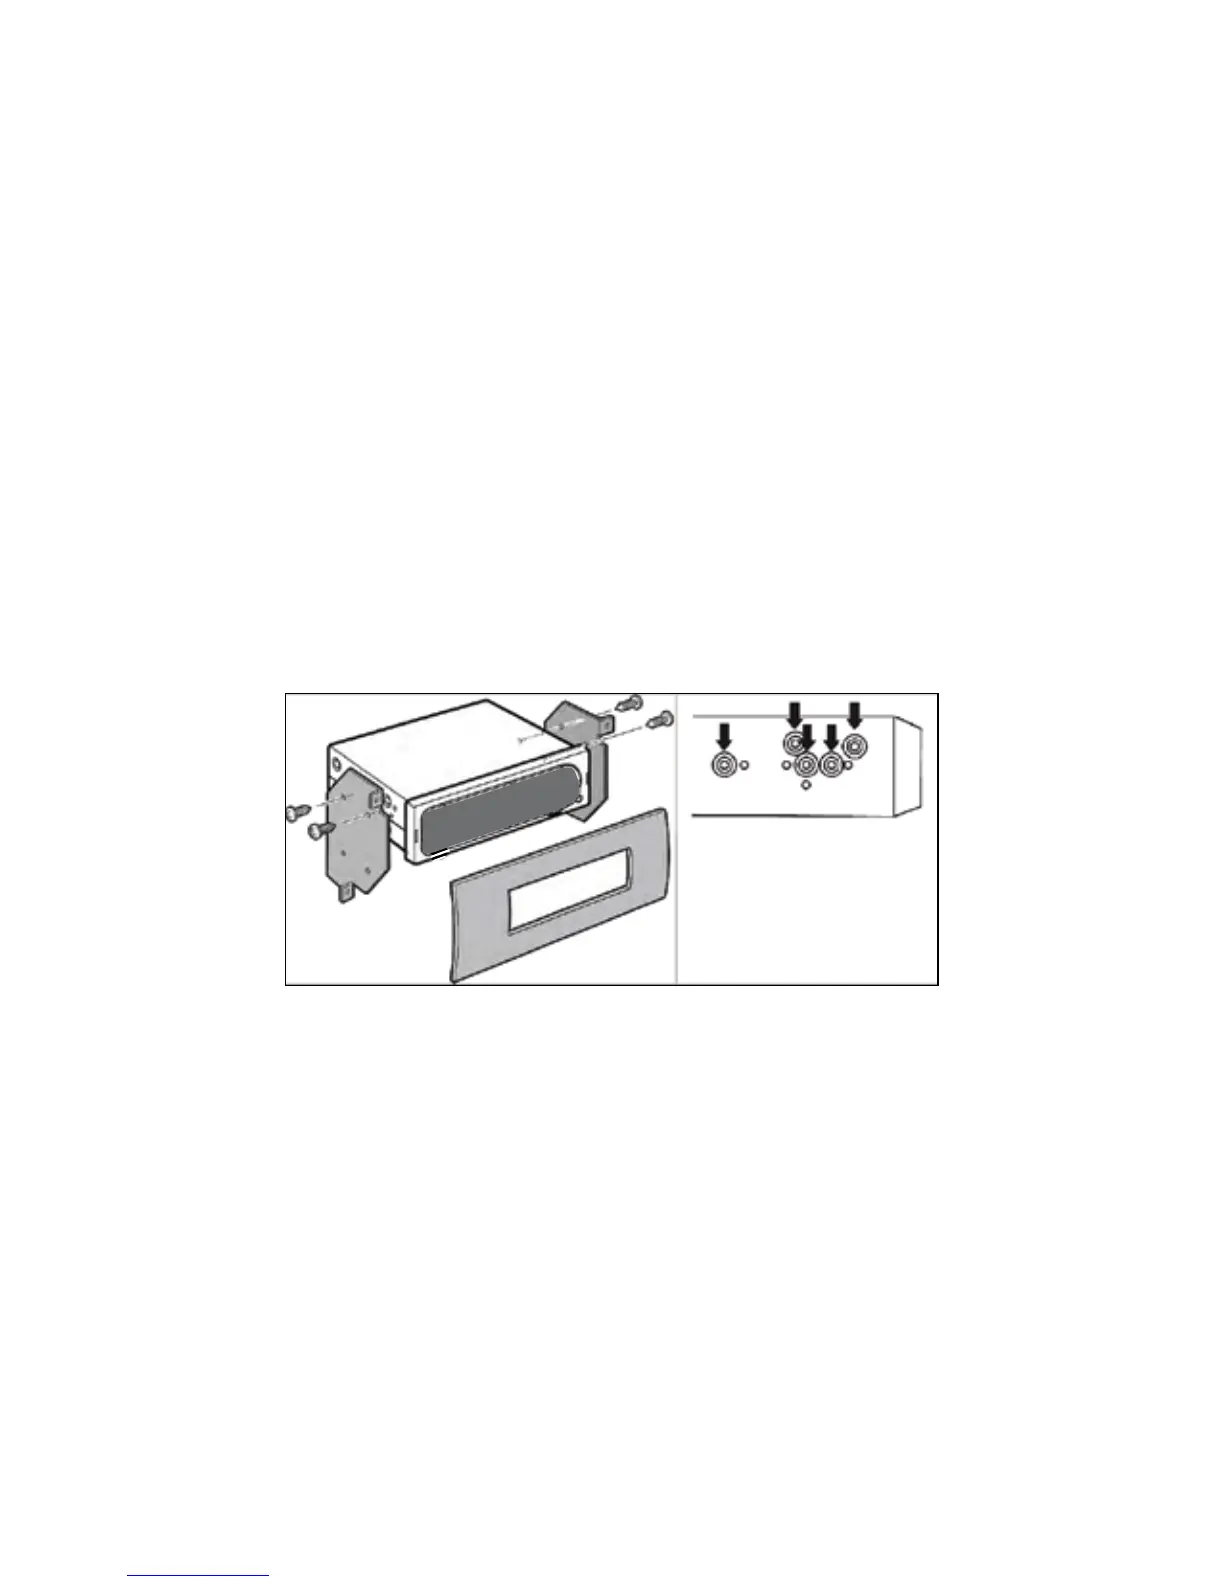
The following illustration is a typical example of the ISO technique and the general side mounting
screw holes often encountered. It does not actually represent the Uniden scanner or your vehicle’s
mounting bracket. Only a professional installer will be able to determine the best and correct
approach.
Connecting DC Cable with Orange Wire
Connect this cable to the vehicle’s electric system that receives power when you turn on your
headlights. Now your scanner’s display will automatically dim when you turn on the headlights.
USING INTERNAL BATTERIES BCD436HP ONLY
You can power your scanner using three alkaline or rechargeable AA batteries.
There is no switch for the battery type. Using non-rechargeable batteries, select “No” at the
Battery message when connecting the USB cable.
1. Install 3 AA batteries, matching the polarity symbols (+ -).
2. Replace the cover.
When Battery icon ashes and the scanner beeps every 15 seconds, replace or recharge the
batteries.
 Loading...