Section 3 - Service & Repair Cylinders
503727-002 Page 3-17
L
IFT
C
YLINDER
R
EMOVAL
Refer to Figure 0-14: “Elevating Assembly,” on page Section 3-18 for details.
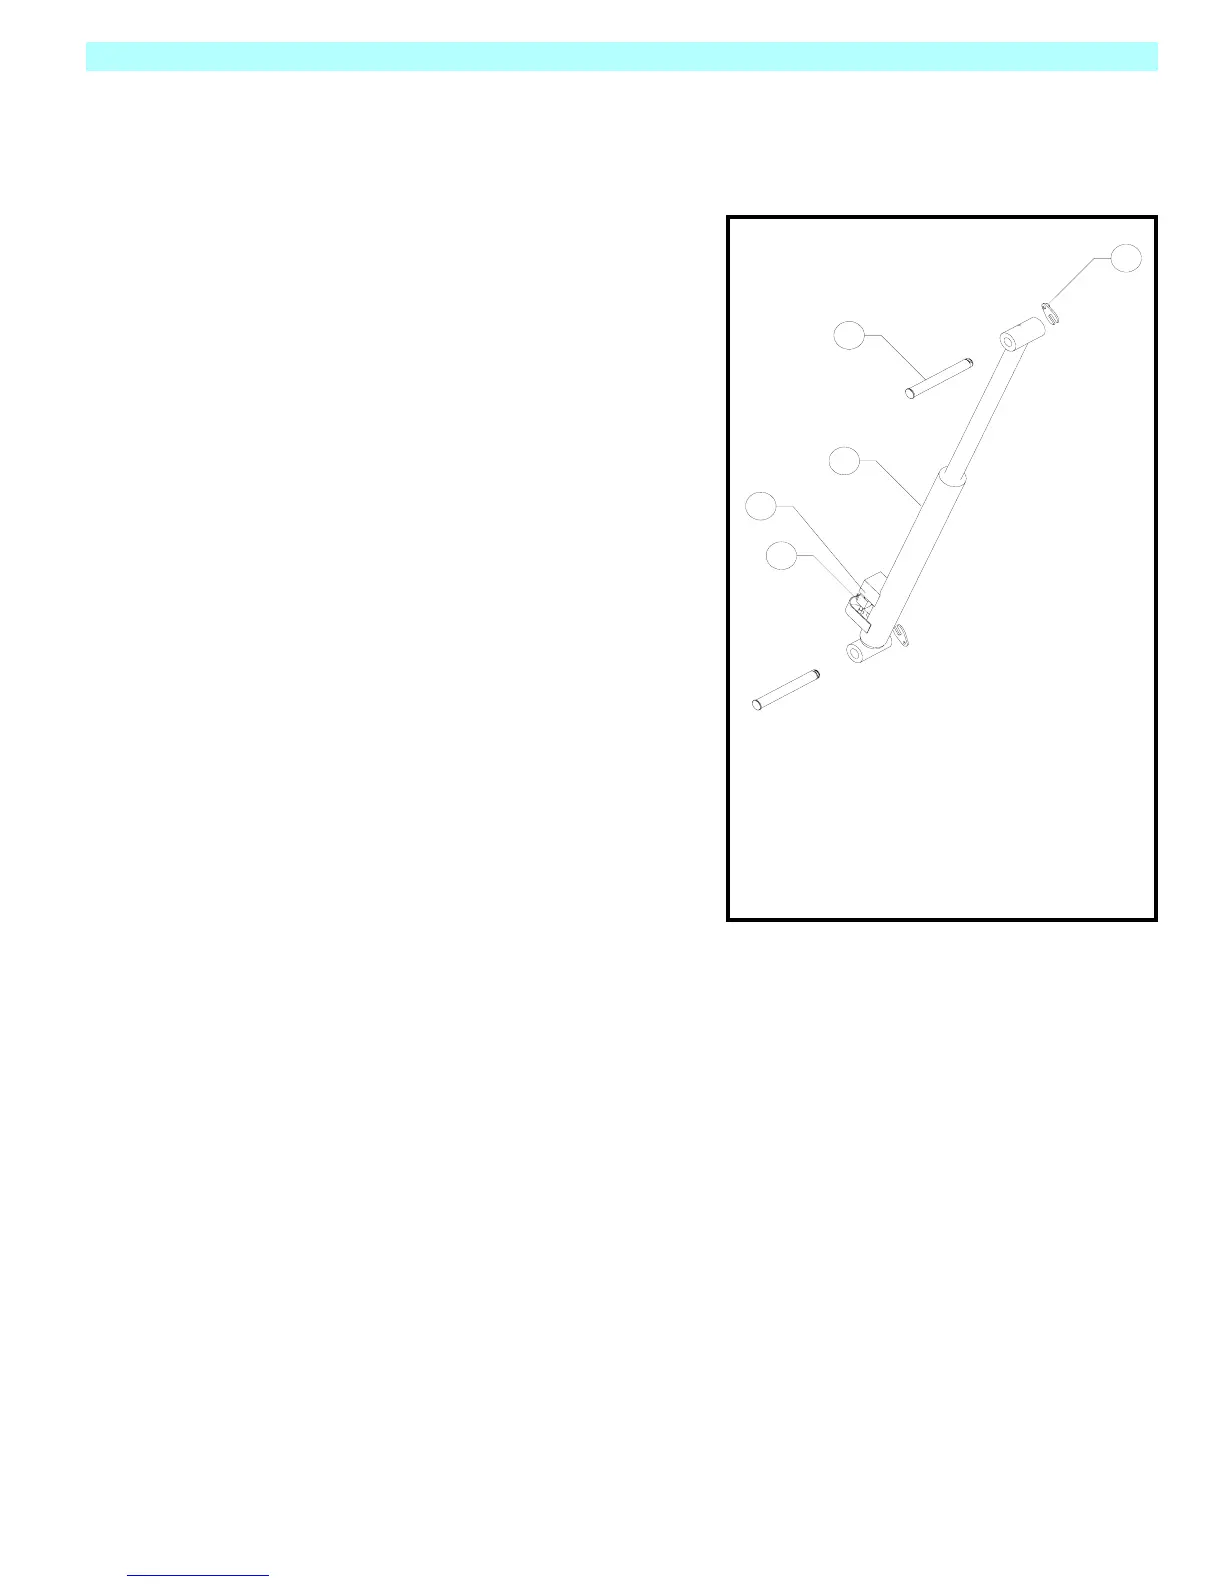
Figure 3-12: Lift Cylinder Seal Kit
1. Provide a suitable container to catch the hydraulic
fluid, then disconnect the hydraulic hoses. Immedi-
ately plug hoses to prevent foreign material from
entering.
2. Remove emergency lowering valve cable and down
valve wires from the emergency lowering/down valve.
3. Remove the cable bracket from the lift cylinder.
4. Remove capscrews and locknuts securing lift cylinder
pivot pins.
5. Remove lower pivot pin and lower cylinder to rest on
chassis.
6. Attach a suitable hoisting device and sling to the cyl-
inder, and remove upper pivot pin.
7. Carefully remove cylinder.
R
EPAIR
Refer to Pothole / Steering Cylinder Repair on Page 14
& 15.
I
NSTALLATION
1. Coat both pivot pins with anti-seize compound.
2. Attach a suitable hoisting device and sling to the cyl-
inder. Carefully position cylinder in the elevating
assembly, and install the upper pivot pin.
3. Install the capscrew and locknut.
4. Carefully lift the cylinder and align the lower mount,
and install the pivot pin. Install the capscrew and locknut securing the pivot pin.
5. Install the cable bracket. Connect the emergency lowering valve cable and down valve wires.
6. Unplug hydraulic hoses and attach to the cylinder.
7. Replace hydraulic fluid removed from lift cylinder.
8. Test with weight at rated Platform load to check system operation. Check for leaks
2
1
4
5
3
1. Lift Cylinder
2. Pivot Pit
3. Capscrew and Lockplate
4. Solenoid, Emergency Down
5. Hose Connections
 Loading...