6.4 Mounting & removing blanks
The machine can process the following blanks:
n
Discs with a diameter of 98.5 mm – 98.8 mm
n
Blocks, max. size: 45x 20x 20mm (L/D/H)
*
n
Prefabricated abutments
*
*
requires extra equipment
You can obtain extra equipment from customer
service.
How to mount the different blank types
Blank type
Holder
required?
How to mount
Discs No Discs >> Blank holder
Blocks Yes Blocks >> Block holder >>
Blank holder
Prefabricated
abutments
Yes Prefabricated abutments
>> Prefabricated abut-
ment holder >> Blank
holder
6.4.1 Mounting discs in the working cham-
ber
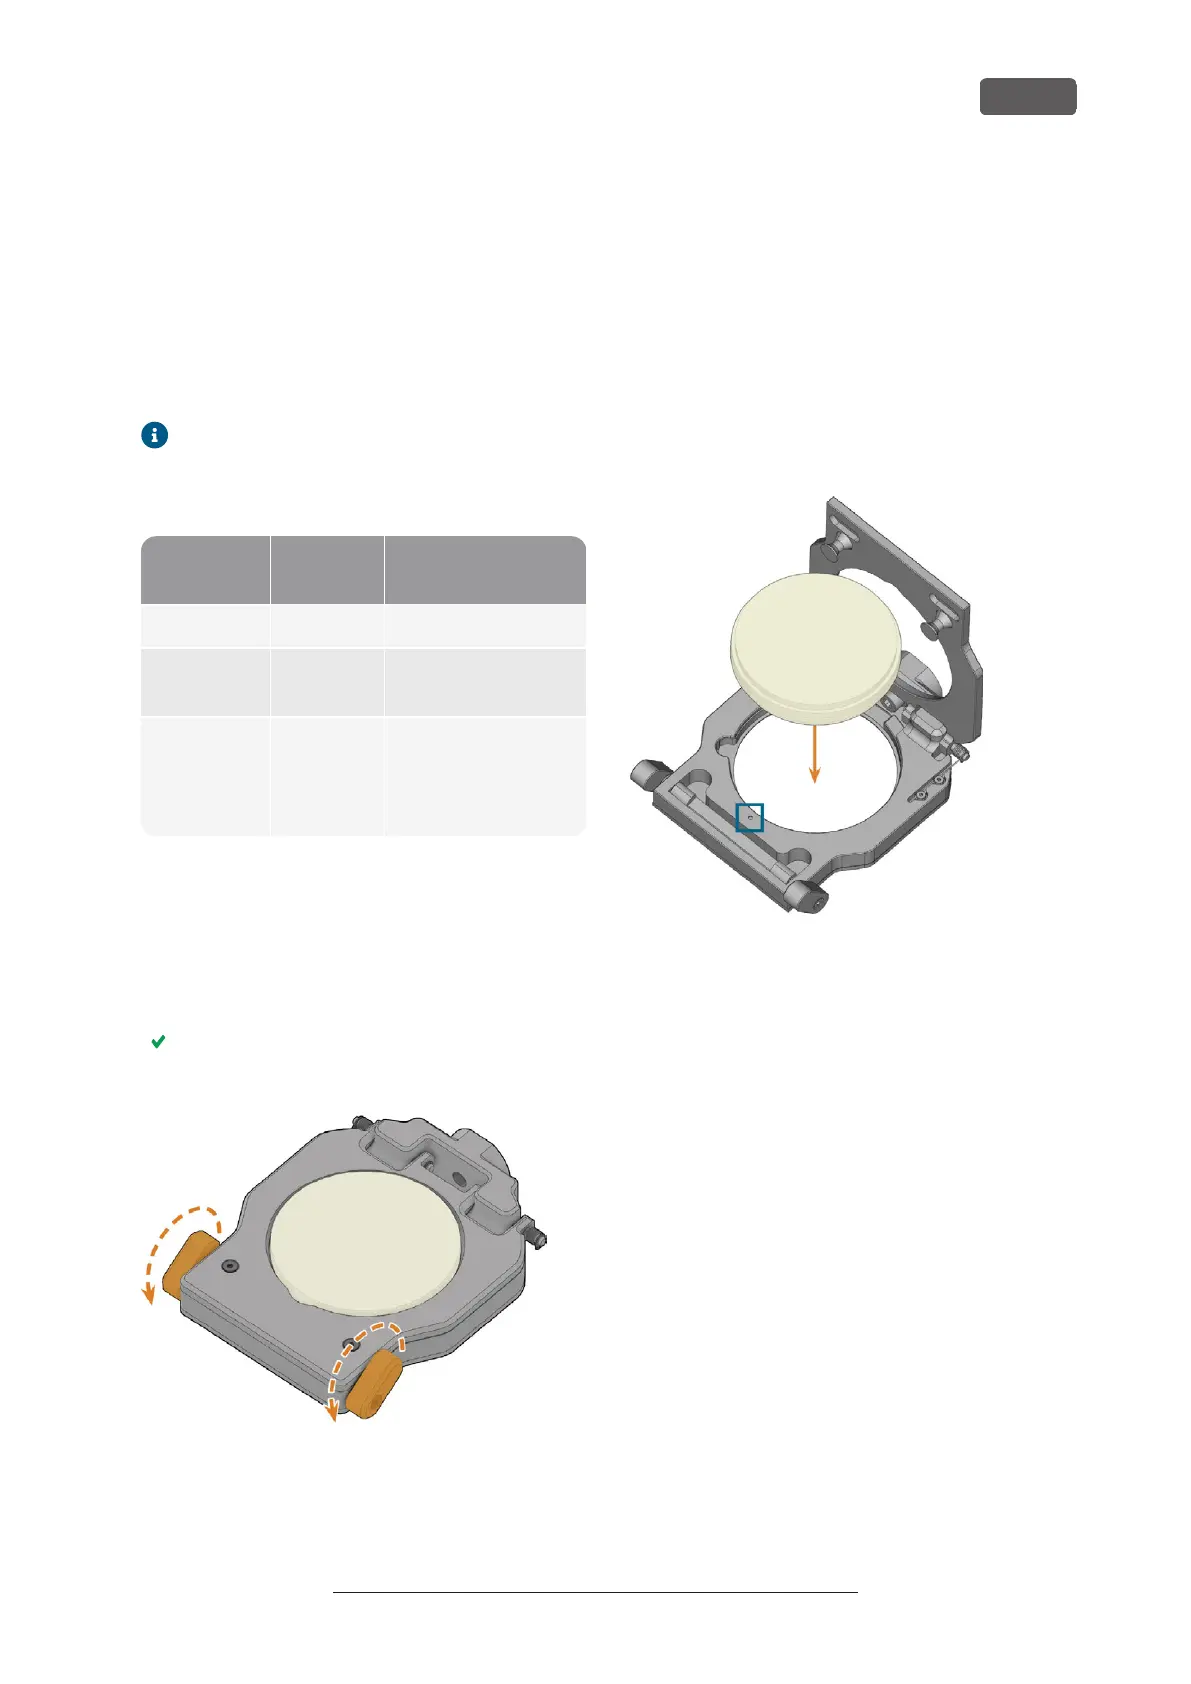
1. Open the working chamber door.
2. Unlock the blank holder by pulling the left and / or
right blank holder lever (marked orange in the fig-
ure) towards yourself into the end position.
The blank holder cover moves upwards and the
blank holder is open.
FIG. 34 OPENING THE BLANK HOLDER
3. Remove the blank from the blank holder if any.
4. To insert the disc to be processed, do the fol-
lowing:
a. If the blank is a multilayer blank, orientate the
blank so that the top color layer is on top.
b. If the disc has been processed before, ensure
the following:
n
The original top side faces upwards.
n
If the disc has been marked for safer
remounting by DENTALCNC, ensure
that the marking is in the position
shown below.
c. Put the disc into the blank holder.
FIG. 35 INSERTING A DISC INTO THE BLANK HOLDER (POSITION FOR
SAFE REMOUNTING MARKED BLUE)
K5+ – Operation: Preparing jobs
EN 31
Original Operating Instructions:K5+
Version: 12/16/2021